
How to Culture Phytoplankton for Your Reef Tank
Culturing your own phytoplankton is way simpler than it sounds. You just mix a starter culture, some specialized fertilizer, and clean saltwater in a clear container. Add a light source and some gentle bubbles, and that's it. In about 7-10 days, that mix transforms into a dense, super-nutritious green liquid, giving you a steady food supply for your reef tank. Trust me, this fresh, live stuff is worlds better than anything you can buy in a bottle.
Why Live Phytoplankton Is a Reef Tank Game Changer
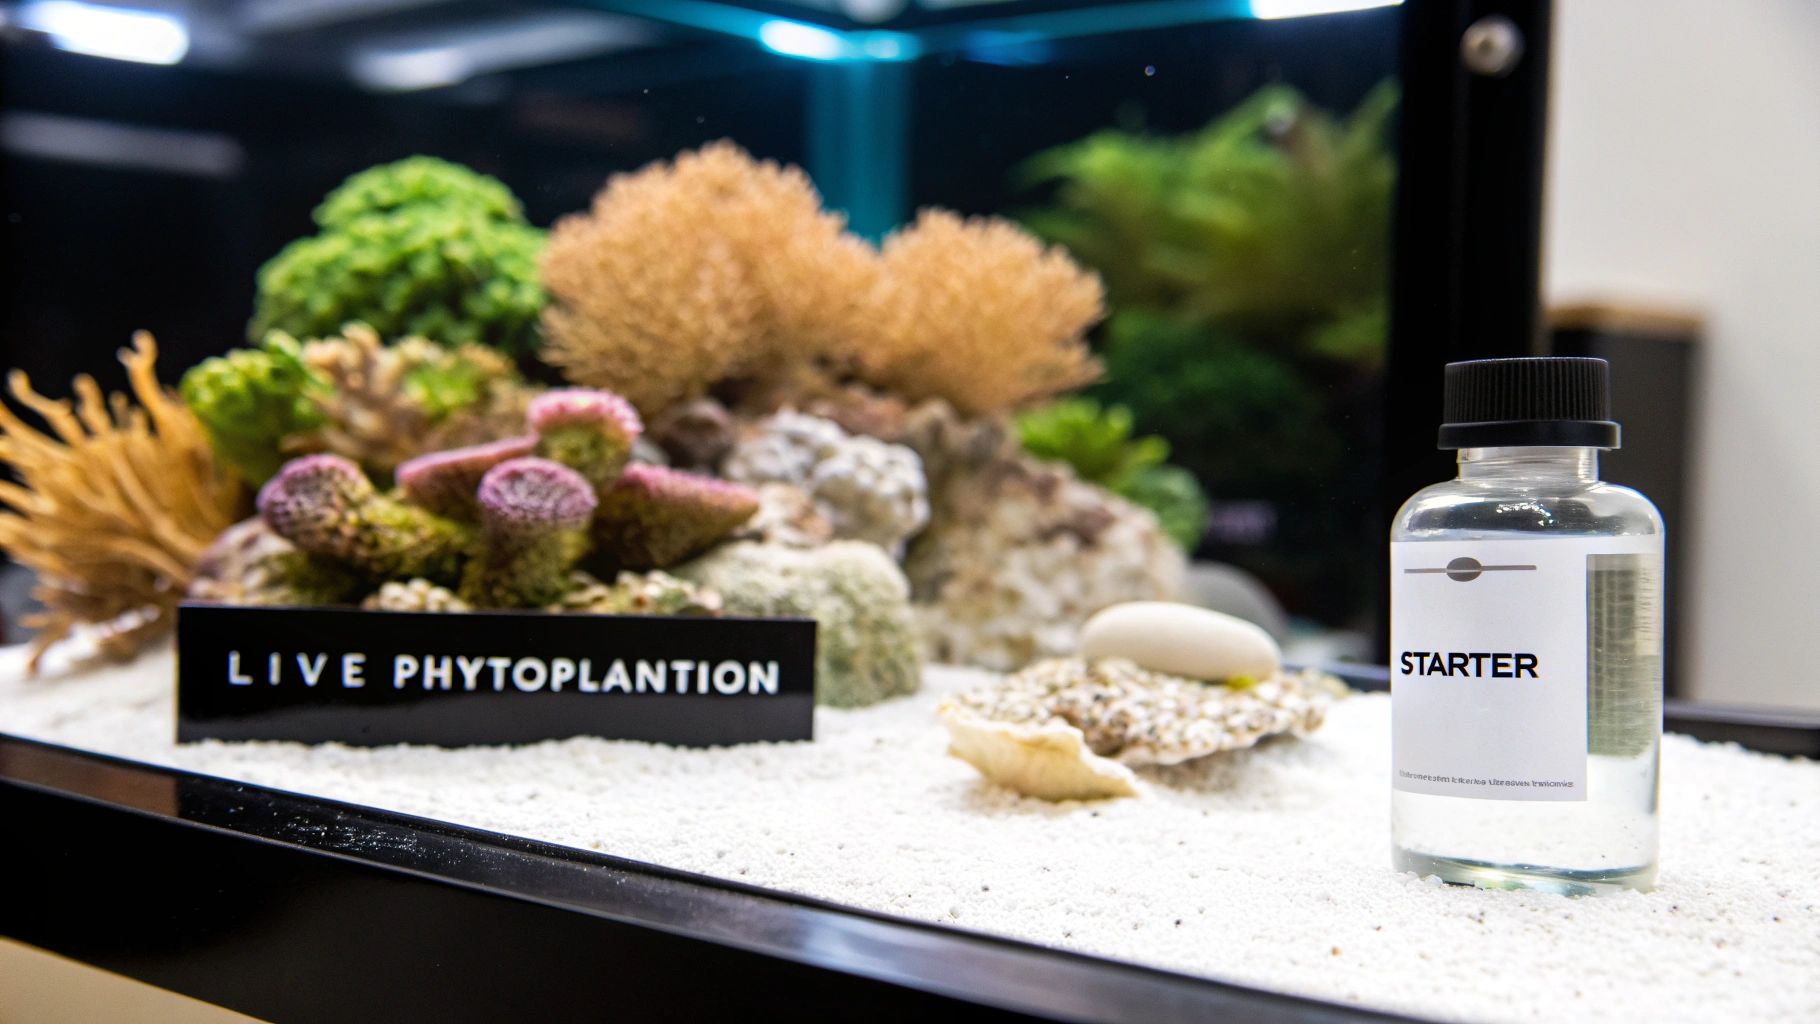
Before we get into the "how-to," let's talk about why this is such a big deal for a marine aquarium. It’s not just "coral food." When you have a constant supply of live phytoplankton, you're building a more balanced, self-sustaining ecosystem from the very bottom up. It's the absolute foundation of the ocean's food web, and dosing your tank with it brings a critical piece of that natural cycle right into your home.
Supercharge Your Microfauna Population
The first thing you'll notice after dosing live phyto is an explosion in your tank's microfauna. Tiny crustaceans like copepods and rotifers are the main critters that eat phytoplankton. Give them a steady buffet, and their populations will boom.
This creates a constant, nutritious live food source for your fish and corals. If you've ever struggled to keep picky eaters like Mandarin dragonets or pipefish, you'll see them grazing happily on this thriving pod population.
Natural Nutrient Export and Algae Control
Here's a cool side effect: nuisance algae and phytoplankton are fighting for the same food—mainly nitrates and phosphates. By dosing a healthy culture, you're introducing a powerful competitor that pulls these nutrients right out of the water column.
This natural form of nutrient export keeps your water parameters in check and helps shut down those ugly algae outbreaks before they even start.
Key Takeaway: Think of dosing phytoplankton as proactive algae management. You're essentially letting the good stuff outcompete the bad stuff by starving out the undesirable algae that can plague a reef tank.
This is exactly what happens in the wild, just on a much smaller scale. On a global level, phytoplankton are responsible for around 49% of the planet's primary production and oxygen. They're absolute powerhouses when it comes to consuming nutrients and carbon.
Cost Savings and Superior Nutrition
The money you'll save is a huge bonus. Those little bottles of commercial phytoplankton are pricey, and let's be honest, their nutritional value starts degrading the second they're bottled.
Culturing your own gives you a fresh, incredibly nutritious supply for just pennies. The living cells are jam-packed with the essential fatty acids (EFAs), vitamins, and amino acids that are crucial for healthy coral growth and amazing coloration. If you want to dive deeper, we've put together a guide covering the many benefits of live phytoplankton in marine aquariums.
Assembling Your Phytoplankton Culture Station
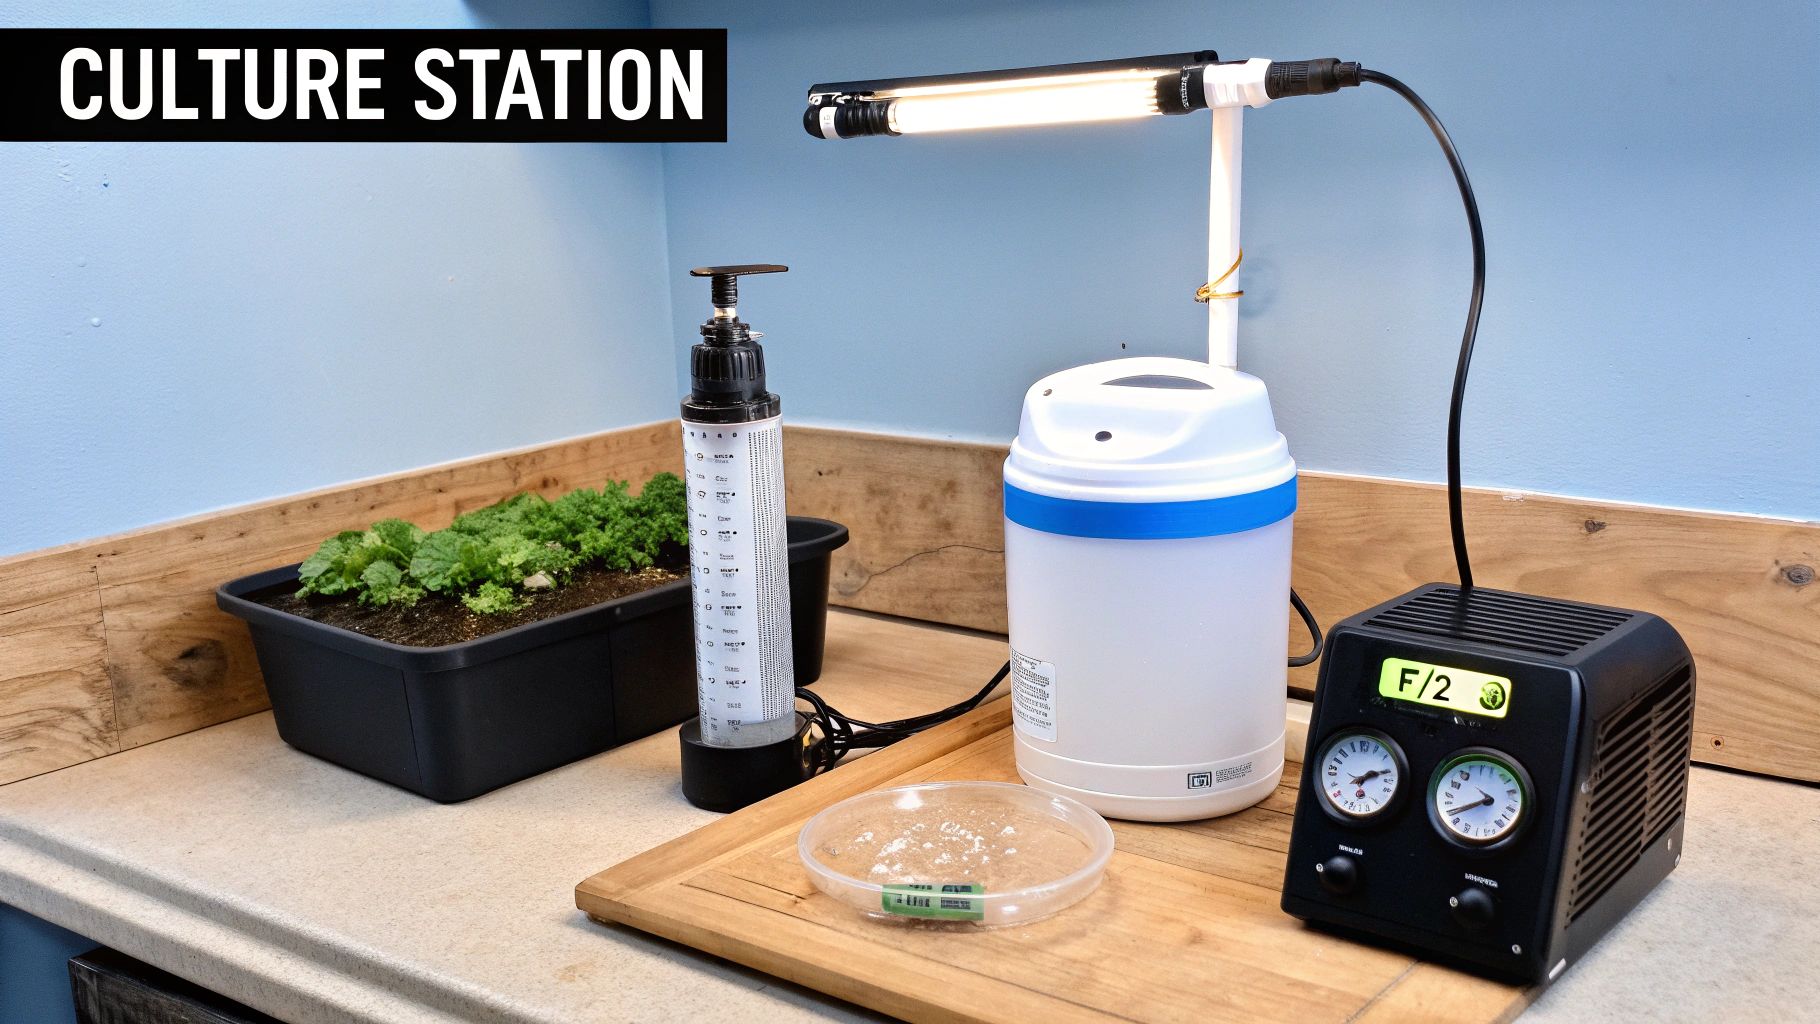
Alright, let's get your phytoplankton culture station built. The good news is, this is way simpler and cheaper than most people imagine. You can forget about needing a lab coat or a sterile clean room—all you really need is a dedicated corner where you can pull together a few key items.
The whole point is to create a clean, consistent environment where your phyto can multiply with as little fuss as possible.
Think of it like setting up a tiny, hyper-specialized aquarium. Your job is to provide just three things: a clean container to live in, a light source for energy, and just enough water movement to keep the microscopic cells from settling on the bottom. Get those right, and you're golden.
Your Essential Equipment Checklist
You can get a surprisingly effective setup going with some very basic, affordable gear. Here’s a rundown of the absolute must-haves to start culturing your own phytoplankton.
- Culture Vessels: Honestly, simple 2-liter soda bottles are a fantastic way to start. Their cone-shaped bottoms are perfect for preventing cells from settling out, plus they're cheap and a breeze to sterilize. If you get more serious later, you can always upgrade to glass jars or even a purpose-built culture reactor.
- Air Pump and Tubing: Any small, quiet aquarium air pump will do the trick. You'll also need some standard airline tubing and a rigid tube to feed down into the bottle. The goal is a gentle, rolling bubble—you're not trying to create a violent boil. Just enough movement to keep the culture circulating.
- A Reliable Light Source: You definitely don’t need a fancy, high-powered reef light for this. A simple LED or fluorescent bulb with a "cool white" or 6500K color temperature is the perfect light spectrum for photosynthesis. Just make sure you can position it right up against your culture vessels.
- Timer: Consistency is everything in this game. A cheap outlet timer from the hardware store is non-negotiable. It will ensure your culture gets a steady photoperiod of 16 to 18 hours of light per day, which is the sweet spot for rapid growth.
Once you have these items, you've got the basic hardware for a fully functional culture station. Now, let's talk about the "software"—the ingredients that actually make the magic happen.
The Critical Consumables
These are the things you’ll be using up with each new batch. The quality of these ingredients has a direct impact on your success rate, so don't cut corners here.
- Sterile Saltwater: Always, always start with freshly mixed RODI water and a quality salt mix. Aim for a specific gravity between 1.019 and 1.023. Whatever you do, never use water from your display tank; it’s loaded with bacteria and other tiny organisms that will outcompete your phytoplankton.
- Starter Culture: This is your "seed" stock. It is absolutely critical to begin with a pure, dense starter from a reputable source. The quality of this initial dose sets the stage for the health of your entire culture. Thinking about the best phytoplankton for your reef tank is a good place to start, and a strain like Nannochloropsis is incredibly forgiving for beginners.
- Fertilizer: Phytoplankton are plants, and plants need food to grow. A specialized fertilizer like Guillard's F/2 formula provides all the necessary nitrates, phosphates, silicates, and trace elements in the exact ratios they need to multiply.
Pro Tip: When you're just starting out, I highly recommend running two culture vessels at the same time. This gives you an immediate backup if one gets contaminated or crashes, which can happen. It's a simple trick that ensures you always have a healthy batch ready to harvest and restart the cycle.
So, should you go with the soda bottle method or spring for a fancy reactor? It really depends on your goals and budget. The table below breaks down the practical differences between a simple DIY approach and investing in a dedicated piece of equipment.
DIY vs Professional Phytoplankton Culture Setups
| Component | DIY Budget Option (e.g., Soda Bottle) | Professional Reactor Option | Key Considerations |
|---|---|---|---|
| Culture Vessel | 2-liter soda bottle or glass jar | Purpose-built acrylic/glass reactor | Soda bottles are cheap and effective; reactors offer better light penetration and easier harvesting. |
| Aeration | Air pump with rigid airline tubing | Integrated aeration system, often with a bubble counter | DIY requires manual adjustment; reactors offer precise, consistent flow control. |
| Lighting | Clamp-on LED or fluorescent bulb | Integrated, wrap-around LED lighting | External lights can have uneven coverage; integrated lights provide 360-degree illumination for faster growth. |
| Sterilization | Bleach solution and thorough rinsing | Can be disassembled for cleaning; some are autoclavable | Sterilization is critical. Both methods work, but reactors can be easier to clean thoroughly. |
| Initial Cost | Under $50 for everything | $150 - $400+ for the reactor alone | The DIY route is a fantastic, low-risk way to learn the process before committing more money. |
| Harvesting | Siphoning or pouring out of the bottle | Built-in drain valve or spigot | Reactors make harvesting clean and simple, reducing the risk of contamination. |
Ultimately, both paths lead to the same destination: fresh, nutritious phytoplankton for your reef tank. Starting with a DIY setup is a great way to master the fundamentals without a big upfront cost, while a professional reactor offers convenience, consistency, and a higher production capacity once you've decided to stick with it.
A Practical Guide to the Culturing Process
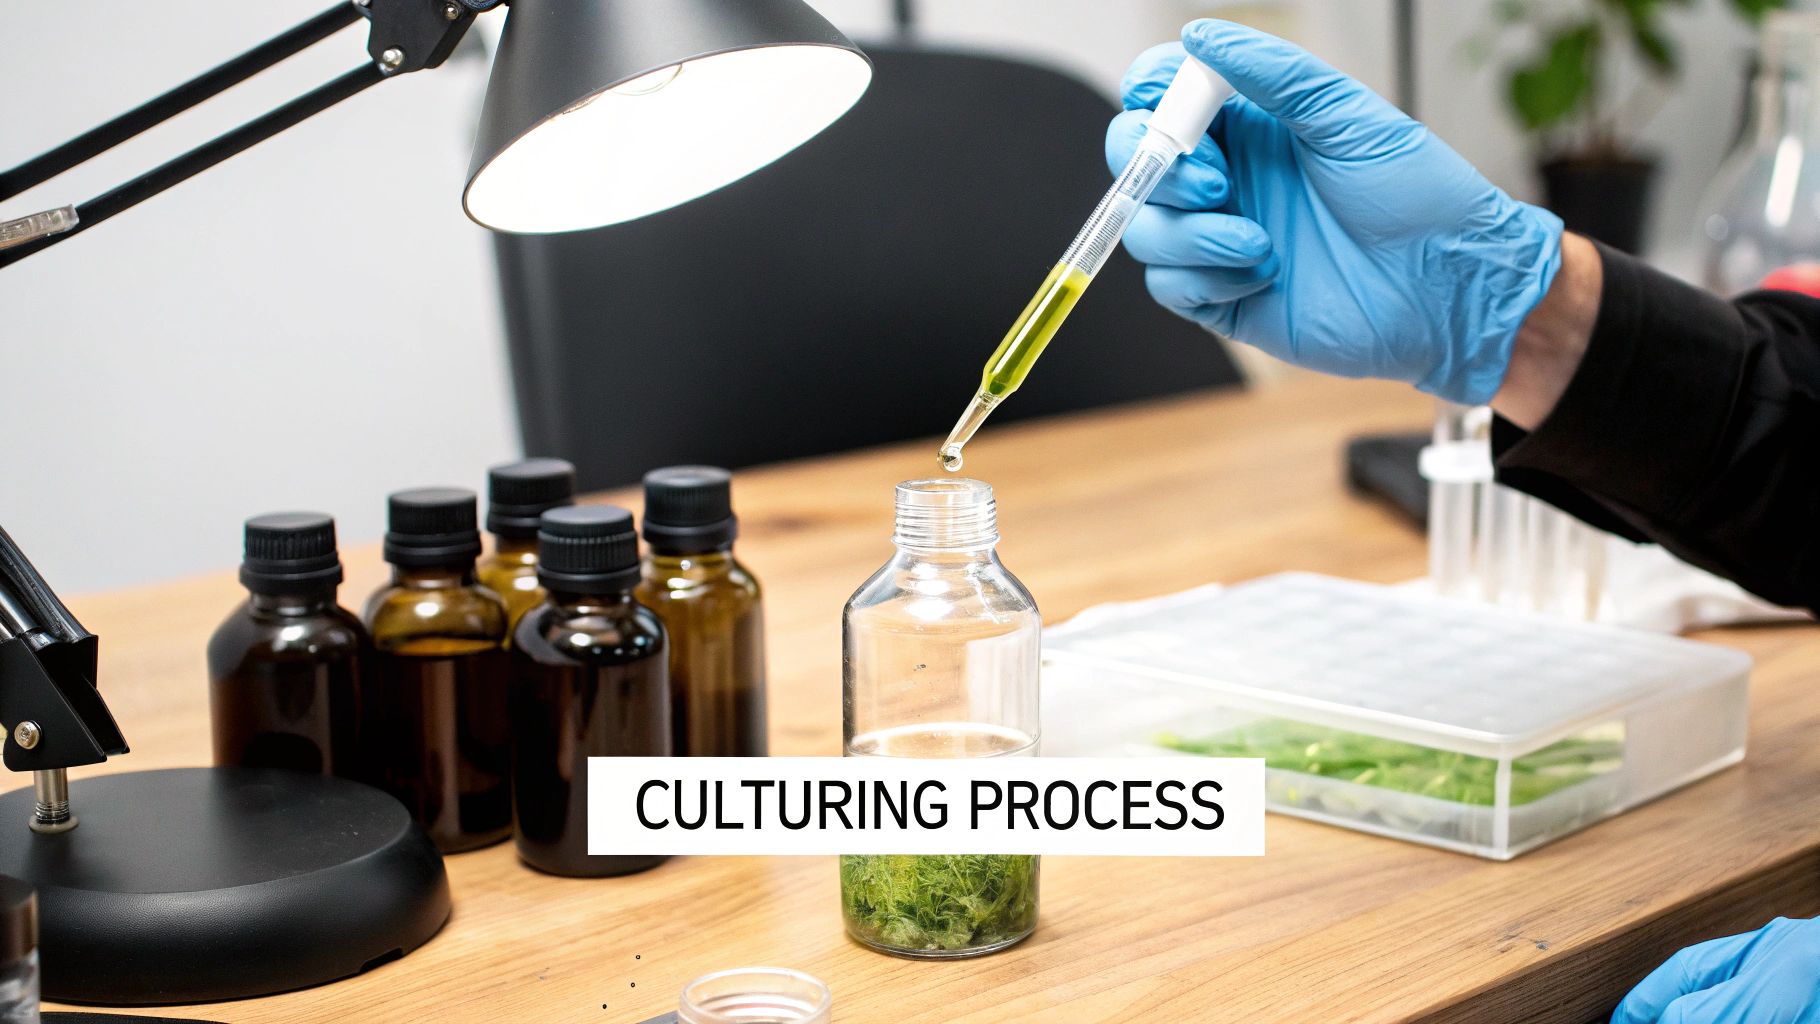
Alright, with your culture station all set up, it's time to roll up your sleeves and actually start growing some phyto. The process itself is pretty straightforward, but success boils down to one simple, non-negotiable rule: cleanliness. You're trying to create a pristine environment where only your phytoplankton can grow, with zero competition.
Before a single drop of water goes in, every piece of gear that will touch your culture needs to be sterilized. This means the culture vessel, air tubing, and anything else you plan on using. A quick soak in a bleach solution (1 part bleach to 10 parts water) followed by a super thorough rinse with RODI water does the trick. Let it all air dry completely. I can't stress this enough—lingering contaminants are the number one killer of new cultures.
Preparing the Growth Medium
First things first, you need to mix up the perfect saltwater base. Grab your fresh RODI water and aim for a specific gravity between 1.019 and 1.025 sg. I've found that running the salinity a little lower than my display tank often gives the phyto a nice growth spurt, and it's perfectly safe.
Once the salt is mixed and the water is at room temperature, it's time to add the "food" that will fuel the growth. This is where a high-quality fertilizer like Guillard's F/2 formula is your best friend.
Crucial Tip: Follow the dosing instructions on your fertilizer to the letter. A common ratio is 1 milliliter of F/2 fertilizer for every liter of saltwater. Throwing in extra fertilizer won't make it grow faster; in fact, it can do the opposite and stall the culture before it even gets going.
Give the water a good swirl after adding the fertilizer to make sure it's fully dissolved. You've now created the perfect nutrient-rich soup for your phytoplankton to thrive in.
Inoculation and Incubation
Now for the fun part: adding your starter culture. Gently pour your live phytoplankton starter into the fertilized saltwater. You don't need to dump in the whole bottle. A good rule of thumb is to add just enough to give the saltwater a light green, tea-colored tint. A 1 part starter to 10 parts new saltwater ratio is a solid place to start.
As soon as you've added the starter, you need to get the light and air going.
- Aeration Setup: Slide your rigid airline tubing all the way to the bottom of the vessel. You're not looking for a violent, churning boil here. The goal is a gentle, rolling bubble that keeps the water circulating. This ensures all the phytoplankton cells stay suspended, getting equal access to light and all those tasty nutrients.
- Lighting Schedule: Place your light right up against the vessel and plug it into a timer. Set it for a 16 to 18-hour daily photoperiod. This consistent light cycle is what powers photosynthesis and drives the rapid cell division you're looking for.
With the growing interest in home cultivation, it's no surprise that the global market for these kits reached approximately USD 184.7 million in 2024. North America makes up a significant 36% of that market, driven by a strong aquaculture sector and hobbyists eager to create their own sustainable live foods.
Watching for Visual Cues of Success
Over the next 7 to 10 days, you'll get to watch a cool transformation. That light green tint will slowly get darker and darker. What you're hoping to see is a rich, deep green, almost like a pea soup. This is the sign of a dense, mature culture that's ready to be harvested.
For a common species like Nannochloropsis, our detailed guide on live Nannochloropsis for aquarium health offers more specific details on what to look for. This visual cue is your best indicator that the phytoplankton have used up the available nutrients and have hit their peak density.
Harvesting and Dosing Your Live Phytoplankton
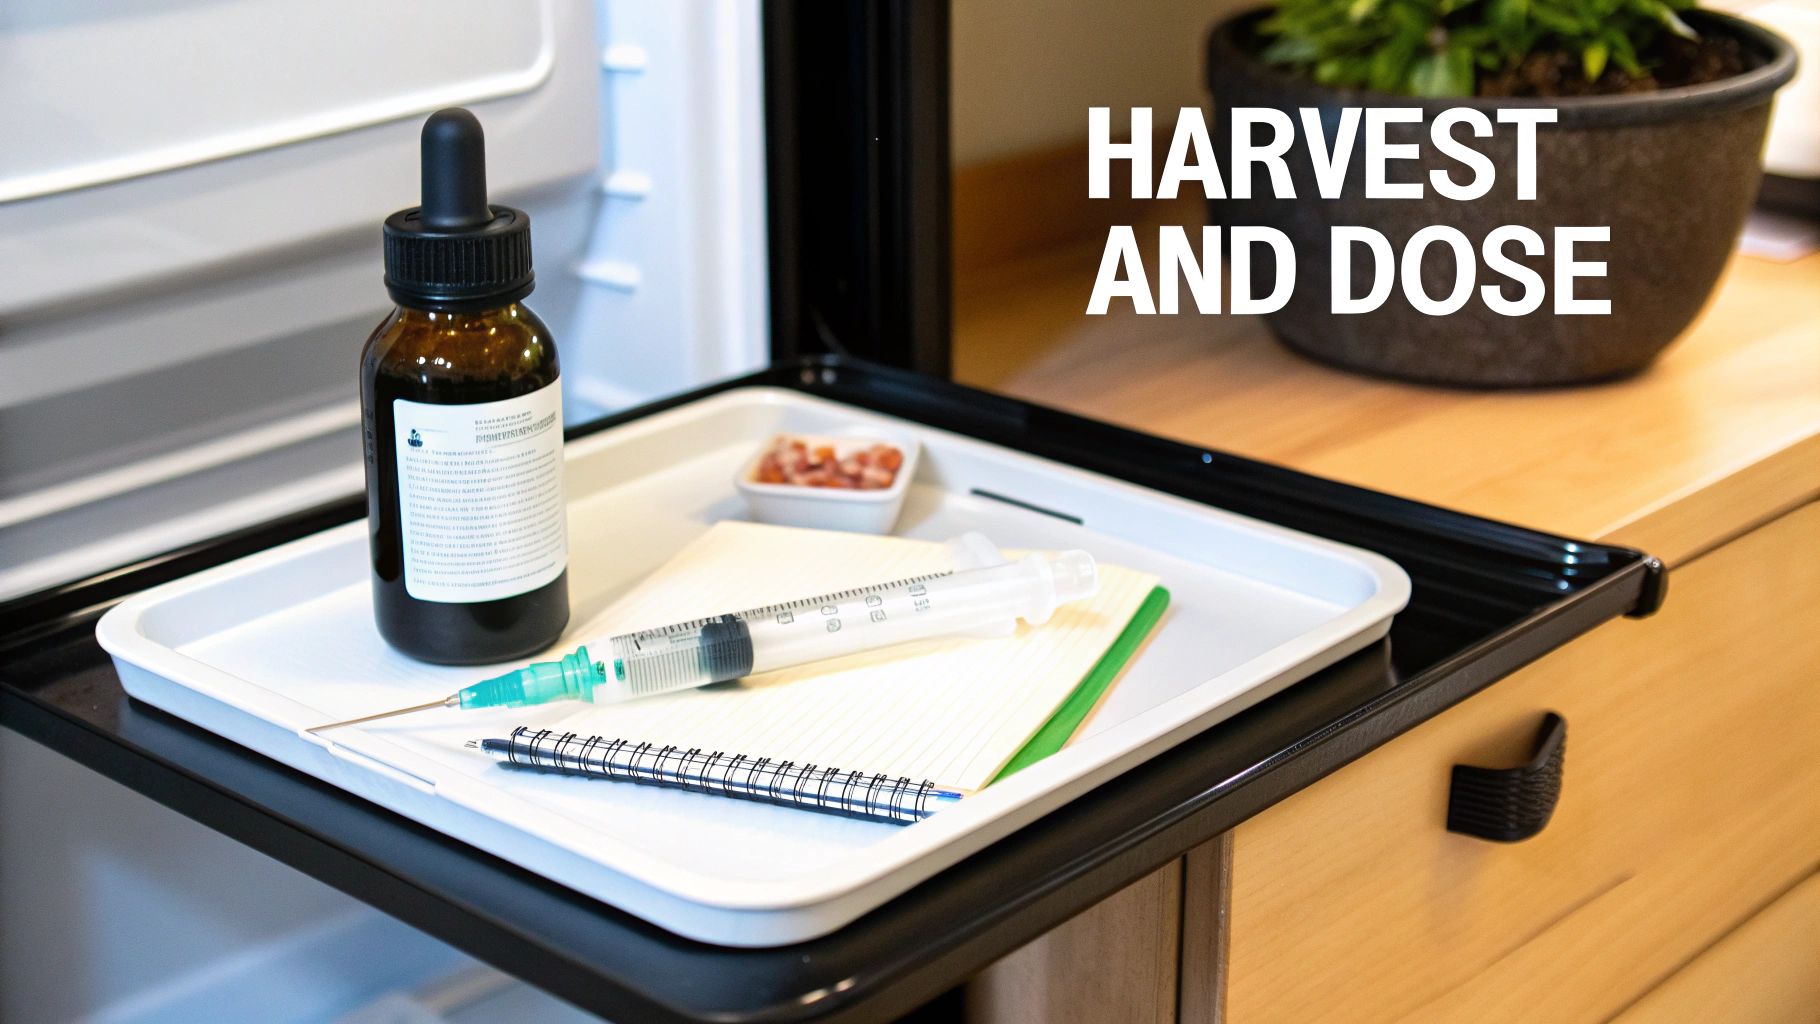
After about a week of culturing, you should be looking at a vessel full of liquid the color of rich, dark pea soup. That vibrant green is the sign you've been waiting for. It means the phytoplankton have bloomed, used up the nutrients, and hit their peak density. Now for the fun part: reaping the rewards.
The sweet spot for harvesting is usually somewhere between 7 and 10 days. If you wait too much longer, you risk a culture crash as the population runs out of resources. The best way I've found to manage this is the "split and restart" method. It’s a simple technique that keeps you in a continuous cycle of fresh, ready-to-use phytoplankton.
The Split and Restart Method
This process is brilliantly straightforward and completely self-sustaining. Instead of using up your whole culture, you’re just going to divide it.
- Harvest for Your Tank: Pour out roughly half to two-thirds of that dense green goodness. This is what you'll use to feed your reef and its inhabitants for the next week or so.
- Restart the Next Culture: What’s left in your culture vessel becomes the starter for the very next batch. Just top it off with your freshly mixed, sterilized, and fertilized saltwater, and the cycle kicks off all over again.
This approach means you never have to buy a starter culture again—you've created a self-sufficient loop. Because you're starting with such a large, dense inoculant, the next batch often matures even faster, sometimes in as little as 5-7 days.
Storing and Dosing Your Harvest
Once you've harvested your phytoplankton, proper storage is key to keeping it nutritious. Pour it into a clean, airtight bottle or jar and stick it right in the fridge. The cold temperature slows down the phytoplankton's metabolism, keeping the cells alive and packed with nutrients for up to a week.
Pro Tip: Give the storage bottle a gentle swirl once a day. This keeps the phytoplankton from settling into a dense sludge at the bottom, where the cells can die off and start to foul the culture.
When it comes to how much to dose, there’s no magic number. The right amount is completely dependent on your tank's bioload—how many corals, filter feeders, and hungry critters you have.
- For Low-Nutrient Systems: Start small. A daily dose of 5-10 ml per 10 gallons of tank volume is a good starting point.
- For High-Demand Tanks: If your system is packed with corals or a booming copepod population, you can easily go up to 20-30 ml per 10 gallons, or even more.
The demand for high-quality live feeds is surging, with the global market for live phytoplankton hitting USD 670 million in 2024. This just goes to show how valuable hobbyists and commercial operations find these live cultures over preserved alternatives. You can dig into more data on this trend and its impact on the live phytoplankton market.
My advice? Start conservatively and just watch your tank. Look for better polyp extension on your corals and a noticeable increase in the tiny critters crawling on the glass. The real key is consistency. A small, daily dose does far more to build a stable, thriving reef ecosystem than dumping in a large amount once in a while.
Solving Common Phytoplankton Culture Problems
Even the most seasoned hobbyist eventually runs into a batch of phytoplankton that just looks... off. Don't sweat it. Learning to spot the early warning signs of trouble is a huge part of culturing phytoplankton successfully for the long haul. Most of the time, these issues are surprisingly easy to fix once you know what you're looking for.
The most common—and by far the most frustrating—problem is the dreaded culture crash. You can go from a beautiful, rich green brew one day to a pale, sad-looking yellow liquid with a funky smell the next. This dramatic die-off happens when something throws the culture out of balance, like contamination, a sudden temperature change, or running out of food.
Identifying a Failing Culture
Catching a problem early can sometimes save a batch, but you absolutely need to know the signs of a total crash. Keep an eye out for these red flags. If you see them, it's time to either intervene fast or just cut your losses and start over.
- Color Change: This is the most obvious sign. A healthy, dark green color will fade to a light green, then a sickly pale yellow, or even brownish. That color change means the phytoplankton cells are dying off in droves.
- Sedimentation: Take a look at the bottom of your container. A healthy culture has very little gunk settled at the bottom. If you see a noticeable layer of dead cells collecting down there, you’ve got a problem.
- The Smell Test: A good, thriving culture has a clean, fresh ocean smell. A crashed culture, on the other hand, has a foul, rotten odor that is impossible to miss. Trust your nose—it's often the fastest and most reliable indicator that something has gone horribly wrong.
When in Doubt, Throw it Out: This is the golden rule. Never, ever dose a crashed or questionable culture into your aquarium. The decaying organic matter will dump a ton of unwanted nutrients like ammonia and phosphates into your tank, which can cause serious problems for your corals and fish. It's always safer to discard the batch, sterilize everything thoroughly, and start fresh.
Diagnosing the Root Cause
So, your culture crashed. What happened? Figuring out the "why" is the key to preventing it from happening again. It almost always comes down to one of a few usual suspects.
- Contamination: This is the #1 culprit, hands down. Sneaky bacteria or even microscopic rotifers can find their way into your culture and quickly outcompete your phytoplankton for resources. This is why being meticulous about sterilizing your gear between every single batch is so critical.
- Temperature Swings: Phytoplankton are creatures of habit; they love stable conditions. If you set up your culture next to a drafty window, a heater vent, or in direct sunlight that heats up the container, the rapid temperature swings will stress the cells and can easily cause a crash.
- Nutrient Issues: Did you forget to add the fertilizer? Or maybe you waited too long to harvest? As soon as the phytoplankton consume all the available nutrients in the water, the population has nowhere to go but down. The die-off can happen surprisingly fast.
- Inadequate Aeration: The gentle bubbling isn't just for show—it keeps the cells suspended in the water column so they can get light. If your airline gets clogged or the pump fails, the phytoplankton will settle to the bottom. Without light, they can't photosynthesize, and they'll quickly perish.
Answering Your Phytoplankton Culture Questions
As you start getting into the rhythm of culturing phytoplankton, you're bound to have some questions. It's totally normal. Think of this as your go-to guide for the common hurdles and "what-ifs" that pop up when you're just starting out. Getting these things sorted early builds the confidence you need to keep your cultures going strong.
One of the first things people ask is if they can just use water from their display tank. It seems like a clever shortcut, but it's probably the single biggest mistake you can make. Your aquarium water is a microscopic soup of competitive bacteria, stray algae spores, and all sorts of tiny critters that will absolutely crash your culture.
The Golden Rule: Always, always start with freshly mixed, sterilized saltwater. This gives your phytoplankton a clean, sterile environment to grow in, ensuring the species you want is the only thing that thrives. No competition.
Nailing this one simple step will radically improve your chances of getting a pure, dense, green culture every single time.
Choosing the Right Phytoplankton Strain
So, what's the best type of phytoplankton to start with? For the vast majority of us culturing at home, the answer is hands-down Nannochloropsis. This tiny, non-motile green alga is about as tough and forgiving as they come, which is exactly what you want when you're learning the ropes.
- High Nutritional Value: It’s loaded with the essential fatty acids that corals crave and that fuel explosive copepod growth.
- Ease of Culture: This stuff is resilient. It’s far less likely to crash from small swings in temperature or lighting than other, fussier species.
- Ideal Size: Its super-small cell size makes it the perfect food for a huge range of filter feeders in your tank, from corals to copepods.
There are other great strains out there, like Isochrysis or Tetraselmis, which offer different nutritional benefits. But trust me, get your process dialed in with Nannochloropsis first. It provides the perfect foundation to build on.
How Much Light Is Too Much?
It's tempting to think that blasting your culture with more light will make it grow faster, but it actually does the opposite. Too much light can literally damage the phytoplankton cells—a process called photoinhibition—and bring growth to a screeching halt. Don't even think about using direct sunlight or your powerful reef tank light; it's total overkill.
All you really need is a simple, low-wattage LED or even an old-school fluorescent bulb with a 6500K color temperature. That gives you the right spectrum and intensity. The real key isn't raw power, but consistency. You're aiming for a steady, moderate light source running for 16-18 hours per day. That consistent photoperiod is what really drives a healthy, dense bloom.
Ready to skip the DIY hassle and get a guaranteed, high-quality live food source delivered right to your door? PodDrop Live Aquarium Nutrition offers pure, lab-grown phytoplankton and copepod cultures that are packed to order, ensuring maximum freshness and nutritional value. Fuel your reef's entire food web by visiting https://www.getpoddrop.com today.