
Aquarium Sump Tank Setup: The Essential Guide to a Healthy Reef
If you've ever admired a truly breathtaking reef aquarium, chances are there was a powerful, unseen system working tirelessly behind the scenes. That system is the aquarium sump tank, and for serious hobbyists, it’s the secret to creating a stable, thriving slice of the ocean. It's more than just a box under the tank; it's the command center for your entire aquatic ecosystem.
Why a Sump Is the Heart of a Thriving Reef Tank
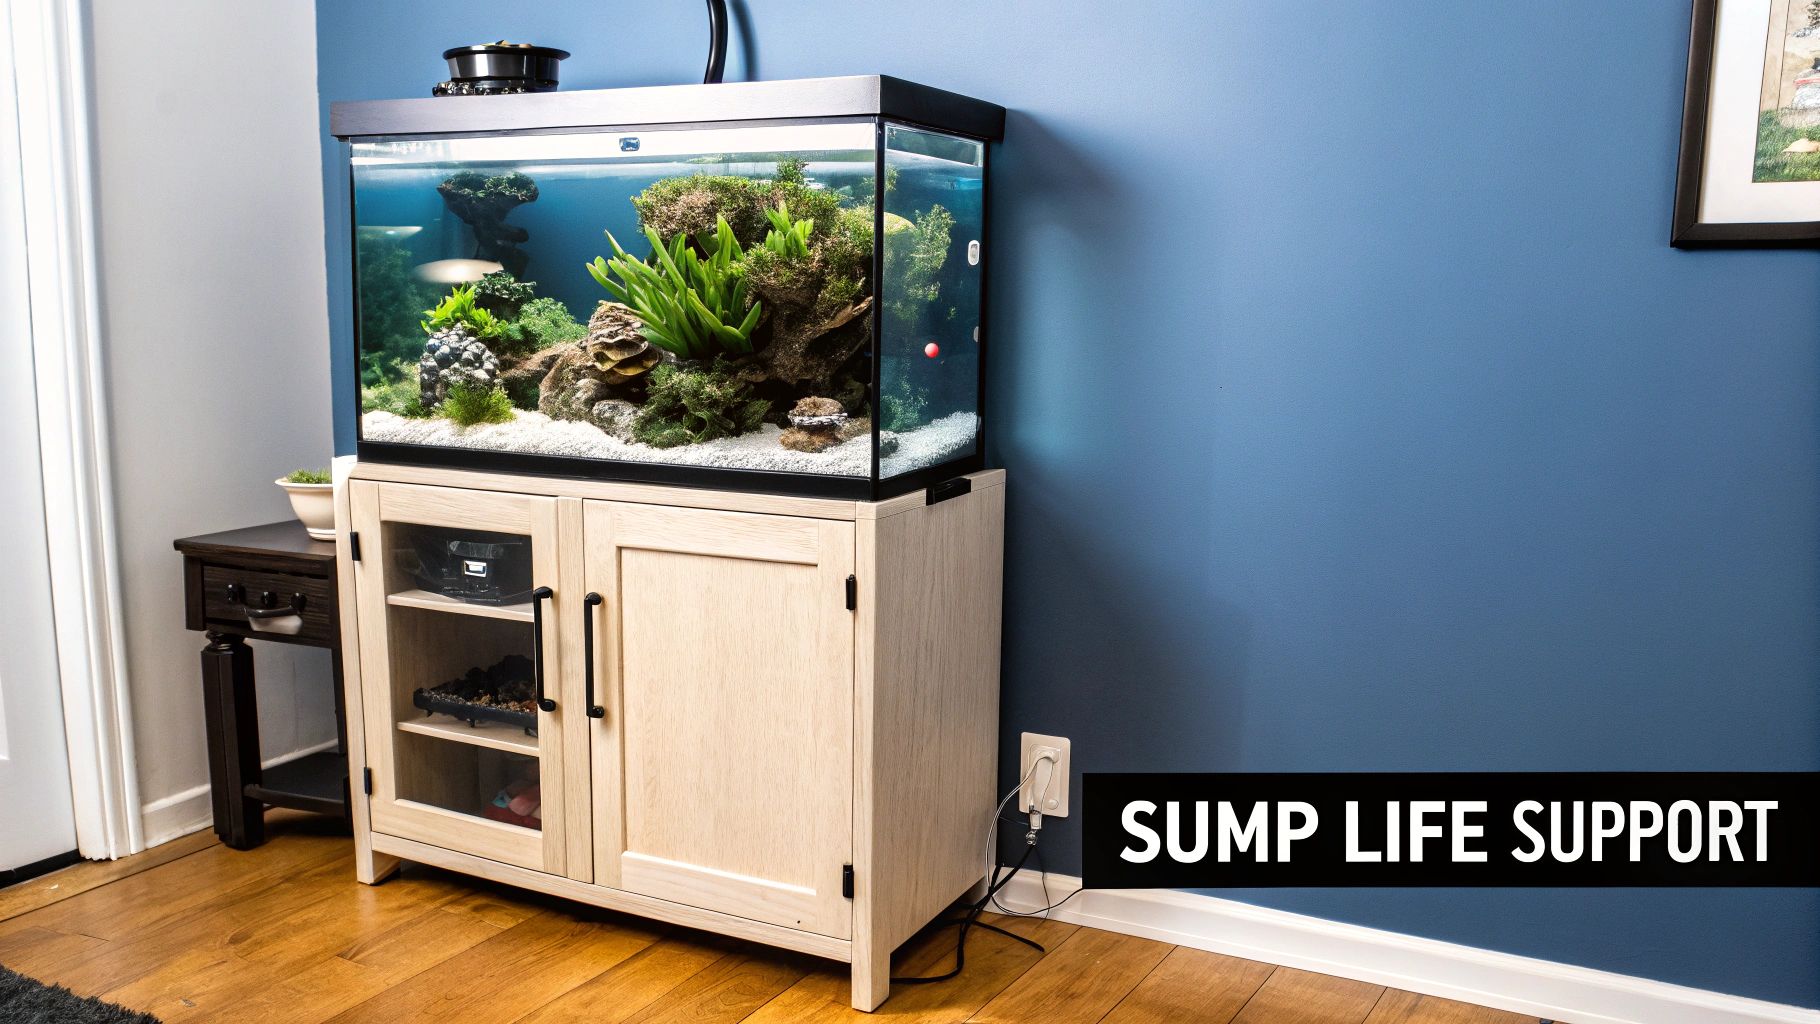
For anyone new to the hobby, a sump might seem like an intimidating piece of gear. But its purpose is simple: to give your aquarium the life support it needs for delicate corals and fish to flourish. Think of it as the engine room of a ship—out of sight, but absolutely essential.
One of the biggest, yet simplest, benefits is the immediate boost in total water volume. A 100-gallon display tank paired with a 30-gallon sump isn't a 100-gallon system; it's a 130-gallon system. This added volume creates a massive stability buffer. Small mistakes, like a heavy feeding or a slight temperature swing, have a much smaller impact on the overall water chemistry, giving you a crucial margin for error.
A Cleaner Display and a Healthier System
Let's be honest, nobody likes the look of heaters, pumps, and dangling wires cluttering up a beautiful aquascape. An aquarium sump tank setup lets you tuck all that essential-but-ugly equipment neatly away in the cabinet. The result? A clean, natural view where your corals and fish are the undisputed stars of the show.
This isn't just about looks, though. Centralizing your gear makes maintenance so much easier. Instead of sticking your hands in the display tank to tweak a heater or clean a skimmer, everything is organized and easily accessible right below. This makes your routine chores quicker and far less stressful for your tank's inhabitants.
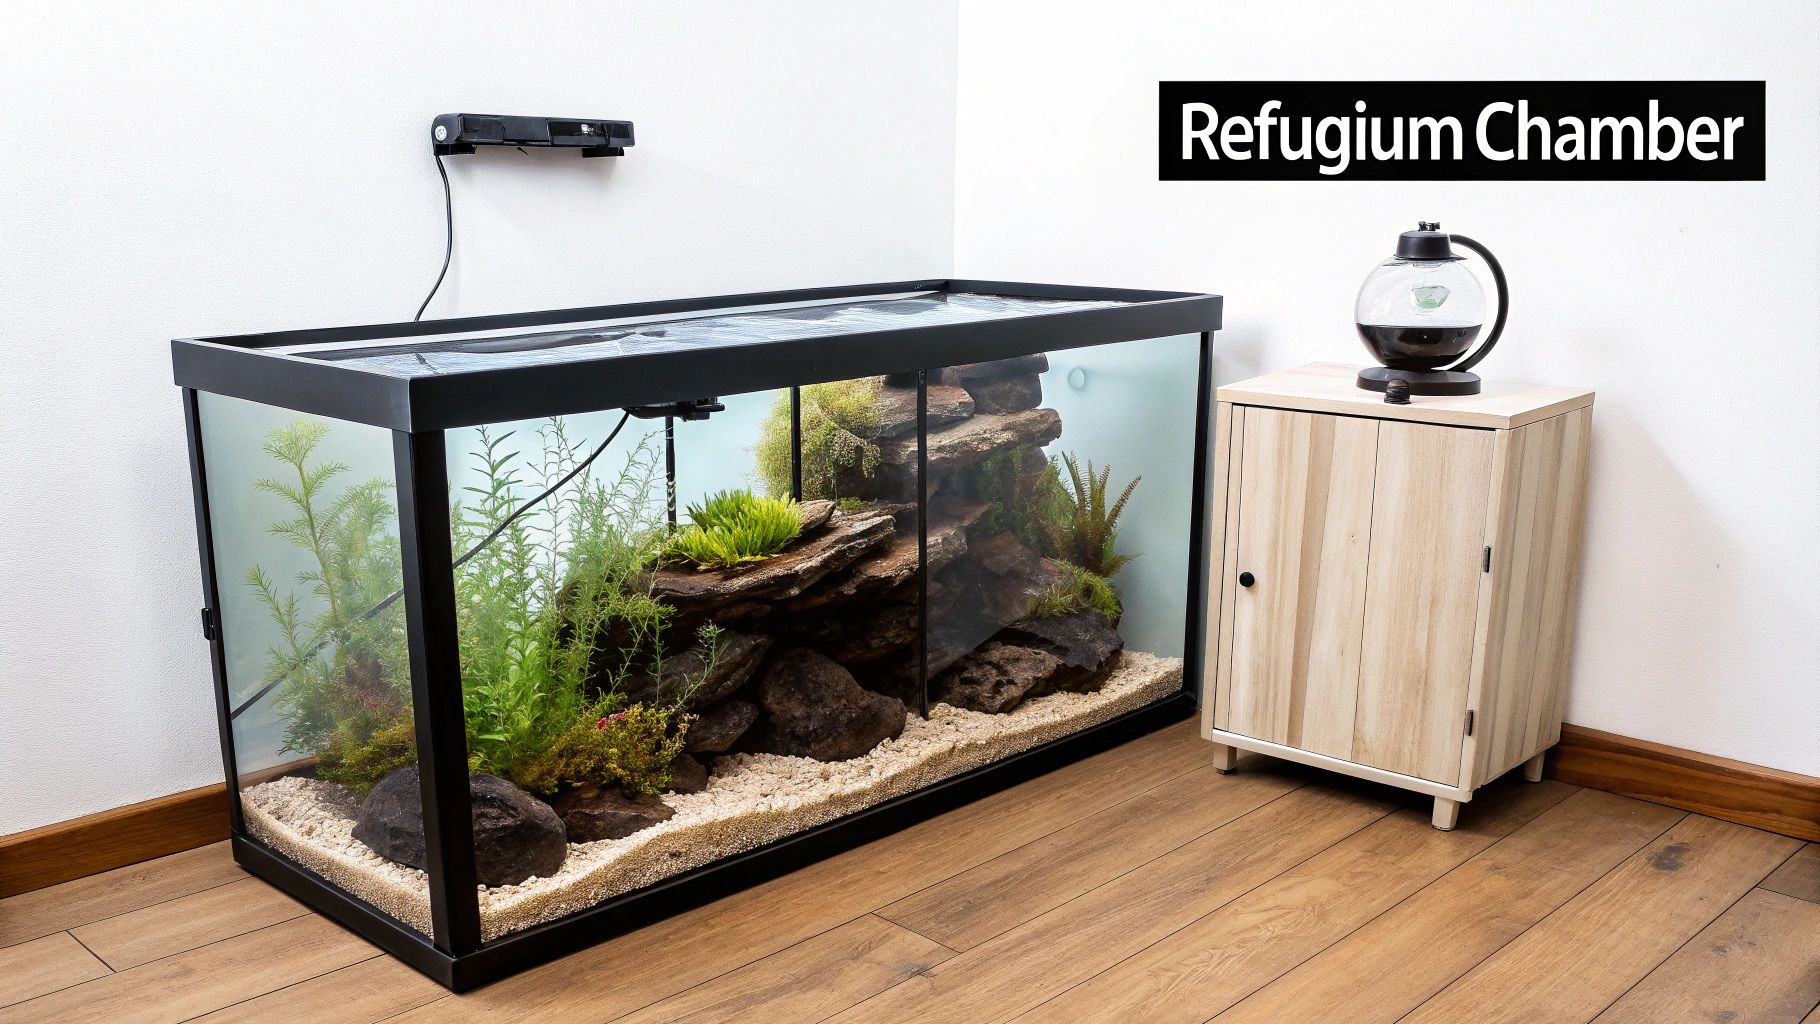
The Power of a Dedicated Refugium
This is where a sump really shines. Modern sumps almost always include a dedicated chamber for a refugium—a protected space designed to grow beneficial macroalgae and tiny critters. This is where the biological magic happens.
By dedicating a section of your sump to a refugium, you're essentially building a biological powerhouse. It becomes a nutrient-exporting machine and a 24/7 live food factory, directly supporting the health of your display tank.
A refugium is a simple but incredibly effective biological filter. Here’s what’s going on inside:
- Macroalgae: We typically use fast-growing algae like Chaetomorpha (or "Chaeto"). As it grows, it aggressively consumes nitrates and phosphates—the very things that fuel nuisance algae in your display tank. You're basically outcompeting the bad algae by growing good algae.
- Live Rock and Sand: This adds a massive amount of surface area for beneficial bacteria to colonize, supercharging your nitrogen cycle and making your biological filtration rock-solid.
- Microfauna: A refugium is the perfect predator-free zone to cultivate booming populations of copepods and amphipods. These tiny crustaceans are a fantastic, natural food source that continuously gets swept into the display tank, providing a constant snack for corals and picky fish like mandarins.
Want to dive deeper into this? Check out our guide on creating a self-sustaining aquarium ecosystem.
In the end, a well-designed sump isn't just an add-on; it's a foundational investment in the long-term success of your reef. It gives you the control, filtration, and biological stability you need to build something truly special.
Choosing the Right Sump and Core Equipment
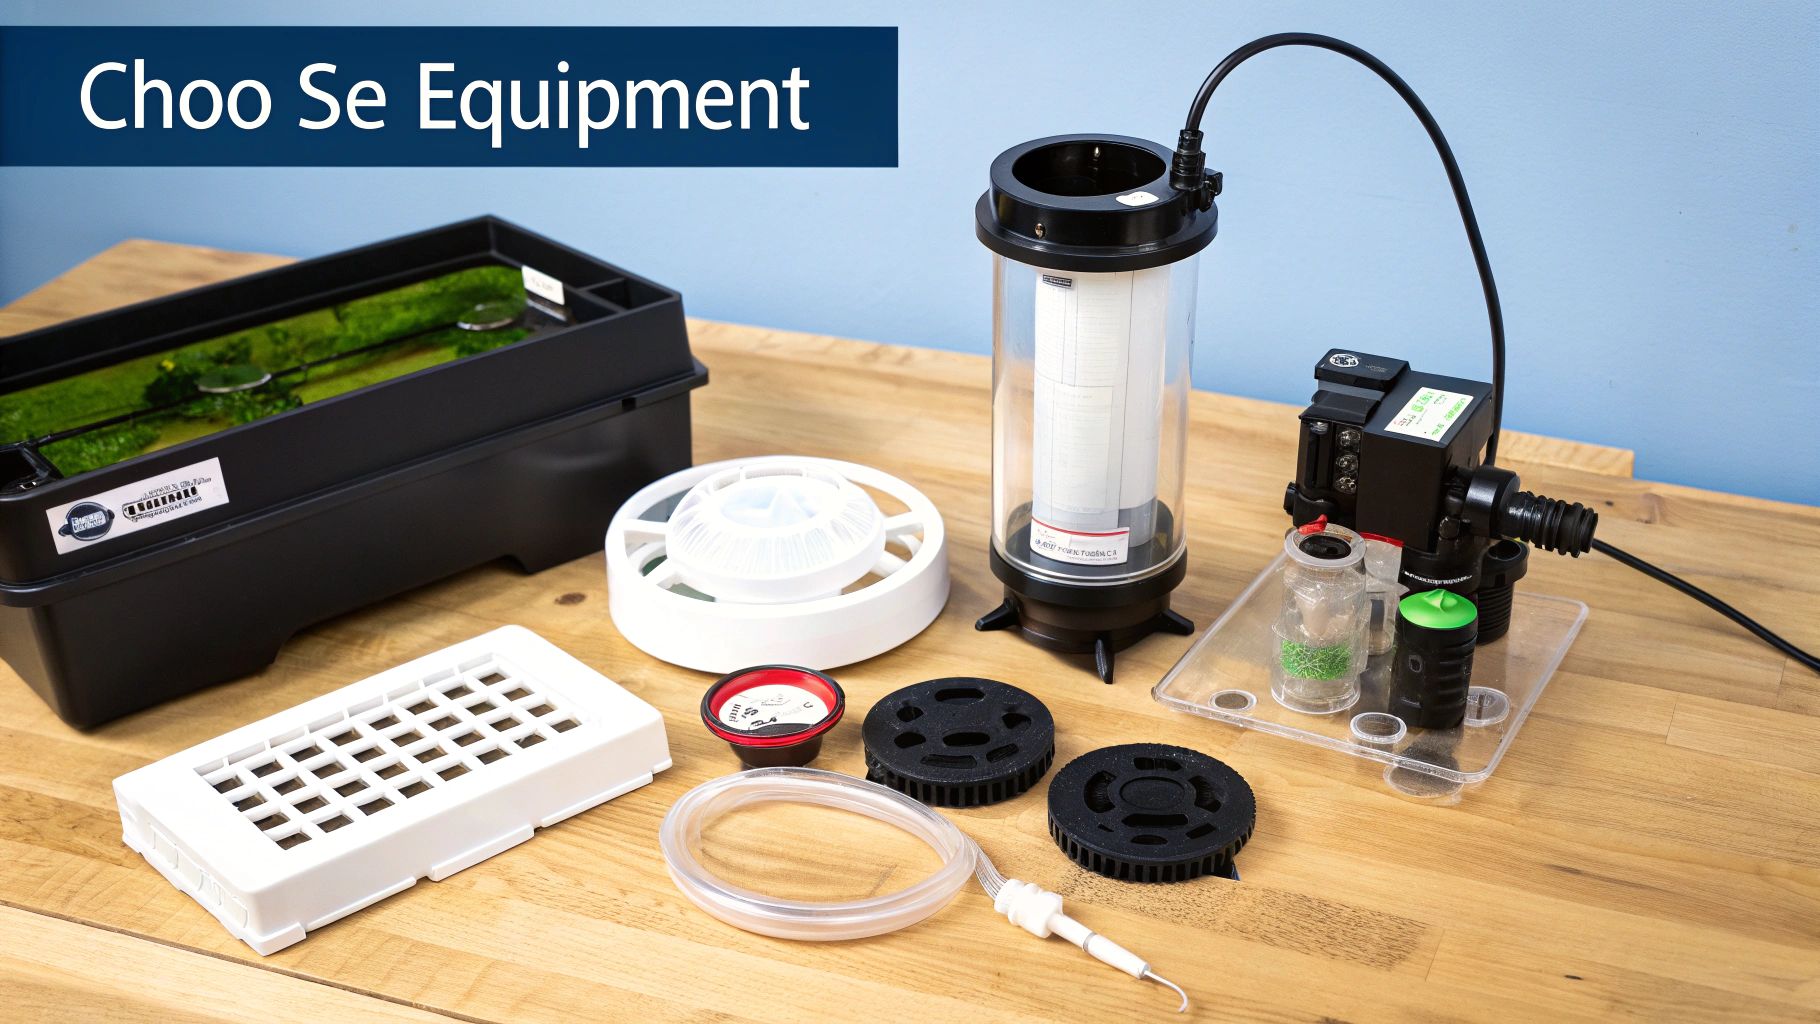
Alright, this is where the fun begins. Getting the right gear is the foundation of a successful sump setup, and it's less about buying the most expensive toys and more about making smart choices for your specific aquarium. Think of yourself as building the life-support system for a thriving underwater world.
Your first big decision is the sump itself. You'll be looking at glass versus acrylic, and deciding between a ready-to-go model or a DIY project. Each path has its pros and cons, boiling down to your budget, skillset, and how much you enjoy tinkering.
Key Takeaway: A solid rule of thumb I've always followed is to aim for a sump that holds 20-30% of your display tank's volume. For a 100-gallon display, that means a 20 to 30-gallon sump is the sweet spot. This gives you plenty of room for equipment while adding crucial water volume that helps keep your system stable.
The Great Debate: Sump Materials and Styles
Acrylic sumps are fantastic. They’re light, tough as nails, and you won't have to worry about shattering them. Best of all, they are a breeze to drill or modify if you want to add a new piece of gear down the road. The only catch? They scratch more easily than glass, so just be mindful when working with sand or sharp tools.
On the other hand, glass sumps have incredible scratch resistance and can be easier on the wallet, especially if you repurpose a standard aquarium for a DIY build. Their main downsides are weight and fragility—one clumsy moment can mean a chip or a crack.
Once you’ve settled on the material, you have two main routes:
- Pre-Made Sumps: These are plug-and-play. They come with professionally designed chambers and baffles, taking all the guesswork out of the equation. If you're new to sumps or just want to save time, this is the way to go.
- DIY Sumps: Building your own from a standard glass tank is a classic, rewarding project that can save you a good chunk of change. It gives you total freedom to design a layout that perfectly fits your chosen equipment.
Selecting Your Return Pump
The return pump is the heart of your entire system. Its only job is to push water from the sump back into the display tank, but getting it right is crucial. You’re looking for a balance between raw power and the resistance it needs to overcome.
The two numbers you need to care about are Gallons Per Hour (GPH) and head pressure. GPH tells you the pump's maximum flow, but head pressure—the vertical height it has to push water—is the real-world factor. A pump rated for 1000 GPH at zero feet of height might only push 500 GPH once it fights gravity to climb five feet to your tank. Always, always check the manufacturer’s flow chart to see what the actual output will be for your specific setup.
Decoding Protein Skimmers and Other Essentials
If you're running a saltwater tank, a protein skimmer is probably the single most important piece of equipment you'll put in your sump. It's a workhorse that pulls organic waste out of the water before it can break down into nitrates and phosphates. This proactive approach is the secret to pristine water quality in a reef tank.
When you're shopping for a skimmer, match it to your tank size and, more importantly, your bioload (how many fish you have). A skimmer rated for a 150-gallon tank is great for a heavily stocked 100-gallon reef, but it would be overkill for a lightly stocked one. The fact that the global aquarium sump market has hit USD 1.24 billion shows just how vital these systems are. Within that, the protein skimmer market alone is worth USD 134.63 million, which tells you how critical this one piece of gear is. In fact, efficient filtration, with a good sump at its core, drives about 70% of hobbyists' purchasing decisions. You can read more about the growth of the aquarium sump market to see the trends.
Beyond the skimmer, a few other pieces of equipment are absolute must-haves for a modern sump system.
- Heaters: Tucking your heaters away in the sump keeps the display tank looking clean and natural, while also protecting them from being bumped by rocks or curious fish.
- Auto Top-Off (ATO) System: Water evaporates, and when it does, your salinity spikes. An ATO uses a small sensor to automatically add fresh water from a reservoir, keeping your water level and salinity rock-solid. It's a true set-it-and-forget-it game changer.
- Media Reactors: While not strictly necessary, reactors are the most efficient way to run media like GFO (to eliminate phosphates) or activated carbon.
Essential Sump Equipment Sizing Guide
To make things easier, I've put together a quick reference table to help you match your equipment to your tank size. This is a great starting point, but always consider your specific stocking plans.
| Display Tank Size (Gallons) | Recommended Sump Volume (Gallons) | Return Pump Flow Rate (GPH) | Protein Skimmer Rating (Gallons) |
|---|---|---|---|
| 30-50 | 10-15 | 300-500 | 60-75 |
| 55-75 | 20-25 | 500-800 | 90-120 |
| 90-125 | 25-40 | 800-1200 | 150-200 |
| 150-180 | 40-60 | 1200-1800 | 220-300 |
Remember, these are guidelines. A heavily-stocked tank might benefit from stepping up to the next size on the skimmer, while a fish-only system could get by with a bit less. Use this as your foundation and adjust from there.
Designing and Plumbing Your Sump System
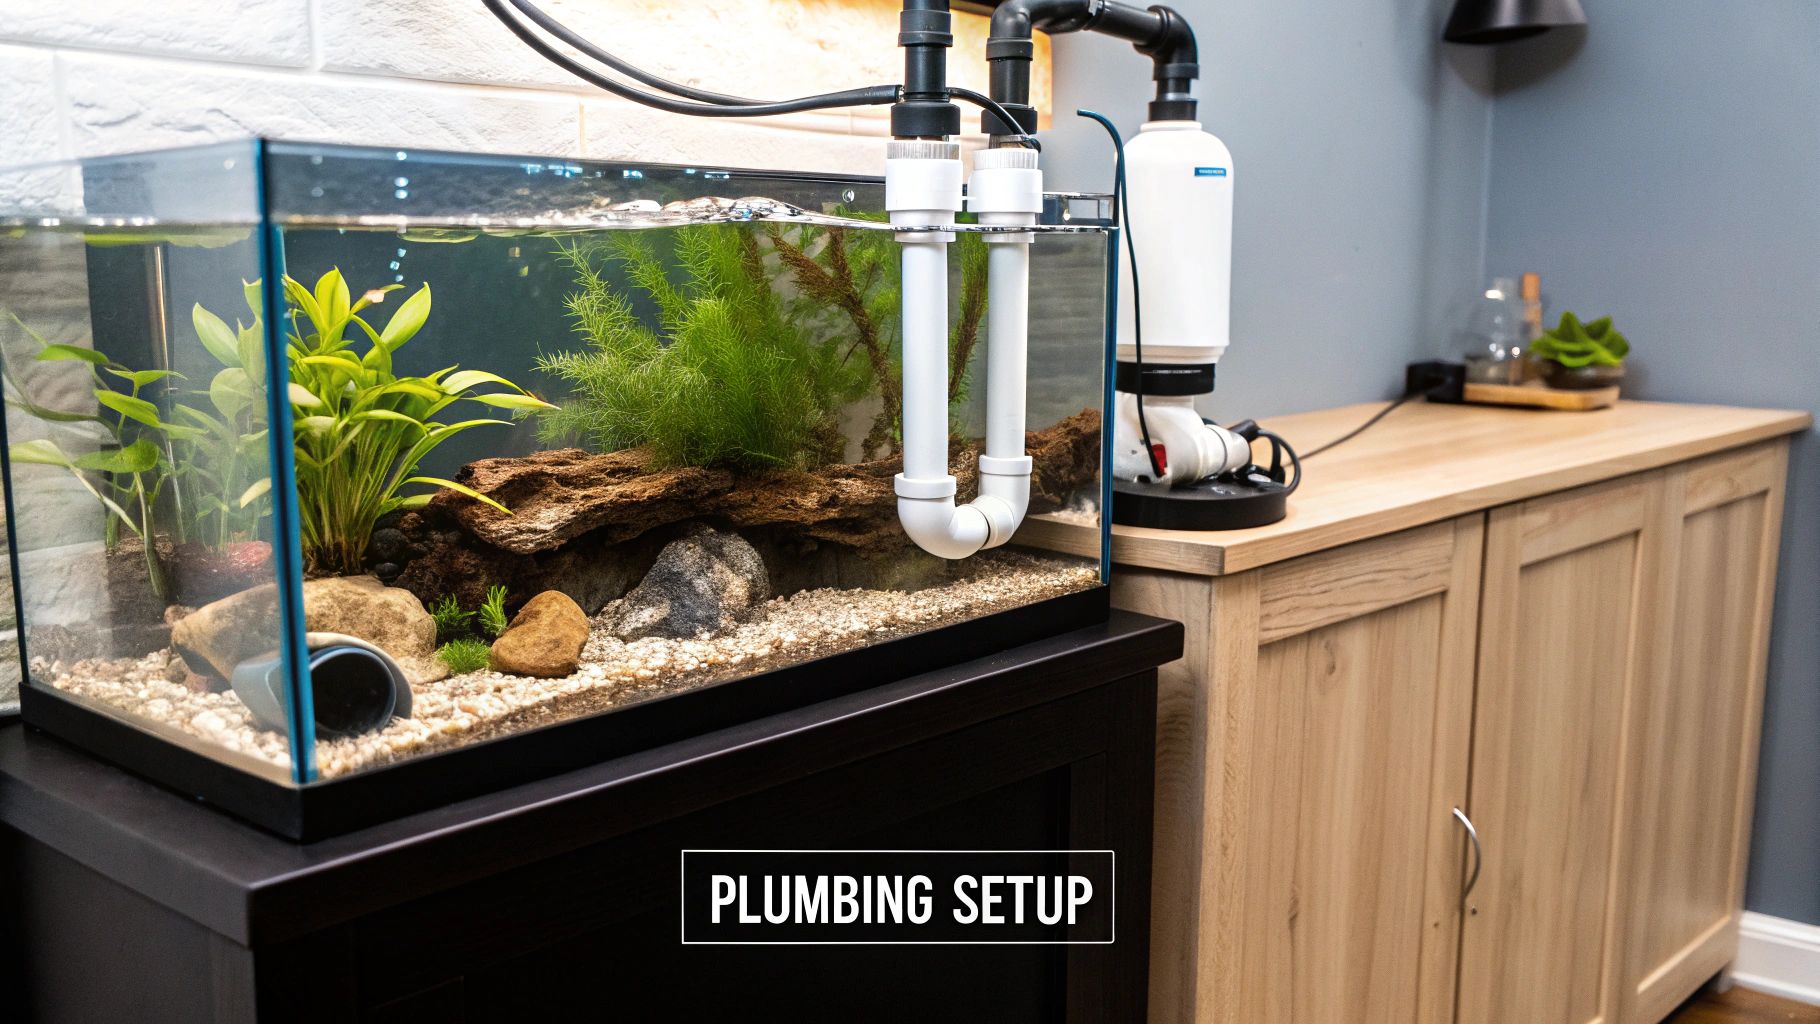
Alright, you’ve picked out your sump and have a pile of gear ready to go. Now for the part that often feels the most intimidating: the plumbing. Don’t sweat it. With a little bit of planning, connecting everything is actually one of the most satisfying parts of the whole build. Our goal is simple: create a silent, reliable, and completely leak-proof system that moves water from the display tank, through the sump, and back again.
We're going to skip the old, noisy methods and focus on two modern overflow designs that have become the gold standard in the hobby. These are engineered to be dead silent and incredibly safe, so you can finally get rid of that awful gurgling toilet sound for good.
Choosing Your Overflow Method
For any tank with a built-in overflow box, the conversation really begins and ends with two options: the "Herbie" and the "BeanAnimal" methods. Both are designed from the ground up to eliminate noise and give you peace of mind against floods.
The Herbie-style overflow is the workhorse of the two and my go-to for most builds. It uses two drain pipes:
- Main Siphon: This is your primary drain, and the secret to its silence is that it runs as a full siphon—no air, just water. You’ll use a gate valve on the sump end to fine-tune the flow so it perfectly matches your return pump's output.
- Emergency Drain: This pipe is set just a little higher than the main drain. In a perfect world, it stays bone dry. If the main drain ever gets clogged, the water level rises just enough to spill into this emergency pipe, preventing a disaster and letting you know there's a problem.
The BeanAnimal-style overflow is the "belt and suspenders" approach, offering an extra layer of redundancy. It uses three pipes:
- Main Siphon: Works exactly like the Herbie's main drain, controlled by a gate valve for silent operation.
- Open Channel: Set slightly higher, this pipe skims off any excess flow the main siphon can't handle and also allows trapped air to escape. You’ll hear a gentle, quiet trickle from this line, which is totally normal.
- Emergency Drain: This is your last line of defense, set highest of all. Like the Herbie's emergency drain, it stays dry unless things go very wrong.
So, which one do you need? Honestly, for most tanks under 150 gallons, a well-tuned Herbie is rock-solid and more than enough. If you have a larger tank or just want the absolute pinnacle of failsafe protection, you can't beat a BeanAnimal.
Pro Tip: Do yourself a huge favor and install "unions" in your plumbing. Put one on either side of your return pump and near your bulkhead connections. These threaded fittings let you easily disconnect your pump or other equipment for maintenance without ever having to cut and re-glue your PVC.
Getting the Plumbing Right
Once you've decided on an overflow method, it's time to map out the pipework. This is where a little forethought saves a ton of future headaches. Always use rigid PVC pipe for the main runs; it's cheap, strong, and will outlast your tank.
Pipe Sizing: Just match the pipe diameter to your tank's bulkheads. Most pre-drilled tanks come with 1-inch or 1.5-inch drains. Don't fall into the trap of thinking bigger is always better—it's all about matching the pipe size to your pump's flow rate.
Valves are Key: This part is critical. You absolutely need a gate valve on your main siphon drain. A ball valve is just an on/off switch, but a gate valve gives you the incredibly precise, micro-adjustments needed to perfectly balance the drain flow with your return pump. That balance is the key to a silent system. For the return line going back to the tank, a simple ball valve is perfectly fine to dial back the flow if needed.
Assembling Your Leak-Proof System
Now for the fun part: putting it all together. The golden rule here is to dry-fit everything first. Assemble all your pipes, elbows, and valves without a drop of glue. Make sure it all lines up, fits in the stand without being cramped, and that you can easily access your valves.
Once you’re happy with the layout, it's time to make it permanent.
- Grab your PVC primer (it’s usually purple) and apply it to the outside of the pipe end and the inside of the fitting you’re connecting. This stuff cleans and softens the plastic for a solid bond.
- While the primer is still wet, quickly apply an even coat of PVC cement to both surfaces.
- Push the pipe straight into the fitting and give it a slight quarter-turn twist. This helps spread the cement and ensures a good seal.
- Hold it firmly in place for about 30 seconds. The cement sets incredibly fast, creating what is essentially a welded plastic bond.
Always work in a well-ventilated area—the fumes are no joke. The most important step? Let the cement cure for a full 24 hours before you even dream of letting water touch it. A little patience now will be rewarded with a reliable, leak-free system that will serve you for years to come.
Setting Up Your Sump Chambers for Maximum Impact
With the plumbing all planned out, we can finally dive into what makes a sump tick: the chambers. A sump is far more than just a box to hide equipment. It's a series of specialized zones, each with a crucial role. Getting the order and setup of these chambers right is what turns a simple sump into the life-support system for a thriving reef aquarium.
Most sumps you'll find today use a classic three-chamber layout. This design isn't arbitrary; it guides water through a logical filtration process, making sure every piece of gear and every biological process can do its job without getting in the way of the next. Water flows from an intake chamber, through a refugium, and finally into a return chamber.
The First Stop: The Intake Chamber
As water tumbles down from your display tank, it brings all the messy stuff with it—detritus, leftover food, and fish waste. The job of this first chamber is straightforward: grab all that solid gunk before it can decompose and become fuel for nuisance algae. Think of this as your mechanical filtration zone.
For years, the workhorse here has been the simple filter sock. These felt socks, usually in the 100-200 micron range, are fantastic at polishing water and making it crystal clear. The only downside? They clog quickly and need to be cleaned or swapped out every few days. If you leave them too long, they start to do the opposite of what you want, becoming little nitrate factories.
A more modern, hands-off alternative is the automatic filter roller, often called a "roller mat." This clever device uses a spool of filter fleece that slowly advances as it gets clogged, effectively capturing waste and pulling it out of the water column entirely. They're a brilliant upgrade, though they do have a higher upfront cost. This is also the chamber where you'll place your protein skimmer, right where it can get to the "dirtiest" water first.
The Refugium: The Biological Heartbeat
Once the water has been mechanically cleaned, it moves into what is arguably the most vital part of a reef tank sump: the refugium. This is a protected "refuge" where beneficial life can flourish, acting as both a nutrient export engine and a non-stop food factory for your fish and corals.
Putting together a great refugium is pretty easy. You just need a few key ingredients:
- A Deep Sand Bed: A 4-6 inch layer of sand gives beneficial bacteria a massive amount of surface area to colonize. The deepest layers can even go anaerobic, creating a home for bacteria that consume nitrates.
- Live Rock or Rubble: Throwing in some porous live rock creates even more real estate for bacteria and gives tiny critters like copepods and amphipods endless places to hide and breed.
- Macroalgae: This is the real star. Growing a healthy ball of macroalgae, like Chaetomorpha (or "chaeto"), creates a powerful nutrient sponge. As it grows, it sucks up the same nitrates and phosphates that fuel ugly algae in your display tank.
- A Dedicated Light: Algae needs light to grow. A cheap LED grow light is all you need. The real pro-tip here is to run it on a reverse daylight cycle. When your main tank lights go out for the night, the refugium light kicks on. This simple trick helps stabilize your tank's pH, preventing the natural drop that happens overnight.
A well-lit refugium packed with life quickly becomes the biodiversity hotspot of your entire system. For reef tanks, a sump-based refugium can house 80-90% of the tank's total pod population. Under the right 6500K lighting, some copepod species have been shown to multiply 5-10 times weekly.
The Final Stage: The Return Chamber
The last chamber is the simplest, but it’s no less critical. This is home base for your return pump, heater, and auto-top-off (ATO) sensor. Here, the water—now stripped of solids and scrubbed of excess nutrients—is ready to be sent back up to the main display.
The baffles separating the refugium from this chamber are designed to act as a last line of defense, trapping any stray bits of macroalgae or microbubbles. You want to send nothing but clean, clear water back to your tank.
It is absolutely crucial that the water level in this chamber stays perfectly consistent, which is why your ATO sensor goes here. A stable level ensures your return pump never runs dry and your system's salinity remains rock-solid. Truly understanding how to build out your refugium in a sump is the key to making this entire process work seamlessly. By getting these three chambers dialed in, you create a powerful, self-regulating system that provides incredible stability and health for your aquarium.
Bringing Your Sump Online and Keeping It Maintained
You've built it, plumbed it, and placed all the equipment. Now for the exciting part—turning it all on. This is where your planning and hard work pay off, transforming a collection of acrylic, PVC, and gear into the heart of your aquarium's life support system. The trick is to take it slow and be deliberate. Don't rush to get salt and fish in there just yet.
First things first: the leak test. Fill the entire system—your display tank, all the new plumbing, and the sump itself—with fresh RO/DI water. Fire up the return pump and just let it run for a solid 24 to 48 hours. Check every single union, valve, and bulkhead fitting. I mean really check them. It's so much better to find and fix a tiny, slow drip with freshwater than to wake up to a saltwater flood on your floor.
Tuning the Flow for Whisper-Quiet Operation
Once you're confident everything is watertight, it's time to dial in your overflow and return pump. This is the secret sauce for getting that silent operation every reefer dreams of. The goal here is to get the flow rate from your return pump to perfectly match the drain rate of your primary siphon.
To do this, start with the gate valve on your main drain line wide open. Turn on your pump and watch. The overflow box will fill up, and you'll see water going down both the main drain and the emergency drain.
Now, very slowly, start to close the gate valve on the main drain. You'll see the water level in the overflow box start to rise as you restrict that flow. Keep making tiny, precise adjustments. You're looking for the sweet spot where nearly all the water is flowing down the main siphon, with just a tiny, gentle trickle spilling over into the emergency drain. This tells you the system is balanced. Once you hit that point, the loud gurgling will vanish, and your tank will be almost silent. Use a Sharpie to mark the position of the gate valve handle—it'll save you a ton of guesswork after you've had it shut down for maintenance.
This balancing act isn't just about killing noise; it's about creating a rock-solid, stable system. A properly tuned overflow moves a consistent volume of water, which is crucial for effective filtration, stable water chemistry, and ultimately, the health of your corals and fish.
Nailing Down a Sustainable Maintenance Routine
With your sump humming along quietly, it's time to think about long-term care. Consistency is everything in this hobby. A few simple tasks done on a regular schedule will keep your tank thriving far better than one massive, frantic cleaning session every month.
Here's a practical schedule you can start with and tweak to fit your own system:
-
A Few Times a Week:
- Clean Mechanical Filtration: If you're running filter socks, swap them for clean ones every 2-3 days to prevent them from becoming nitrate factories. If you have a filter roller, just make sure the roll is advancing as it should.
- Empty Skimmer Cup: This is non-negotiable. Once the cup is full, your skimmer stops working. Empty and rinse it at least once a week, maybe more if you have a heavy bioload.
-
Every Week or Two:
- Harvest Macroalgae: If you have a refugium, trim back about a third of your chaetomorpha. When you pull that algae out, you're physically removing the nitrates and phosphates it has consumed from the water.
- Replenish Your 'Fuge: Add a fresh batch of live copepods to your refugium. This keeps the population healthy and dense, providing a constant source of nutritious live food for your fish and corals.
- Check Your Pumps: It only takes a minute. Shut off your return pump and check the intake screen for any debris or snails that might be slowing it down.
In the massive global aquarium market, it's no surprise that sump systems are found on 60-70% of advanced reef tanks. Pairing a sump with modern gear like controllable LEDs and auto-top-offs has helped push coral survival rates past 85% in many home setups. For anyone getting serious about reefing, a sump is a game-changer. You can find more info on the booming aquarium market from Fortune Business Insights.
Lastly, always keep an eye on your Auto-Top-Off (ATO) reservoir. Keeping it filled with fresh RO/DI water is one of the easiest ways to maintain stable salinity. Stick to these simple habits, and your sump will provide reliable, efficient filtration for years to come. For more ideas, check out our guide on creating a consistent saltwater tank maintenance routine.
Answering Your Top Sump Questions
Even the best-laid plans hit a snag or two. When you're plumbing an aquarium, questions are just part of the process. Let's tackle some of the most common things that come up when people are setting up their first sump, so you can move forward with confidence.
How Big Does My Sump Need to Be?
This is probably the number one question I get, and the short answer is: as big as you can comfortably fit.
A good starting point is to aim for a sump that holds between 20% and 40% of your display tank's volume. So, for a 100-gallon aquarium, you’d be looking for a sump in the 20 to 40-gallon range. It's a solid guideline.
Why bigger? A larger sump gives you two huge advantages. First, it adds to your total system water volume, which makes your water chemistry much more stable. Think of it as a buffer against sudden swings in temperature, salinity, or pH. Second, it just gives you more real estate to work with for your skimmer, reactors, and heater, making maintenance way less of a chore.
But here’s the most critical part: your sump must be able to hold all the water that drains back from the display tank when the power goes out. This back-siphon is the ultimate test. If it can’t handle that volume, you’re looking at a wet floor.
What’s the Right Flow Rate for a Sump?
Finding the sweet spot for flow is all about balance, not just blasting as much water as you can. A healthy target for turnover is about 5 to 10 times your total system volume (display tank + sump) per hour. If your whole setup is 120 gallons, a return pump rated somewhere between 600 and 1,200 GPH is your target.
Just don't forget about head pressure. That’s the work your pump has to do to push water uphill from the sump back into the tank. The GPH listed on the box is its performance with zero resistance. Always check the manufacturer's flow chart to see what the actual GPH will be at the height of your aquarium stand.
Getting this right is crucial. Too slow, and your skimmer won't see enough "dirty" water to do its job. Too fast, and you can blast microbubbles into your display and give the water too little "dwell time" in the sump for filtration and heating to be effective. A simple gate valve on the return line is your best friend for dialing it in perfectly.
Can I Use a Sump on a Tank That Isn't Drilled?
You sure can! This is a super common upgrade for people with standard, off-the-shelf aquariums. The magic gadget you need is a hang-on-back (HOB) overflow box.
This device sits on the rim of your tank and uses a U-tube to start a siphon, safely pulling water down to the sump below. It’s a pretty ingenious solution.
The only catch is that HOB overflows need a little more babysitting than a drilled setup. Their main weakness is the risk of the siphon breaking, especially during a power outage. If the siphon doesn't restart when the power kicks back on, the return pump will just keep pumping water into the display until it overflows. My advice? Spend a little extra on a quality model designed to restart automatically and make a habit of checking on it.
How Can I Make My Sump Quieter?
A well-designed sump should be virtually silent. If you're dealing with annoying gurgling or humming, the noise is almost certainly coming from one of two culprits: your drain line or your return pump.
That "toilet flushing" sound from the drain is caused by air mixing with water. The gold standard for silent drains are designs like the "Herbie" or "BeanAnimal" overflow. These systems are specifically engineered to maintain a full siphon in the drain line, which completely cuts out the air and, with it, the noise.
If the pump itself is the problem, the noise is likely from vibration. Never let your pump sit directly on the glass bottom of the sump. Place it on a small silicone pad to absorb the vibrations. Another great pro-tip is to connect the pump's outlet to your hard PVC plumbing with a short piece of flexible vinyl tubing—it acts as an isolator and stops the hum from resonating through your entire stand.
A thriving, vibrant reef tank depends on a healthy population of microfauna. Give your system the live nutrition it craves with PodDrop Live Aquarium Nutrition. Our freshly cultured copepods and phytoplankton will boost the biodiversity of your new sump and keep your fish and corals brilliantly colored and full of life. Seed your reef for success at https://www.getpoddrop.com.