


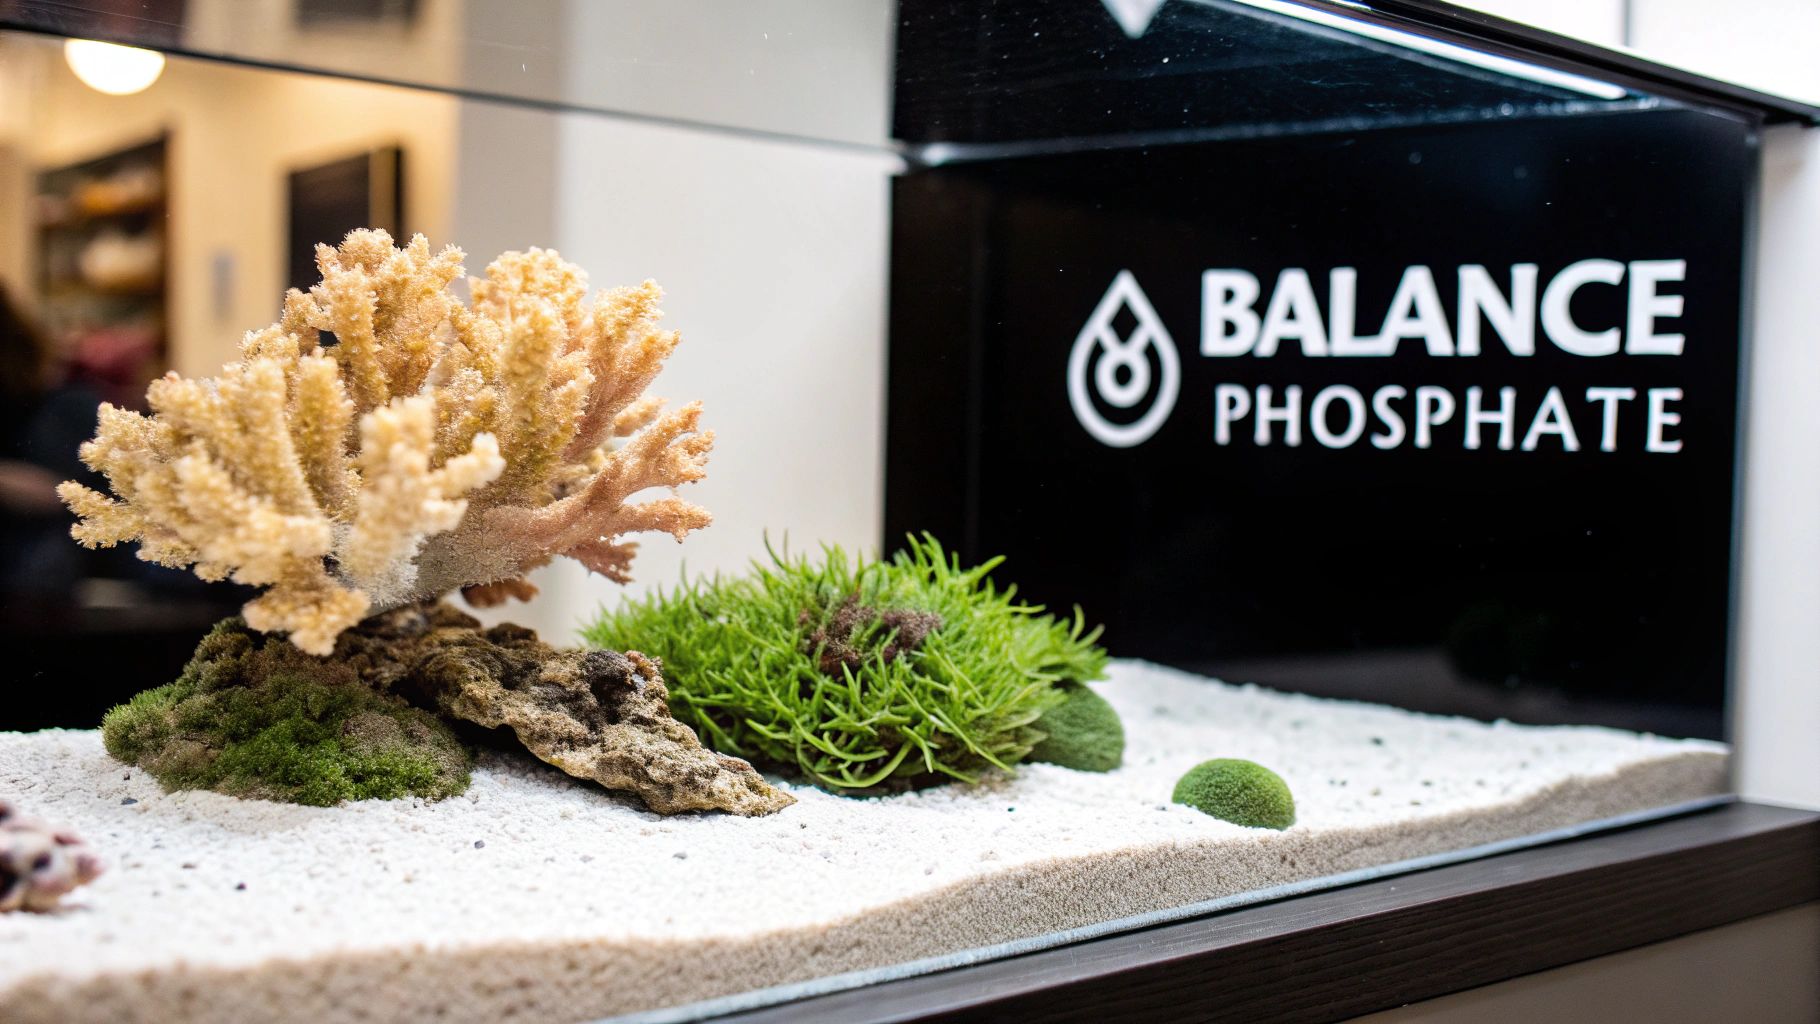
A Complete Guide to Reef Aquarium Phosphate Levels
- fabianbehague
- Dec 9
- 17 min read
Getting your reef aquarium phosphate levels right is one of those non-negotiable parts of the hobby. The sweet spot is a delicate dance, usually somewhere between 0.03 to 0.05 ppm (parts per million). While your corals absolutely need a little bit of it to thrive, letting those numbers creep up is a fast track to algae outbreaks and unhappy corals. Nailing this balance is fundamental to a clean, vibrant reef.
Why Phosphate Is a Reef Tank's Double-Edged Sword
Think of phosphate as rocket fuel for your reef tank. In the right dose, it’s a critical nutrient that helps power the photosynthetic processes in your corals. But just like rocket fuel, too much in the wrong place causes an explosion—in this case, an explosion of nuisance algae.
This is the classic 'phosphate problem' every reefer hits sooner or later. When levels are too high, you’re basically rolling out the red carpet for green hair algae, slimy cyanobacteria, and dreaded dinoflagellates. At the same time, those elevated levels can directly slow down coral skeleton growth.
On the flip side, chasing absolute zero phosphate is just as bad. Too little, and you risk starving your corals, leading to pale colors and tissue loss. The real art of reefkeeping is finding that perfect equilibrium where your corals get what they need, and algae is left out in the cold.
Ideal Phosphate Ranges and Symptoms for Reef Aquariums
Not every tank has the same dietary needs. A simple fish-only setup can handle way more phosphate than a high-end SPS coral display that demands ultra-clean water. Knowing your system's specific needs is the first step to getting things right.
This table is a great starting point. Use it to find your target range and to diagnose problems when you see your corals or tank looking a little off.
Ideal Phosphate Ranges and Symptoms for Reef Aquariums
Tank Type | Ideal Phosphate (ppm) | Symptoms of Low Levels | Symptoms of High Levels |
|---|---|---|---|
Fish-Only with Live Rock | 0.10 - 0.20 ppm | N/A (Fish are resilient) | Persistent nuisance algae growth |
Soft Coral / LPS Dominant | 0.05 - 0.10 ppm | Pale corals, poor polyp extension | Brownish coral tissue, algae blooms |
Mixed Reef | 0.03 - 0.08 ppm | Washed-out colors, tissue loss | Slow coral growth, algae, cyano |
SPS Dominant / ULNS | 0.02 - 0.05 ppm | Starvation, coral death (STN/RTN) | Burnt tips, algae on coral base |
Think of these numbers as guidelines, not rigid rules. The most important thing is finding what works for your tank and keeping it stable.
Learning from Natural Reefs
If you ever wonder why we chase these numbers, just look at the ocean. On natural coral reefs, phosphate levels are incredibly low, often hanging around 0.005 to 0.03 ppm. Sure, they see occasional nutrient spikes, but a constant state of high phosphate is completely unnatural and harmful.
A perfect real-world example comes from Kāne‘ohe Bay in Hawaii. When pollution drove phosphate levels up, the entire ecosystem flipped, with algae choking out the native corals. It’s a powerful reminder of why we obsess over stability in our little glass boxes. For our closed systems, keeping phosphate low and steady isn't just a good idea—it's critical for long-term success. You can dive deeper into these ecological findings to see just how big of an impact this single nutrient can have.
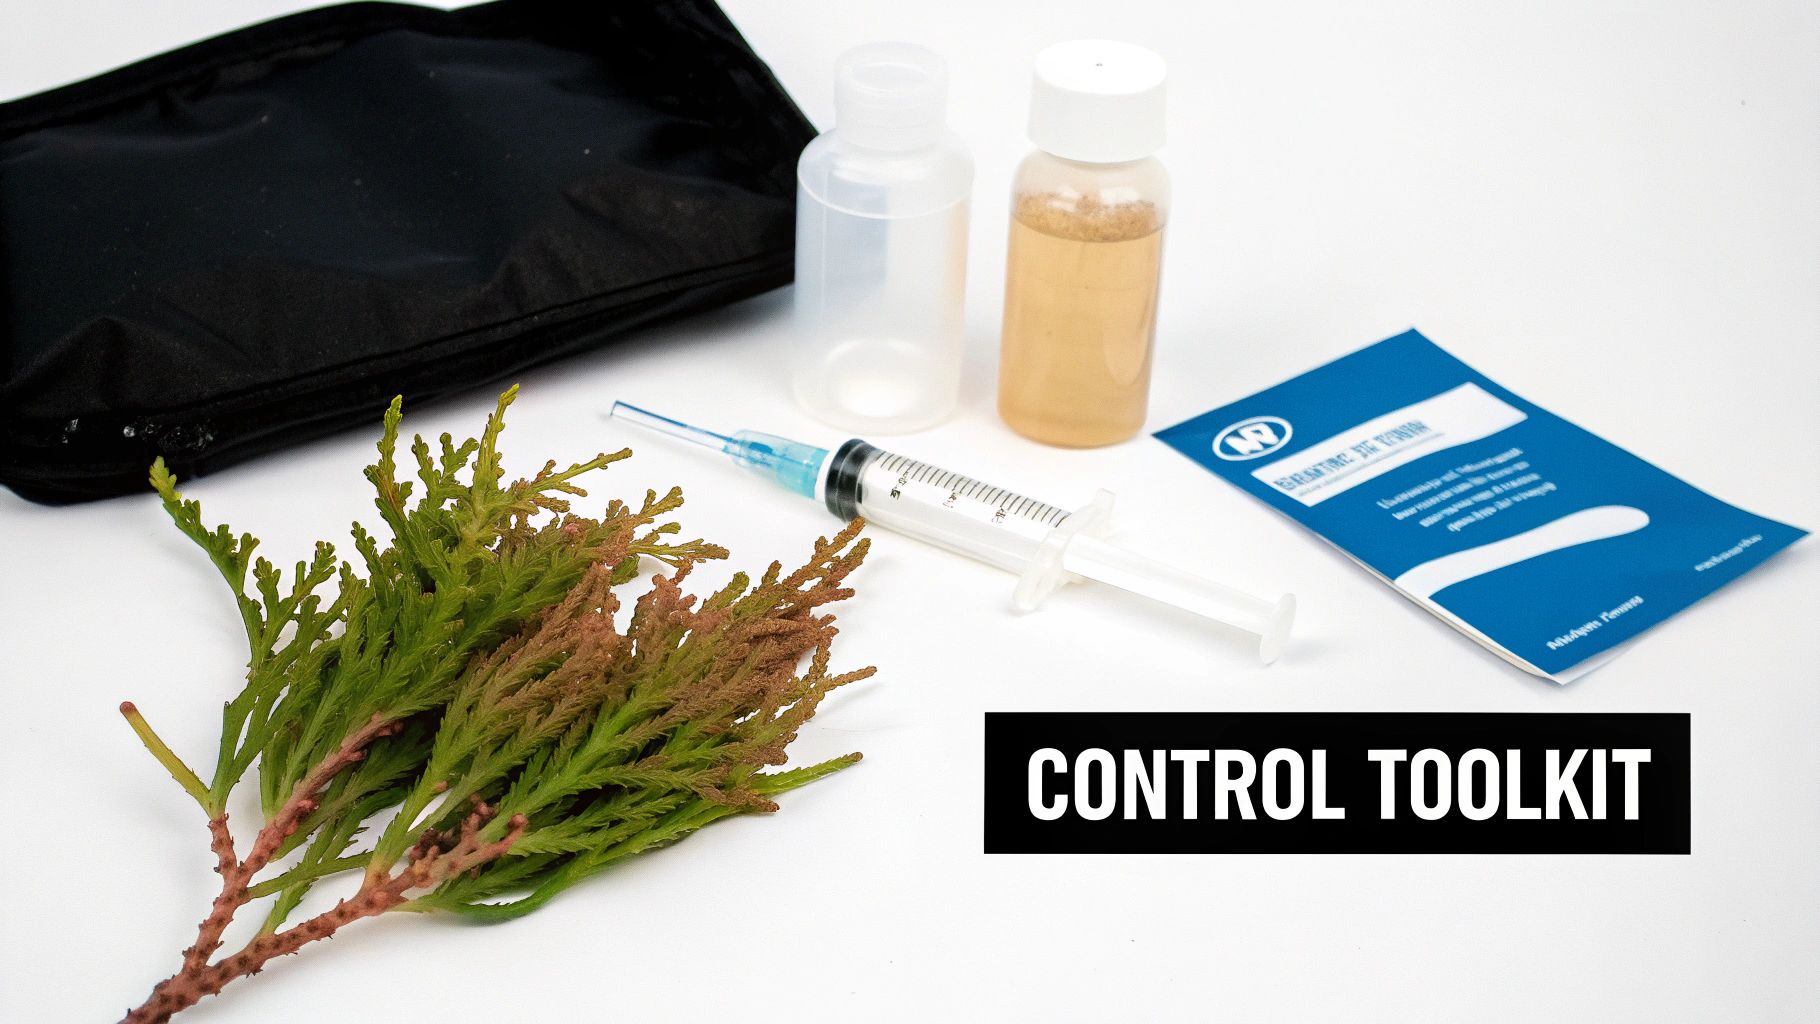
Decoding Your Water: How to Test Phosphate Accurately
You can't manage what you can't measure. When it comes to reef aquarium phosphate levels, that old saying is the gospel. Getting a reliable number isn’t just about collecting data; it's about making informed decisions instead of chasing your tail. Without consistent, accurate testing, you're essentially flying blind.
Choosing the right test is your first major decision. Your options really boil down to two categories, and the best one for you depends on your budget and just how precise you need to be for your specific reef.
Choosing Your Testing Method
For a lot of hobbyists, the journey starts with a simple colorimetric test kit. These are the affordable, widely available kits where you add a few drops of reagent to your tank water, give it a shake, and watch it turn a certain shade of blue. You then hold that vial up to a printed color chart to guess the phosphate level.
The problem? Interpreting those color charts can be a real headache. The tiny differences between shades of blue are often hard to distinguish, especially under the funky lighting of most reef tanks. While they’re decent for spotting a massive spike, they just don't offer the precision needed for a sensitive SPS coral system that demands near-zero nutrients.
This is where a digital colorimeter or checker comes in. These handheld electronic devices are the gold standard for a reason. They work on a similar principle—reagents and a water sample—but instead of your eyes, they use a light sensor to measure the exact color change. It completely takes the guesswork out of the equation.
Key Takeaway: A digital checker gives you a precise number (like 0.04 ppm), eliminating all the ambiguity. For advanced reefers managing SPS-dominant tanks or anyone locked in a battle with stubborn algae, this level of accuracy is a game-changer.
Executing the Perfect Test, Step-by-Step
No matter which kit you choose, your results are only as good as your technique. It’s incredibly easy to make a small mistake that throws off your reading, leading you to "fix" a problem that doesn't actually exist.
Here’s how to nail your test every single time:
Clean Your Vials: Always start by rinsing the test vial thoroughly with RODI water, then do a final rinse with tank water. Any tiny residue from a previous test—or worse, soap—will completely contaminate your sample.
Collect a Good Sample: Grab your water sample from a high-flow area in your display tank. Steer clear of any dosing lines or the direct output from equipment like a calcium reactor to make sure you're getting a reading that represents the whole system.
Follow Instructions Exactly: Don't eyeball it. Use the provided syringes to draw the exact amount of water. When you're adding reagents, count every single drop or use the precise powder packet as directed. Close enough isn't good enough here.
Time it Right: Most tests require a specific waiting period after you add the reagents. Set a timer on your phone. Reading the result too early or too late will absolutely give you a false number.
Use Consistent Lighting: If you're using a colorimetric chart, do yourself a favor and read it under the same neutral, white light every time. Trying to match colors under the heavy blue light of your aquarium is a recipe for frustration and inaccurate results.
How Often Should You Test Phosphate?
If you're dealing with a new tank or you’re actively working to bring high phosphate down, testing twice a week is a great rhythm. This frequency gives you enough data to track your progress and see if your strategies are working, all without making you feel like you need to overreact to every little daily swing.
Once your reef's phosphate levels have settled down into your target range, you can usually back off to testing just once a week. Getting into the habit of logging these results in a notebook or an app is one of the most powerful things you can do. Over time, it helps you spot those slow, creeping trends that often signal a problem long before you see the visual signs, like algae outbreaks or unhappy corals.
The Invisible Stress: What Imbalanced Phosphate Does to Corals
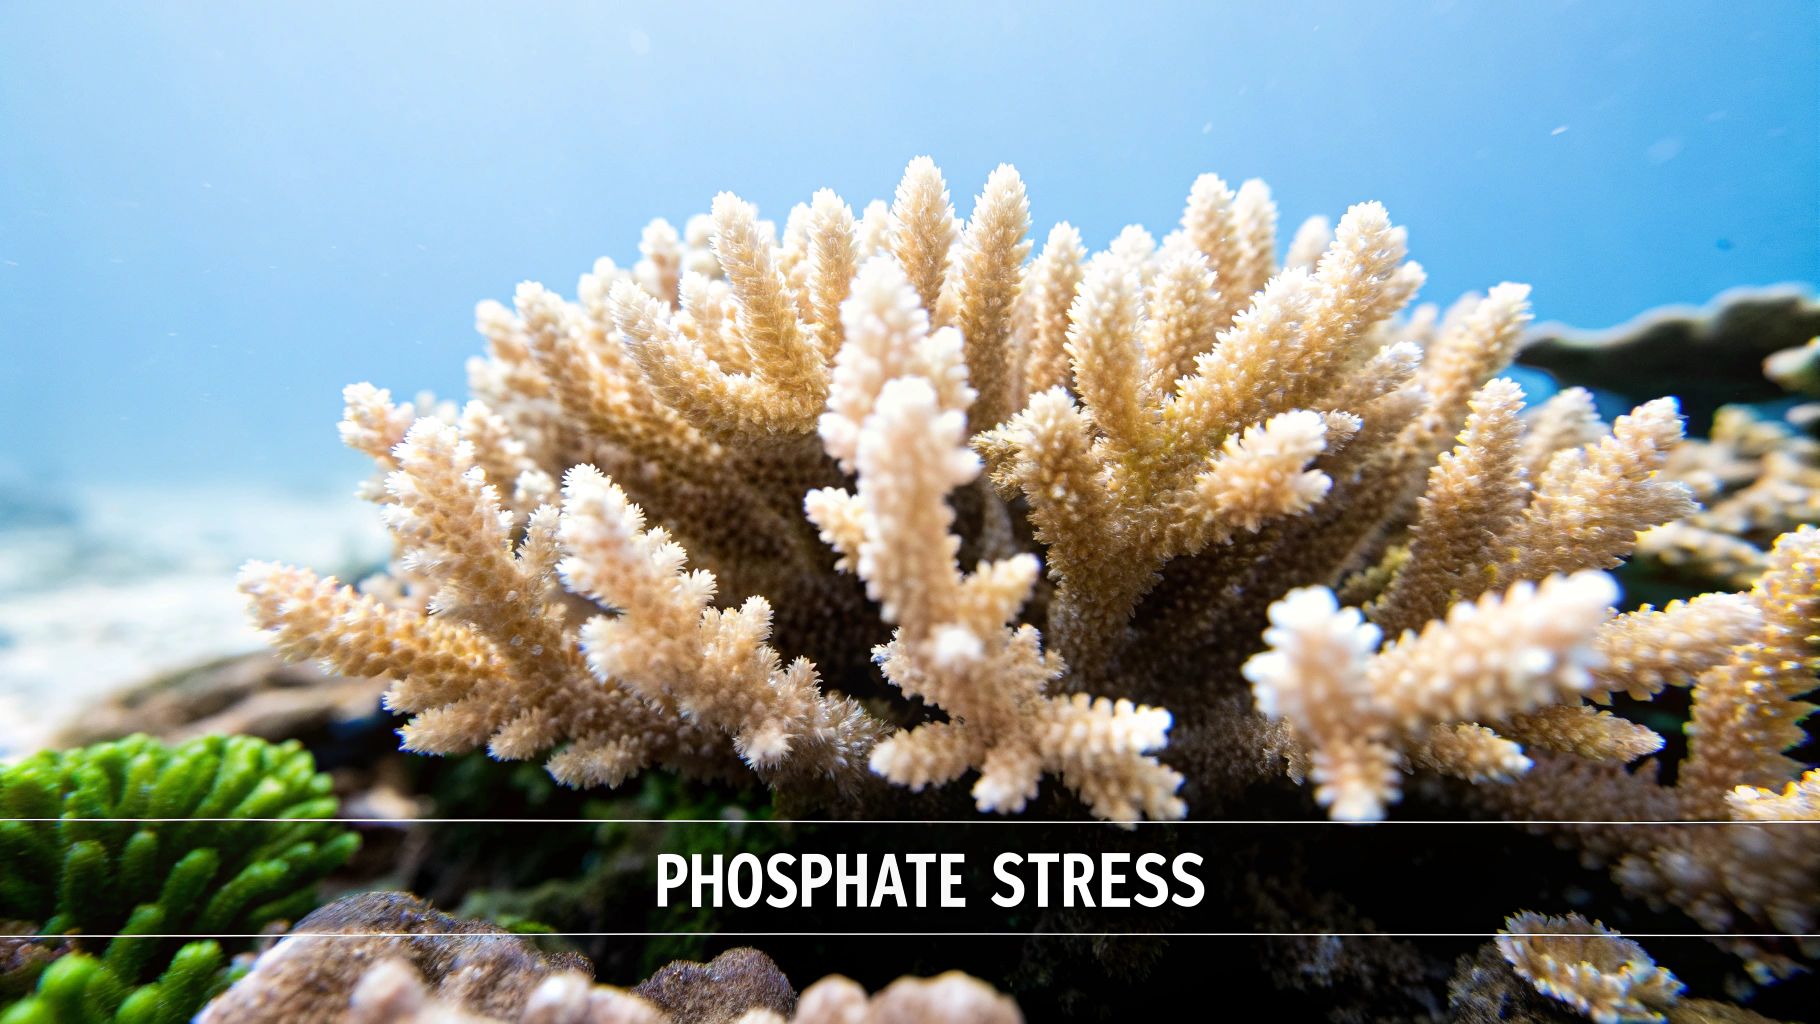
Sure, high phosphate levels can fuel an ugly green hair algae bloom, but that’s just the symptom you can see. The real damage is the silent, direct assault it launches on your corals' most basic biological functions. While you’re busy fighting algae, the unseen damage happening inside your corals’ tissue is often far more dangerous. Getting a handle on this invisible stress is the key to understanding why stability is everything.
Imagine a coral trying to build its skeleton. It needs to pull carbonate ions from the water and combine them with calcium, a process called calcification. But when there’s too much phosphate floating around, those molecules act like microscopic saboteurs, getting in the way and physically blocking the process. They steal the parking spots where carbonate should be, making it nearly impossible for the coral to build new skeleton.
The result? Frustratingly slow growth, even when your lighting and flow are perfect. Frags that should be encrusting and branching just sit there, stagnant. Their skeletons can even become weaker and more brittle. This chemical interference is exactly why tanks with chronically high phosphate struggle to keep thriving SPS corals.
The Problem with Zero Phosphate
In the crusade to obliterate algae, many reefers make a critical mistake: they chase a phosphate reading of 0.00 ppm. This is the other edge of the sword, and it can be just as damaging as having levels that are too high. Phosphate isn't just a pollutant; it's a fundamental nutrient for life. It's a core component of ATP, the energy currency for every living cell, including those in your corals and their symbiotic zooxanthellae.
When you strip all available phosphate from the water, you're essentially putting your corals on a starvation diet. The first thing you'll notice is their color fading. Corals will look pale, washed-out, or "pastel." While this might look cool at first, it's actually a sign of nutrient deprivation. Without enough phosphate, their zooxanthellae can't function properly, and energy production plummets. This stress leaves your corals vulnerable to pests, disease, and tissue necrosis.
Stability Over Numbers: Your ultimate goal shouldn't be a specific number, but a stable, predictable environment. A tank that consistently holds at 0.08 ppm is far healthier than one that swings wildly between 0.01 ppm and 0.15 ppm. Corals are champs at adapting to consistent conditions, but rapid changes cause massive stress.
Microbial Warfare on a Microscopic Scale
The damage from high phosphate goes even deeper, all the way down to the microbial level. A coral isn't just an animal; it's a bustling ecosystem hosting a community of beneficial bacteria—its microbiome. These microbes are vital for nutrient cycling and protecting the coral from pathogens. But high phosphate can throw this delicate balance out of whack, creating an environment where harmful bacteria thrive.
Controlled experiments have shown that adding phosphate can dramatically alter a coral's microbiome, encouraging the growth of opportunistic pathogens like Aquarickettsia. In one study, corals exposed to elevated phosphate showed a significant drop in growth in just three weeks, proving that even a small increase can shut down calcification by causing these negative microbial shifts. You can read the full research on these microbial findings for a deeper dive. It’s a powerful reminder that proper water quality and filtration isn't just about clear water; it's about maintaining a healthy microbial foundation for your entire reef.
Recognizing the Signs of Phosphate Stress
Learning to "read" your corals is a skill that comes with time, but they’ll tell you when something is wrong long before your test kit does. Spotting these subtle visual cues can help you fix phosphate imbalances before they become a real crisis.
Dull, Brownish Tissue: This is a classic sign of high phosphate. The coral might be overproducing zooxanthellae to compensate for reduced light from algae, giving it a muddy, brown look.
Poor Polyp Extension: Stressed corals pull in their polyps. When they’re not out, they’re not eating, and that’s a problem.
Slow or No Growth: If your frags aren’t encrusting or your colonies aren't getting bigger, inhibited calcification from high phosphate is a prime suspect.
Washed-Out, Pale Colors: This is the tell-tale sign of phosphate starvation. Corals look faded and lack vibrancy because their zooxanthellae are nutrient-limited.
By watching your corals every day and maintaining consistent, appropriate reef aquarium phosphate levels, you can sidestep these invisible stressors and build an environment where your animals don't just survive—they truly flourish.
Tracing the Source: Where Does All the Phosphate Come From?

To get a handle on your reef aquarium phosphate levels, you have to put on your detective hat. Phosphate doesn't just materialize out of thin air; it’s constantly trickling into your system from a handful of sources. Pinpointing these supply lines is the absolute first step in winning the long-term war against high nutrients and the algae they love to feed.
Think of your tank as a bucket with a few drains—your protein skimmer, GFO reactor, and other removal methods. If that bucket keeps overflowing, you don't just keep bailing. You have to find the faucets pouring water in and turn them down. Let's go investigate the usual suspects.
The Most Common Phosphate Culprits
In almost every single aquarium, the number one source of phosphate is food. Every flake, pellet, and frozen cube you drop in contains organic compounds that your fish and inverts break down, releasing phosphate as waste. It's a necessary part of keeping everyone healthy, but it's also the biggest faucet wide open.
Overfeeding is the classic mistake that sends phosphate levels through the roof. It’s a double-whammy: not only do your fish produce more waste, but any food that hits the sandbed and rots is basically a phosphate bomb, leaching nutrients directly into the water.
Beyond food, your source water can be a hidden enemy. If you're using untreated tap water for mixing new saltwater or for your auto top-off, you might as well have a phosphate hose connected to your sump. Municipal water often contains phosphates to prevent pipe corrosion, and the levels can be surprisingly high.
This is exactly why a quality Reverse Osmosis Deionization (RODI) system that produces 0 TDS (Total Dissolved Solids) water is non-negotiable for anyone serious about reefing.
Sneaky Sources You Might Overlook
Even if you've dialed in your feeding and have pure water, phosphate can still sneak in. Some of the most frustrating algae battles are fueled by sources you’d never suspect. You have to audit everything that goes into your tank.
Here are a few of the less obvious places to check:
Frozen Foods: Many brands pack their frozen foods like mysis or brine shrimp in a phosphate-rich liquid to prevent freezer burn. A quick rinse in RODI water before feeding can slash the amount of phosphate you're adding.
Aquarium Additives: Some supplements, especially pH buffers or alkalinity products not made specifically for reef tanks, can be loaded with phosphates. Always stick with reef-safe products from reputable companies.
Carbon and Filter Media: Cheap, low-quality activated carbon is notorious for leaching phosphates back into the water. Make sure you're using a high-grade, phosphate-free carbon.
Expert Tip: Never assume a product is phosphate-free just because it’s for aquariums. If you're chasing a mystery phosphate problem, test everything. Mix a fresh batch of saltwater and test it. Test the water coming straight out of your RODI unit. Confirm your inputs are truly clean.
The Old Tank Phosphate Sink
Have an older, established tank? Are your phosphate levels stubbornly high no matter what you do? You might be dealing with the dreaded "old tank syndrome."
Over the years, your live rock and sand bed act like giant sponges, soaking up and storing huge amounts of phosphate. Once that rock gets saturated, it starts leaching the phosphate right back into the water. This creates a relentless internal source that can easily overwhelm your skimmer and reactors.
This leaching is often why a reefer's phosphate starts creeping up even when their routine hasn't changed a bit. Fixing it requires a multi-pronged attack, combining aggressive removal methods with a complete lockdown of all external sources. It’s a similar challenge hobbyists face when they need to figure out how to reduce nitrates in a saltwater aquarium, as both nutrients can get locked up in the system. The only way to win is to systematically identify and cut off every single source.
Your Phosphate Control Toolkit: Proven Management Strategies
Alright, you've figured out where the phosphates are coming from. Now it's time to build your toolkit to get them under control. Managing reef aquarium phosphate levels isn't about finding a single magic bullet. It's about creating a layered defense that blends natural, biological processes with targeted chemical tools when you really need them.
The most successful reef tanks don't just rely on one thing. They use a combination of methods that work together to build long-term stability. This way, you're tackling phosphate from all angles—stopping it at the source, encouraging your tank's ecosystem to consume it, and actively removing any excess that builds up.
Let's dive into the most effective tools you have at your disposal.
The Foundation: Natural and Biological Control
Before you even think about reaching for chemical media, focus on maximizing your tank's natural filtration. These methods are the bedrock of a stable, low-nutrient system, working silently in the background, 24/7, to keep your aquarium in balance.
Consistent Water Changes: This is your number one, most fundamental tool. Regular water changes physically dilute and export dissolved phosphates right out of the system. If you're fighting high levels, a series of smaller, more frequent changes—say, 10% twice a week—is usually far more effective and less shocking to your corals than one massive change.
Macroalgae Refugiums: A refugium is a total powerhouse for natural nutrient export. It's typically a separate chamber in your sump, lit on a reverse schedule to your main display. Fast-growing macroalgae like Chaetomorpha act like a nutrient sponge, soaking up phosphates and nitrates as they grow. When you trim and remove a chunk of the algae, you're permanently exporting those nutrients from your tank.
Probiotic Dosing and Carbon Sources: This is a more advanced technique that involves boosting specific strains of beneficial bacteria that consume phosphates. By carefully dosing a carbon food source, you encourage these bacteria to multiply like crazy. As they grow, they lock phosphate into their biomass, which your protein skimmer then pulls out of the water.
Targeted Chemical Intervention: When to Use Phosphate Removers
Sometimes, natural methods just can't keep up with your tank's bioload. That's when chemical media becomes a powerful ally, offering a direct way to knock phosphate levels down. The secret is using them correctly to avoid sudden, stressful changes in your water chemistry.
Granular Ferric Oxide (GFO) is the go-to choice for most reefers. This reddish-brown media is incredibly effective at binding with phosphate, literally pulling it out of the water column as it passes over.
For the best results, always use GFO in a media reactor. The gentle tumbling action makes sure water hits the entire surface of the media, preventing it from clumping up and becoming useless. Always start with half the manufacturer's recommended dose for your tank size to avoid stripping phosphates too quickly.
Liquid phosphate removers, which are often based on lanthanum chloride, are your emergency button for when levels get dangerously high. These products work almost instantly, binding with phosphate and causing it to precipitate out of the water so your filter sock or skimmer can capture it. Use with caution—they are extremely potent and must be dosed very slowly into a high-flow area to prevent clouding the tank and stressing out your inhabitants.
Comparison of Phosphate Removal Methods
Choosing the right approach—or combination of approaches—comes down to your tank's specific needs, your budget, and how much time you want to spend on maintenance. This table breaks down the pros and cons of the most common strategies to help you decide. For a more detailed walkthrough, check out our complete guide on how to lower phosphates in a reef tank.
Method | How It Works | Pros | Cons | Best For |
|---|---|---|---|---|
Water Changes | Dilutes and removes dissolved phosphates. | Simple, effective, and replenishes trace elements. | Can be labor-intensive; may not be enough for high bioloads. | All tanks, especially as a foundational maintenance routine. |
Refugium | Macroalgae consumes phosphate for growth. | Natural, continuous removal; adds biodiversity. | Requires extra space and equipment (light, pump). | Systems with a sump looking for a stable, long-term solution. |
GFO | Binds phosphate chemically onto its surface. | Highly effective and targeted removal. | Can strip phosphate too fast; media requires regular replacement. | Tanks with consistently high phosphate that need direct intervention. |
Liquid Removers | Precipitates phosphate out of the water. | Extremely fast-acting for emergencies. | Can cloud water and stress inhabitants if dosed improperly. | Emergency reduction of dangerously high phosphate spikes. |
Ultimately, the goal is stability. By layering these methods, you create a resilient system that can handle the occasional heavy feeding or missed water change without spiraling into an algae farm. Start with the natural methods, and only bring in the chemical tools when you need that extra bit of control.
Answering Your Top Phosphate Questions
Even when you have a good handle on phosphate, frustrating questions and weird scenarios always pop up. This last section is all about tackling the most common troubleshooting issues reefers run into. We'll get straight to the point on those tricky situations that can leave you scratching your head.
How Quickly Should I Lower My Phosphate Levels?
This is one of the most important questions, and the answer is always the same: slowly. In the world of reef tanks, stability is king. Rapid chemical swings are the fastest way to stress out your corals. When you see a high reef aquarium phosphate level, it's tempting to hit the tank hard with removers to get the number down fast, but that's a recipe for disaster.
Corals are incredibly adaptive. They get used to the water they live in, even if it's not perfect. A sudden, massive drop in phosphate is a huge shock to their system, often leading to tissue peeling off, a condition we call rapid tissue necrosis (RTN) or slow tissue necrosis (STN). Your mission is to bring the level down gradually and under control.
A safe rate of reduction is no more than 0.02 to 0.04 ppm per day. This gentle pace gives your corals and the entire microbial ecosystem time to adjust without freaking out.
Here’s a real-world example: Let's say your phosphate tests at a whopping 0.25 ppm, and you're aiming for 0.05 ppm. Don't try to fix it in a day. Instead, shoot for around 0.21 ppm on day one, then 0.17 ppm the next day, and so on. It might take a week or more, but this methodical approach protects the health of your reef.
The first time you use a powerful phosphate remover like Granular Ferric Oxide (GFO) or a liquid product, always start with half the recommended dose. Watch your corals like a hawk for any signs of distress—like pulled-in polyps or fading color—before you even think about slowly upping the dose over a few days. In this hobby, patience always pays off.
Can My Phosphate Be Too Low, and What Do I Do?
You bet it can. The chase for "zero" nutrients, a trend often called Ultra-Low Nutrient Systems (ULNS), can be just as damaging as letting phosphate run wild. Phosphate is a fundamental nutrient. It’s essential for basic cellular energy in both corals and their symbiotic zooxanthellae. When your test kit consistently reads 0.00 ppm, you're essentially starving your corals.
At first, the signs of phosphate starvation can look like success. Corals might get lighter, taking on that "pastel" look. But this is often the beginning of a problem.
Symptoms of Critically Low Phosphate:
Washed-Out Colors: Corals, especially SPS like Acropora, lose their deep, rich colors and start to look pale.
Poor Polyp Extension: Hungry, stressed corals will keep their polyps tucked in, making them unable to grab food from the water.
Increased Vulnerability: A nutrient-starved coral is a weak coral. It's far more susceptible to pests, diseases, and opportunistic algae like dinoflagellates.
If you find your tank in this spot, the fix is to gently add a phosphate source back into the system. You can do this by slightly increasing how much you feed your fish, using high-quality, nutritious foods. Another easy fix is to use less GFO in your reactor or run it for shorter periods. For reefers who want pinpoint control, you can even buy dedicated phosphate supplements and add them in carefully measured doses to keep a slight, but detectable, level in the water.
Why Are My Phosphates Still High After Trying Everything?
This is easily the most common and infuriating problem in the hobby. You feel like you're doing everything right—you've got GFO running, you're doing water changes with 0 TDS RODI water, and you aren't overfeeding. But that phosphate number just won't budge. This nightmare scenario is often caused by something called "phosphate sinking."
Over months or years, your live rock and sand bed have been acting like giant sponges, slowly soaking up and storing excess phosphate. Once that rock and sand are completely saturated, they can't absorb any more. Even worse, they start to leach the stored phosphate back into the water, creating a constant internal source that your removal methods can't keep up with.
This leaching effect creates a frustrating cycle. No matter how much phosphate you pull out with GFO, the rocks and sand just release more to take its place.
Troubleshooting a Phosphate Sink:
Re-Audit All Inputs: Go back to basics and double-check every single thing going into your tank. Is your RODI system truly making 0 TDS water? Are your salt mix, foods, and additives all confirmed to be phosphate-free?
Rinse Frozen Foods: If you aren't already, start rinsing your frozen foods in RODI water before feeding. That packing juice they come in is often loaded with phosphates.
Stay Aggressive with Removal: Keep that GFO running, but change it out more often—maybe every two weeks instead of every four. This ensures it’s always fresh and ready to bind phosphate.
Consider Carbon Dosing: Kicking off a probiotic or carbon dosing routine can build up a population of phosphate-eating bacteria, which are then conveniently removed by your protein skimmer.
Beating a phosphate sink is a game of persistence. It's a long-term battle where you have to consistently pull out phosphate faster than your rocks can release it. Stick with it, and eventually, you'll deplete that reserve. Your levels will finally start to drop and stabilize where you want them.
A vibrant reef is built on a balanced food web, starting with microscopic life. PodDrop Live Aquarium Nutrition provides the live copepods and phytoplankton that form the foundation of that food web, helping to naturally process nutrients while feeding your corals and fish. Fuel your reef's biodiversity by exploring our live nutrition solutions at https://www.getpoddrop.com.