


How to lower phosphates in reef tank: A practical guide to reef health
- fabianbehague
- 5 days ago
- 17 min read
High phosphates are way more than just a number on a test kit; they're a direct threat to the delicate balance you've worked so hard to create in your reef tank. Think of them as the primary fuel for stubborn nuisance algae. Worse, they can actively sabotage your corals' health by making it harder for them to build strong skeletons. Proactive control isn't just a good idea—it's essential for long-term stability.
Why Phosphates Are a Problem for Your Reef Tank
So many reefers get laser-focused on nitrates, but in my experience, phosphates often play a much more destructive role in a closed system. While they are essential for life in trace amounts, even slightly elevated levels can quickly tip the scales from a thriving ecosystem to a constant, frustrating battle. The sweet spot for most reef tanks is a razor-thin margin between 0.03 ppm and 0.07 ppm, which really drives home how important consistent management is.
When phosphate levels start to climb, the first thing you'll almost always see is an explosion of nuisance algae. This isn't a coincidence. Phosphates are a direct food source for pests like green hair algae and the dreaded red slime, cyanobacteria. These unwelcome guests can quickly smother your live rock, sand bed, and even your corals, creating an ugly mess while competing with your prized inhabitants for light and real estate.
The Impact on Coral Health
Beyond just feeding algae, high phosphate levels are directly toxic to your corals by inhibiting calcification. Corals build their intricate skeletons by pulling carbonate from the water column. Excess phosphate gums up the works, getting in the way of this critical process and making it incredibly difficult for them to grow and maintain their structure.
It’s like trying to build a brick wall with weak, sandy mortar. The coral is burning energy trying to grow, but its skeleton ends up fragile and brittle. This leads to several problems you can actually see:
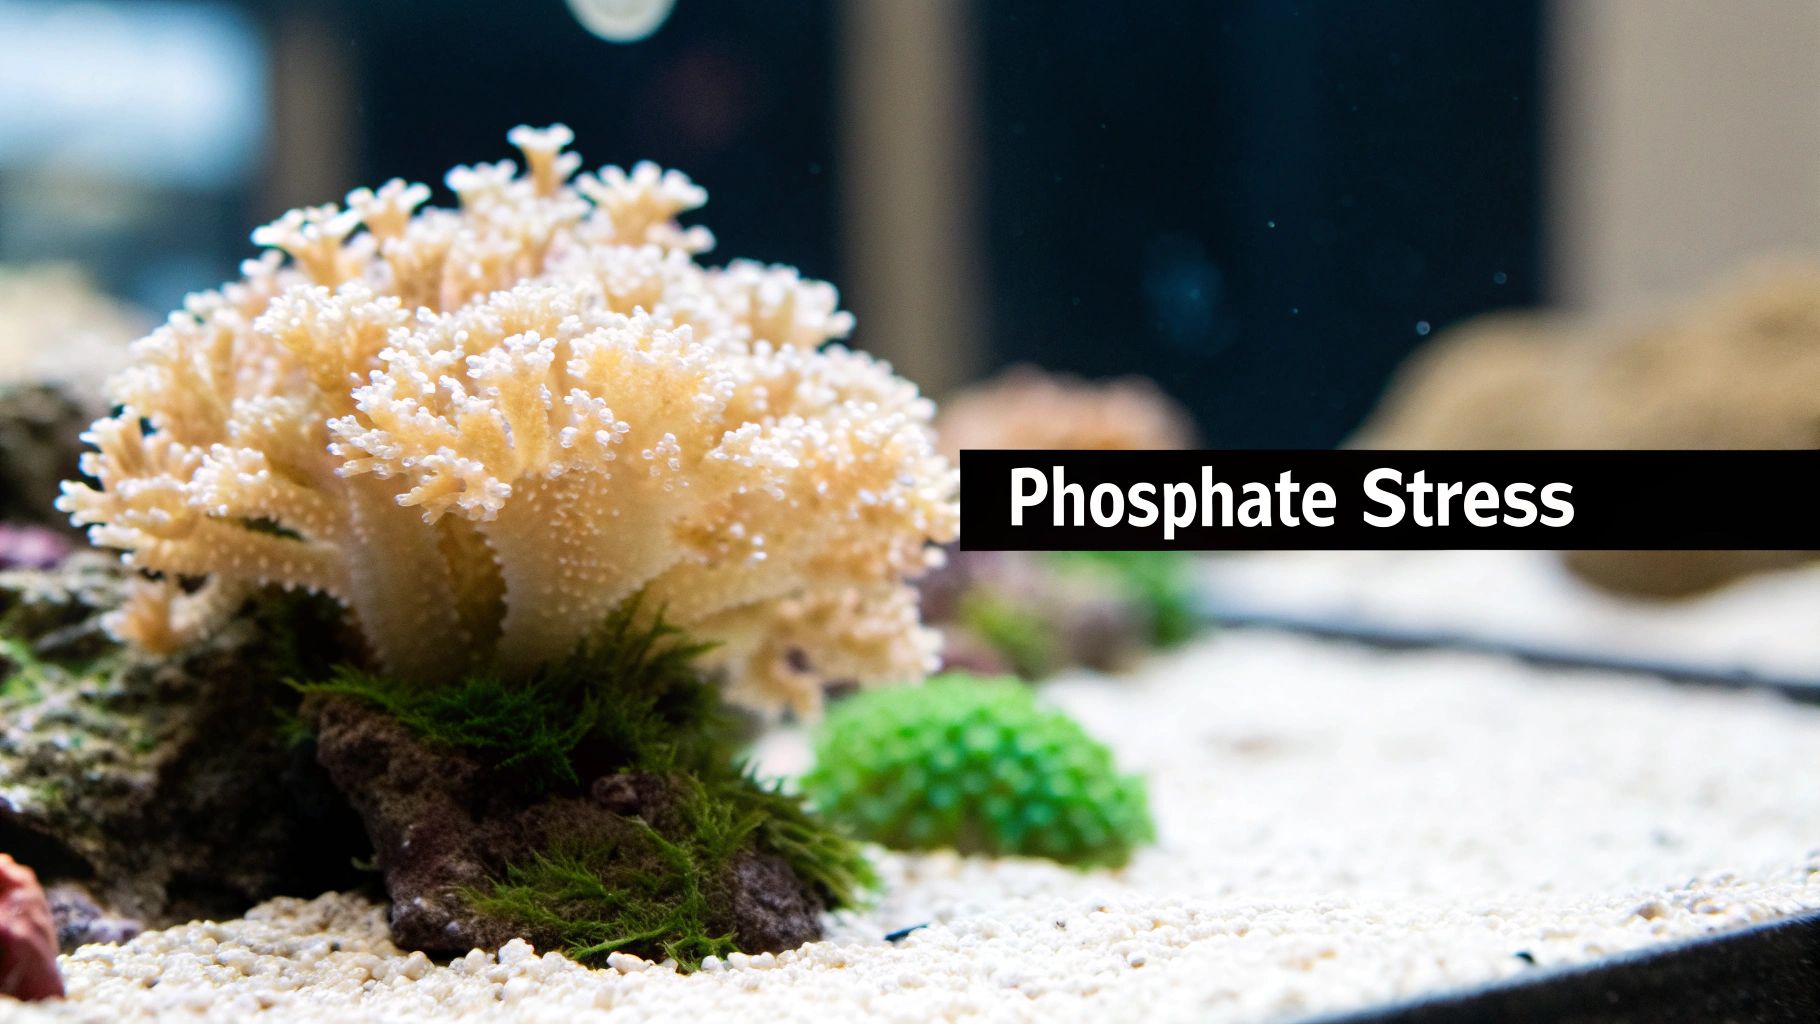
Slower Growth: Corals, especially fast-growing SPS varieties like Acropora, will hit the brakes. You'll notice their growth slows to a crawl or stops completely.
Dull Coloration: Those vibrant colors we all chase are a direct sign of good health. Phosphate stress can cause corals to "brown out" as their symbiotic zooxanthellae overpopulate in response to the excess nutrients.
Tissue Recession: In more severe cases, you might see coral tissue begin to pull back from the base, exposing the stark white skeleton underneath. This is a serious red flag.
A common mistake I see is reefers chasing a phosphate reading of absolute zero. Remember, corals are living animals and need a tiny amount of phosphate for their own metabolic processes. The goal isn't total elimination; it's stable, ultra-low nutrient control that starves out the bad stuff while still providing for your corals.
Recognizing the Subtle Signs of Trouble
The obvious signs, like a carpet of green hair algae taking over a favorite rock, are pretty hard to miss. But the earlier indicators of a phosphate problem are much more subtle. An experienced reefer learns to watch for a general decline in the tank's overall vitality.
For instance, you might notice your glass needs cleaning a little more frequently because of a stubborn green film. Or maybe your normally brilliant corals just look a little less vibrant than they did a month ago. These small, almost imperceptible changes are often the first whispers of a growing nutrient issue. Understanding these impacts is the first step in learning how to lower phosphates in your reef tank effectively, so you can treat the root cause and not just the symptoms.
Identifying and Eliminating Phosphate Sources
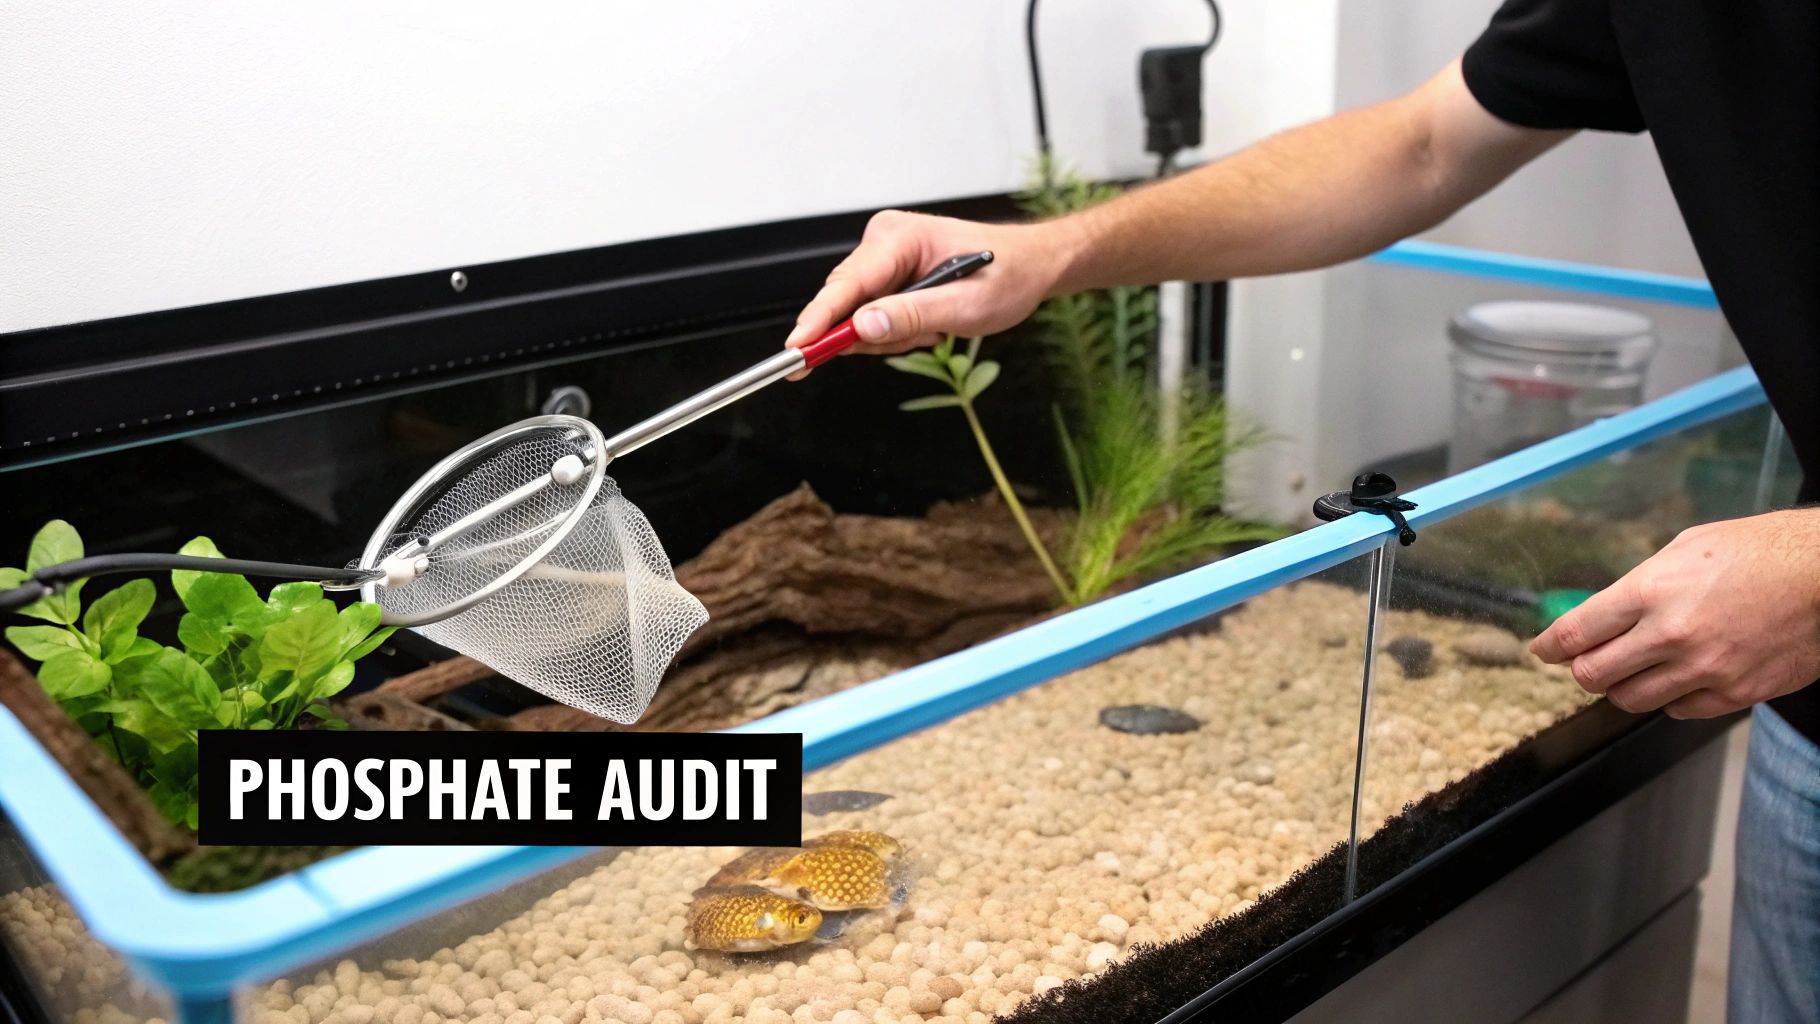
Before you even think about buying a phosphate reactor or dosing a chemical remover, let's talk about the most effective strategy: turning off the tap. Constantly adding media to your tank without finding the root cause is like trying to bail out a leaky boat with a teacup. You'll be working hard, but you're not actually fixing anything.
The only way to win the phosphate battle for good is to become a detective. You need to conduct a full-blown "phosphate audit" on your system, systematically tracking down every single thing that goes into your tank. More often than not, the culprit is hiding in plain sight, slowly leaching nutrients that fuel nuisance algae and stress out your corals.
The Number One Culprit: Food and Waste
Let's be blunt: overfeeding is, hands down, the biggest reason reefers struggle with high phosphates. Every single flake, pellet, and cube of frozen food you drop in is loaded with them. Whatever your fish don't eat breaks down and releases those phosphates right into the water column. Then, the food they do eat is processed and released back into the tank as phosphate-rich waste.
It's a common trap to think a weekly water change will solve this. But veteran hobbyists will tell you that even a 20% weekly change often isn't enough to keep phosphates below that magic 0.05 ppm number in a stocked tank. Why? Because you're adding more phosphates through feeding every single day. If you want a deeper dive into nutrient control, check out the resources over at Bulk Reef Supply—it's a real eye-opener.
To get your feeding under control, try these simple habits:
Follow the Five-Minute Rule: Only add what your fish can devour in about five minutes. If you see food hitting the sandbed, you're putting way too much in.
Target-Feed Your Corals: Instead of just dumping food in and hoping for the best, use a turkey baster or pipette to deliver it directly to your corals. This keeps waste from floating around the tank.
Rinse Your Frozen Food: That cloudy liquid your frozen Mysis or brine shrimp is packed in? It's a phosphate bomb. Thaw the food in a bit of tank water, then pour it through a fine net to rinse that junk away before feeding.
Here’s a pro tip: wait about 30 minutes after you feed the tank, then take a close look. If you still see bits of food floating around or settling in low-flow spots, that's your clear signal to cut back on the portion size.
Unseen Sources Leaching into Your System
If you've tightened up your feeding schedule and are still seeing high numbers, it’s time to look for the sneakier sources. Food is the most common entry point, but it's far from the only one. These other culprits can quietly add up, keeping your nutrient levels stubbornly high.
One of the most overlooked sources is your source water itself. Are you using tap water for top-offs or water changes? Big mistake. Tap water can be loaded with phosphates and other nasty stuff you don't want in a reef tank. Always, always use RODI (Reverse Osmosis De-Ionized) water. And don't forget to maintain your unit—once those DI resins are exhausted, they stop working, and phosphates will start slipping right through.
A quick-reference guide to pinpointing the most common phosphate culprits and the immediate actions you can take to address them.
Source | How It Adds Phosphate | Immediate Solution |
|---|---|---|
Fish & Coral Food | Uneaten food decomposes; fish waste releases bound phosphates. | Feed less, rinse frozen foods, and target-feed corals directly. |
Tap Water | Municipal water often contains phosphates to prevent pipe corrosion. | Switch to RODI water for all top-offs and water changes. |
Old/Poor Quality Rock | Some dry rock or sand can leach phosphates for months or years. | Test new rock/sand before use; use phosphate removers like GFO. |
Detritus Buildup | Trapped organic waste in sand and rockwork breaks down over time. | Siphon the sandbed during water changes and improve water flow. |
Certain Additives | Some pH buffers or supplements may contain phosphate impurities. | Research product ingredients; choose high-purity brands. |
By systematically checking off each item on this list, you can methodically find and eliminate the sources that are working against you.
Some other hidden phosphate sources to investigate include:
Leaching Rock and Sand: Not all rock is created equal. Certain types of dry rock, especially those not specifically sold for reef aquariums, can leach phosphates for months on end.
Decaying Organics: All that gunk trapped in your sandbed and rockwork? That's detritus, and it's basically a phosphate time bomb just waiting to go off as it decomposes.
Certain Additives: Always read the label. Some cheaper pH buffers or trace element supplements can contain phosphates as an unfortunate byproduct of their manufacturing process.
Emergency Methods for High Phosphate Levels
There’s a special kind of dread that hits when your phosphate test kit shows a number way higher than you expected. You know the feeling—especially when you’re already seeing the first signs of trouble, like that ugly slime algae creeping over your favorite rocks.
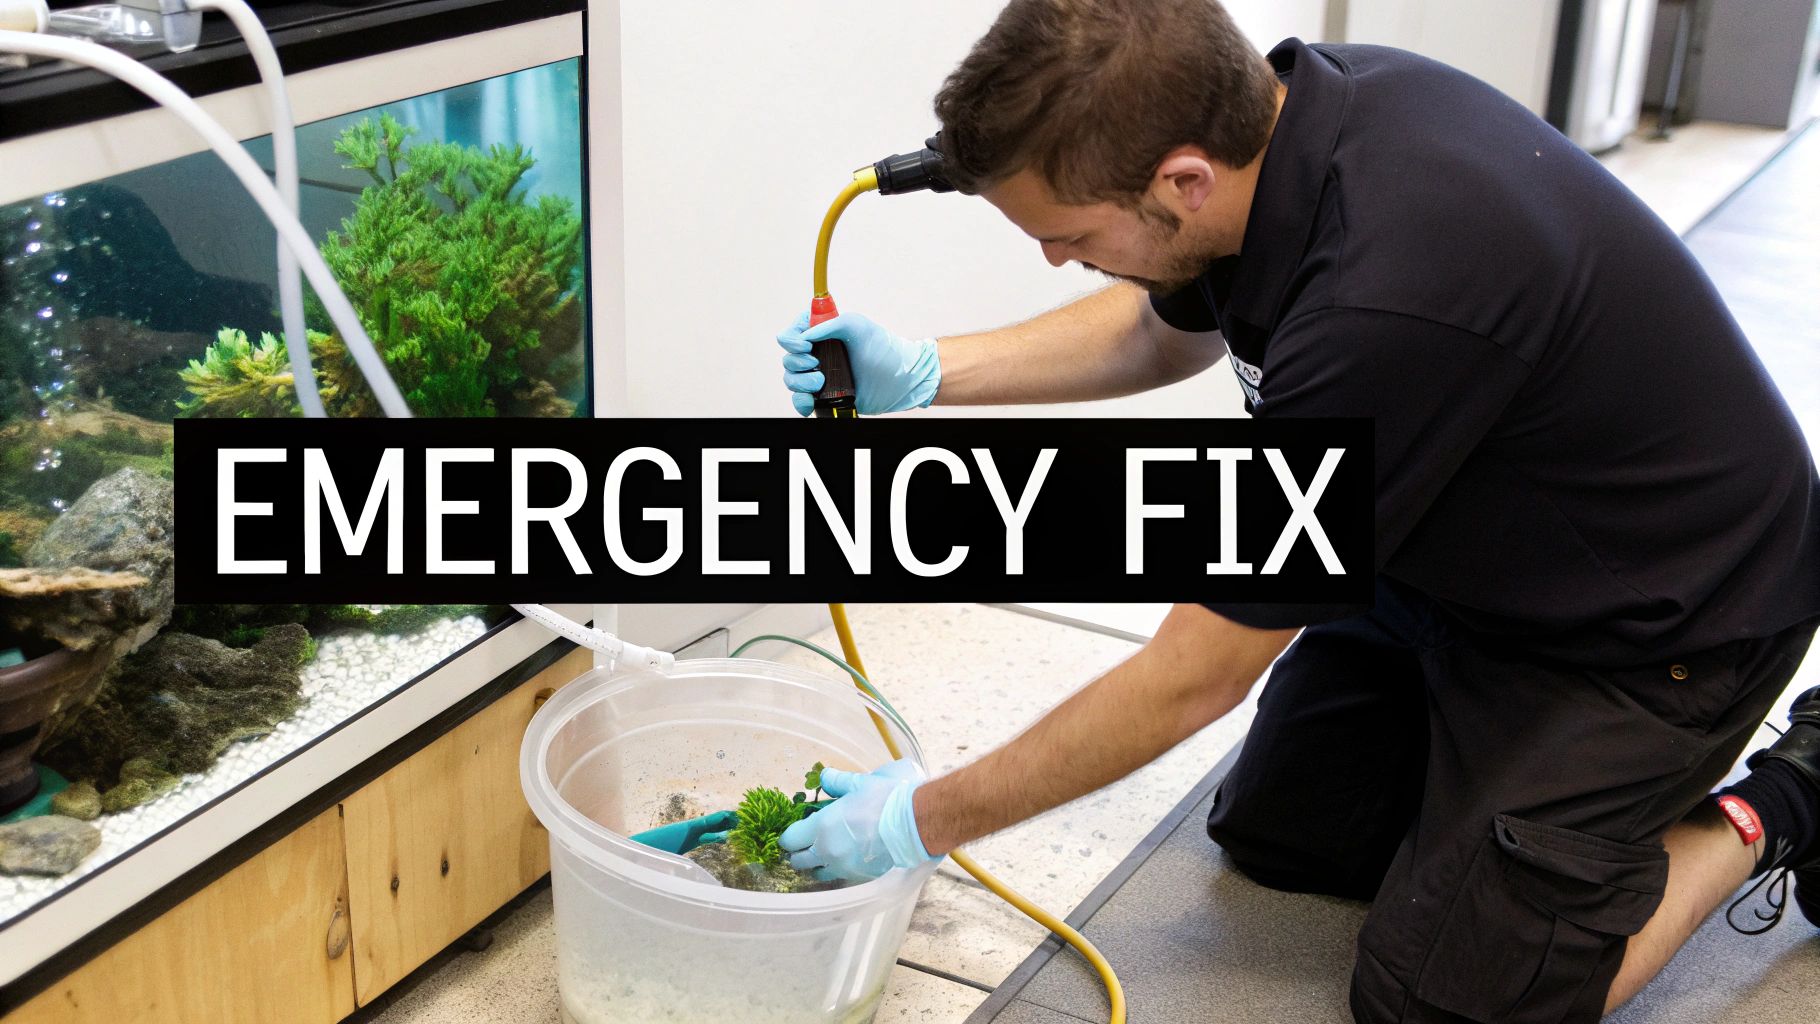
When your phosphate levels spike, you need an emergency plan that acts fast but doesn't shock your system into a new crisis. The goal is a swift, controlled reduction, not a catastrophic plummet.
Your first and most reliable tool is a good old-fashioned water change. This is the most direct way to physically remove phosphate-rich water and dilute what's left. A single, large change can bring that number down significantly, but you have to be meticulous to avoid stressing your fish and corals.
For a serious spike, a 30-50% water change is a solid place to start. The absolute key here is to match your new saltwater's parameters to your tank's water as closely as possible.
Temperature: Get it exact. A few degrees difference can shock your inhabitants.
Salinity: Use a calibrated refractometer and aim for a perfect match, usually around 1.026 specific gravity.
Alkalinity: This is a big one. A major swing in alkalinity can be lethal to SPS corals. Test both your tank and the new water to make sure they're right on the money.
Using Liquid Phosphate Removers
Sometimes, a water change alone isn't enough, or you need to act even faster. This is where liquid phosphate removers come in handy. Most of these products contain lanthanum chloride, a compound that binds directly with phosphate in the water, causing it to precipitate out as a harmless, solid particle.
But you can't just dump this stuff into your display tank. Doing so will create a cloudy mess that can severely irritate fish gills and stress out your corals.
The right way to dose is to drip the remover very slowly into a high-flow area of your sump, directly before a fine filter sock—100 microns or less is ideal. The flow ensures it mixes well, and the sock catches the solid precipitate before it ever has a chance to hit your display.
Always start with less than the manufacturer recommends to gauge your tank's reaction. You want to bring the phosphates down gradually over hours or even a couple of days, not crash them to zero instantly. Corals that have adapted to high-nutrient water can get seriously shocked by such a rapid drop.
The Power of Physical Removal
While you're treating the water, don't forget about all the phosphate that's already locked up inside algae and detritus in your tank. These are basically phosphate reservoirs just waiting to fuel the next bloom.
Get in there and physically remove as much of the gunk as possible. Use an old toothbrush to scrub algae off the rocks, then immediately siphon out the floating debris. This is also the perfect time to give your sandbed a deep clean with a gravel vacuum, pulling out all the detritus that has settled there.
Every bit of algae and sludge you pull out is phosphate that can no longer cause problems. High phosphate is also a primary driver of those dreaded cyanobacteria outbreaks. If you're seeing slimy red mats appear, our detailed guide on how to get rid of cyanobacteria in a reef tank can be a real lifesaver.
By combining these three tactics—a large, carefully matched water change, the precise use of liquid removers, and aggressive manual cleanup—you can wrestle dangerously high phosphate levels back under control and start building a path toward long-term stability.
Choosing Your Phosphate Removal Media
To get that long-term, consistent success in keeping your reef tank looking its best, chemical filter media is often the unsung hero. While good husbandry like water changes and controlling what goes into your tank are the first lines of defense, dedicated phosphate removal media is your 24/7 purification system.
This is the key to maintaining that ultra-low, stable environment where corals truly thrive. Media is constantly pulling phosphates right out of the water column, preventing them from ever becoming fuel for algae or a roadblock for coral growth.
But making the right choice means knowing the tools of the trade. The market is full of options, but they mostly boil down to a few key players: Granular Ferric Oxide (GFO), aluminum-based media, and a growing number of proprietary blends.
Granular Ferric Oxide (GFO): The Workhorse
There's a reason Granular Ferric Oxide, or GFO, is probably the most trusted phosphate sponge in the reefing community. This iron-based media has a massive capacity to bind with phosphate, effectively grabbing it out of the water and locking it away for good.
GFO works through a process called chemical adsorption. As water flows over the tiny granules, phosphate ions are drawn to the iron oxide surface and stick to it. This process is incredibly effective and keeps on working until the media's surface area is completely maxed out.
Pros: Huge binding capacity, relatively cheap, and a long, proven track record of being safe and effective in reef tanks.
Cons: Can be dusty and needs a good rinse before use. If you tumble it too aggressively in a reactor, it can grind itself down and release fine particles into your system.
The performance of GFO is hard to beat. For instance, independent tests on high-quality media like RowaPhos have shown it can remove up to 5 mg of phosphorus per gram of dry media in saltwater. That's a huge number, and it blows many competitors out of the water—some only manage about 30-40% of that capacity.
A critical benefit is that it has a minimal impact on your water chemistry. It causes almost no shift in pH or dissolved organic carbon (DOC), which is a huge deal for keeping sensitive corals happy. If you're a data geek, you can explore the detailed test results to see just how different media types stack up.
Aluminum-Based Media: The Fast Actor
Aluminum oxide media is another popular go-to for phosphate removal. Its main claim to fame is speed—it tends to pull phosphates out of the water column very quickly. This can be a real lifesaver if you're dealing with a sudden, unexpected spike.
That speed does come with a couple of trade-offs, though. Aluminum-based products typically have a lower total binding capacity than GFO, which means they get used up faster and you'll be swapping them out more often. There have also been some long-running debates in the hobby about the potential for aluminum to leach into the tank, but modern, quality products are widely considered safe when you follow the instructions.
Reefer's Tip: When you're starting with any new chemical media, especially something powerful like GFO or aluminum oxide, start with half the manufacturer's recommended dose. This prevents you from stripping phosphates out of the water too quickly, which can seriously shock corals that have gotten used to higher nutrient levels.
Application Methods: Bags vs. Reactors
How you use the media is just as important as which one you pick. The two main ways to run it are either passively in a media bag or actively in a dedicated media reactor.
Media Bag: This is the easiest method by far. Just fill a fine mesh bag with your media, give it a rinse, and stick it in a high-flow area of your sump. It's simple and doesn't require any extra gear. The downside? Water often finds the path of least resistance and channels around the bag instead of through it, meaning a lot of your media never even sees the water.
Media Reactor: A reactor is a more advanced and much more efficient way to go. It’s a dedicated chamber that actively pushes water up through the media, causing it to gently tumble or "fluidize." This simple action ensures every single granule is constantly exposed to tank water, maximizing its phosphate-binding power and using the media to its full potential before it needs changing.
While a bag is certainly better than nothing, a reactor is the way to go for anyone serious about how to lower phosphates in a reef tank for the long haul. It guarantees you get every penny's worth out of your media and delivers far more consistent, reliable results. When you set up a GFO reactor, you're looking for a slow flow that makes the media gently "simmer" at the surface—not a violent tumble that will grind it into dust.
Comparing Popular Phosphate Removal Media
To help you decide what's right for your tank, here's a quick head-to-head comparison of the common phosphate removal options. Every tank is different, so the "best" choice really depends on your specific needs, budget, and how much time you want to spend on maintenance.
Media Type | Primary Benefit | Potential Drawback | Best Use Case |
|---|---|---|---|
Granular Ferric Oxide (GFO) | High capacity; long-lasting and cost-effective over time. | Can be dusty; requires a reactor for best results; can clump if not tumbled. | For consistent, long-term phosphate control in a well-established reef tank. |
Aluminum-Based Media | Very fast-acting; excellent for knocking down sudden spikes. | Lower overall capacity; exhausts more quickly than GFO; debated leaching potential. | Responding to acute phosphate spikes or for tanks with lower, intermittent phosphate issues. |
Hybrid/Proprietary Blends | Often combine GFO with other media like activated carbon for all-in-one use. | Can be more expensive; may not excel at any single task compared to dedicated media. | Simple, all-in-one filtration for smaller tanks or those looking for convenience. |
Ultimately, whether you choose the slow-and-steady workhorse of GFO or the fast-acting power of an aluminum-based product, using a reactor will give you the most bang for your buck. By understanding how each type works, you can make an informed choice that keeps your water pristine and your corals thriving.
Building a Natural Phosphate Export System
While chemical media and big water changes are great for emergencies, they're reactive fixes. The real endgame in reefkeeping is building a balanced ecosystem that cleans up after itself. Instead of constantly battling nutrient spikes, you want to create natural, long-term systems that continuously export phosphates.
This shift in mindset—from intervention to prevention—is a total game-changer. By bringing in biological filtration methods, you're essentially hiring a microscopic cleanup crew that works 24/7. This creates a powerful buffer against the daily influx of nutrients from feeding and waste, making your maintenance routine a whole lot easier and your tank's health far more predictable.
Harnessing the Power of a Refugium
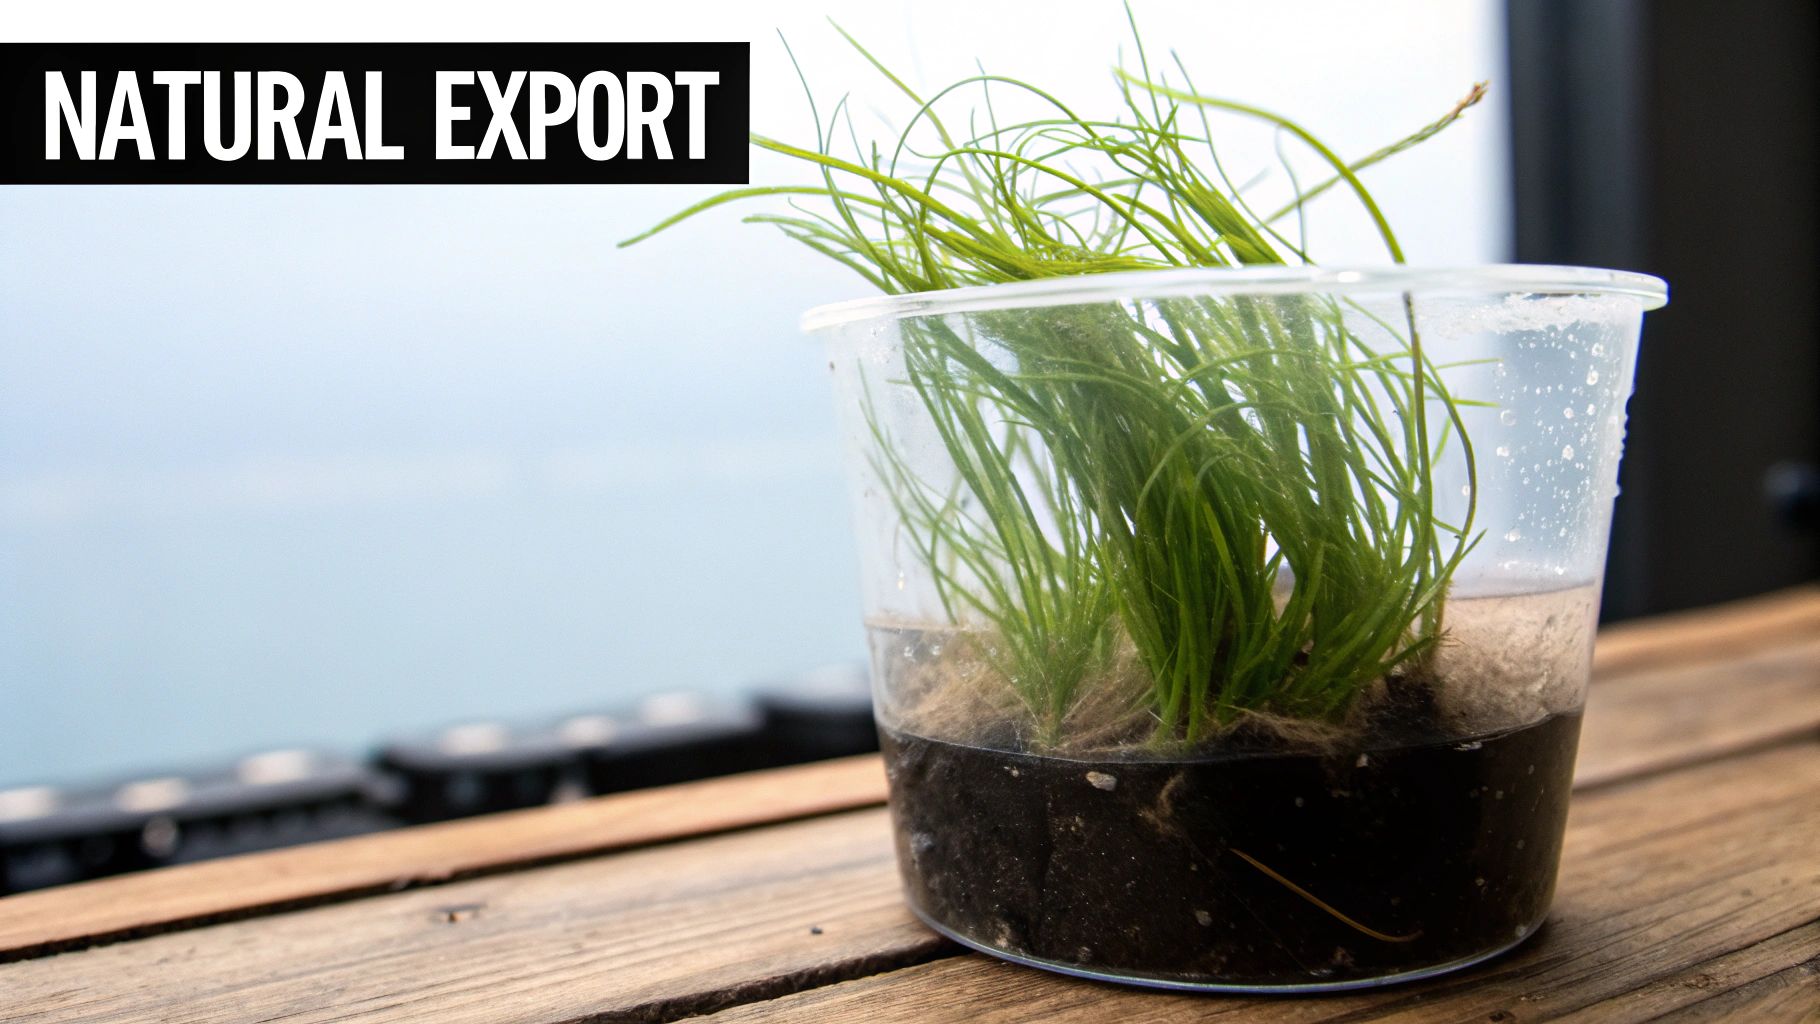
One of the most effective and time-tested methods for natural nutrient control is setting up a refugium. A refugium is just a dedicated, protected space—usually a chamber in your sump—where you can grow macroalgae without your fish turning it into a salad bar. The concept is simple but brilliant: as the algae grows, it sucks up nitrates and phosphates from the water to fuel its growth.
The undisputed king of refugium macroalgae is Chaetomorpha, which most reefers just call "Chaeto." It looks like a tangled-up ball of green fishing line and it's an absolute beast at absorbing nutrients.
To get the most out of it, you'll need to provide a few key things:
Dedicated Lighting: A simple, cheap LED grow light works perfectly. A great pro-tip is to run it on a reverse light cycle—meaning it's on when your display tank lights are off. This helps stabilize pH by consuming CO2 at night, counteracting the natural pH dip that happens in every tank after dark.
Moderate Flow: You want just enough water movement to gently tumble the Chaeto ball so all sides get light, but not so much that it gets shredded and shot up into your display tank.
Regular Harvesting: This is where the magic happens. The whole point is to remove the algae after it has soaked up all those nutrients. Once the Chaeto ball has grown significantly (it can double in size every week or two), just reach in and pull out about half of it. You've now physically exported the phosphates and nitrates it absorbed.
Setting up a refugium might seem like a project, but it’s a cornerstone of modern reefing. If you're ready to take the plunge, our refugium in sump guide walks you through every step.
A thriving refugium does way more than just lower phosphates. It becomes a five-star hotel for beneficial microfauna like copepods and amphipods. These tiny critters breed like crazy in the safety of the algae, and their babies get swept into the display tank, providing a constant source of natural, nutritious food for your fish and corals.
The Unsung Hero: Your Protein Skimmer
Never, ever underestimate what a good, properly-tuned protein skimmer does for phosphate management. Your skimmer is your first line of defense. It works by ripping dissolved organic compounds (DOCs) out of the water before they have a chance to break down and release phosphates and nitrates.
Think of it this way: every bit of fish poop, uneaten food, and other gunk that your skimmer pulls out as that dark, nasty "skimmate" is waste that your system no longer has to deal with. Running a skimmer that's sized right for your tank and keeping it clean is non-negotiable for any reefer serious about nutrient control.
Advanced Biological Methods
For tanks packed with fish or for hobbyists chasing those ultra-low nutrient levels, a few advanced methods can take your natural export game to the next level. These systems require a bit more research and careful setup, but the performance is incredible.
A popular strategy is the algae turf scrubber (ATS). An ATS works by pumping tank water over a screen that is blasted with intense light, which encourages a thick mat of turf algae to grow. This dense algae is an unbelievably efficient nutrient sponge. Just like with a refugium, the export happens when you periodically scrape the algae off the screen and throw it away.
These natural systems work together to create a resilient reef environment. By turning waste into growth and then physically removing that growth, you establish a sustainable export pathway that keeps your water pristine and lets your corals truly shine.
Common Questions About Reef Tank Phosphate Control
Let's be honest, navigating reef tank nutrients can sometimes feel like you need a chemistry degree. It's totally normal to have questions, especially when you're trying to figure out how to lower phosphates. I see the same handful of concerns pop up again and again on forums and in conversations at my local fish store.
Getting clear, straightforward answers is the key to building confidence and finally getting a stable, healthy system. I've rounded up some of the most common questions reefers ask and broken them down with some practical, real-world advice.
What Is the Ideal Phosphate Level for a Reef Tank?
For most mixed or SPS-dominant tanks, the sweet spot is somewhere between 0.03 ppm and 0.07 ppm.
It’s really tempting to chase that perfect zero on your test kit, but corals actually need tiny amounts of phosphate to live. It fuels their metabolic processes and keeps them healthy. Trying to hit and maintain absolute zero can backfire, essentially starving your corals of a necessary nutrient.
The real goal isn't total elimination; it's stability within that target range. Once your levels consistently creep above 0.1 ppm, you're entering the danger zone. That’s when you’ll start seeing stunted coral growth and providing an all-you-can-eat buffet for nuisance algae.
Can Lowering Phosphates Too Quickly Harm My Corals?
Absolutely, and this is a big one. A sudden, massive drop in phosphate is a huge shock to corals that have slowly gotten used to a higher-nutrient environment. This rapid change can trigger some serious stress responses—think tissue recession, losing all their color, or just refusing to show their polyps.
Always, always aim for a gradual reduction. We're talking over several days or even weeks, especially if you're using powerful tools like a GFO reactor or a liquid lanthanum chloride solution. Slow and steady wins the race here. Keep a close eye on your corals, and if you see any signs of stress, back off your removal methods immediately.
My Phosphate Test Is Zero but I Still Have Algae. Why?
Ah, the classic reefer's dilemma. This one is incredibly frustrating but has a simple explanation. It almost always means the algae is consuming phosphate the moment it enters your system.
Your test kit can only measure the "free" phosphate floating in the water column. If the algae has already gobbled it all up, your test will read zero, even though there's plenty of fuel for the algae.
The solution? Stop focusing on the water test and start hunting down the source. Do a serious audit of your feeding habits, check your source water for phosphates, and look for detritus buildup. At the same time, you can add an export method like GFO to out-compete the algae for any available nutrients, effectively starving it out. This concept is a huge part of overall nutrient management, which you can read more about in our guide on how to reduce nitrates in your saltwater aquarium.
How Often Should I Replace My Phosphate Removal Media?
There’s no magic number here; it completely depends on your tank’s specific nutrient load. A heavily stocked tank where you feed messy foods will burn through media way faster than a sparsely populated system.
The most reliable way to know for sure is to test the water coming directly out of your reactor or media bag. If the phosphate reading of that water (the effluent) is the same as your main tank water, the media is spent. It's not pulling anything out anymore.
As a general starting point, a lot of hobbyists get into a routine of checking and replacing their media every 4 to 6 weeks. But honestly, the only way to be certain you aren't wasting money on fresh media or letting your levels creep up is to test regularly.
At PodDrop Live Aquarium Nutrition, we believe a truly healthy reef starts from the ground up. By seeding your tank with a thriving population of live copepods, you’re adding a natural cleanup crew that devours detritus and out-competes nuisance algae for resources. This creates a more balanced, stable, and resilient ecosystem. Fuel your reef's biodiversity by visiting us at https://www.getpoddrop.com.
Comments