
Setting Up a Saltwater Sump Made Simple
Setting up a saltwater sump is hands down the single best upgrade you can make for a stunning, low-maintenance reef tank. It’s what transforms a simple glass box into a high-performance ecosystem. A sump is the hidden engine that drives your reef's health by centralizing equipment, boosting your total water volume, and supercharging your filtration.
This is your blueprint for getting it right from day one.
Your Sump Is Your Reef Tank's Engine Room
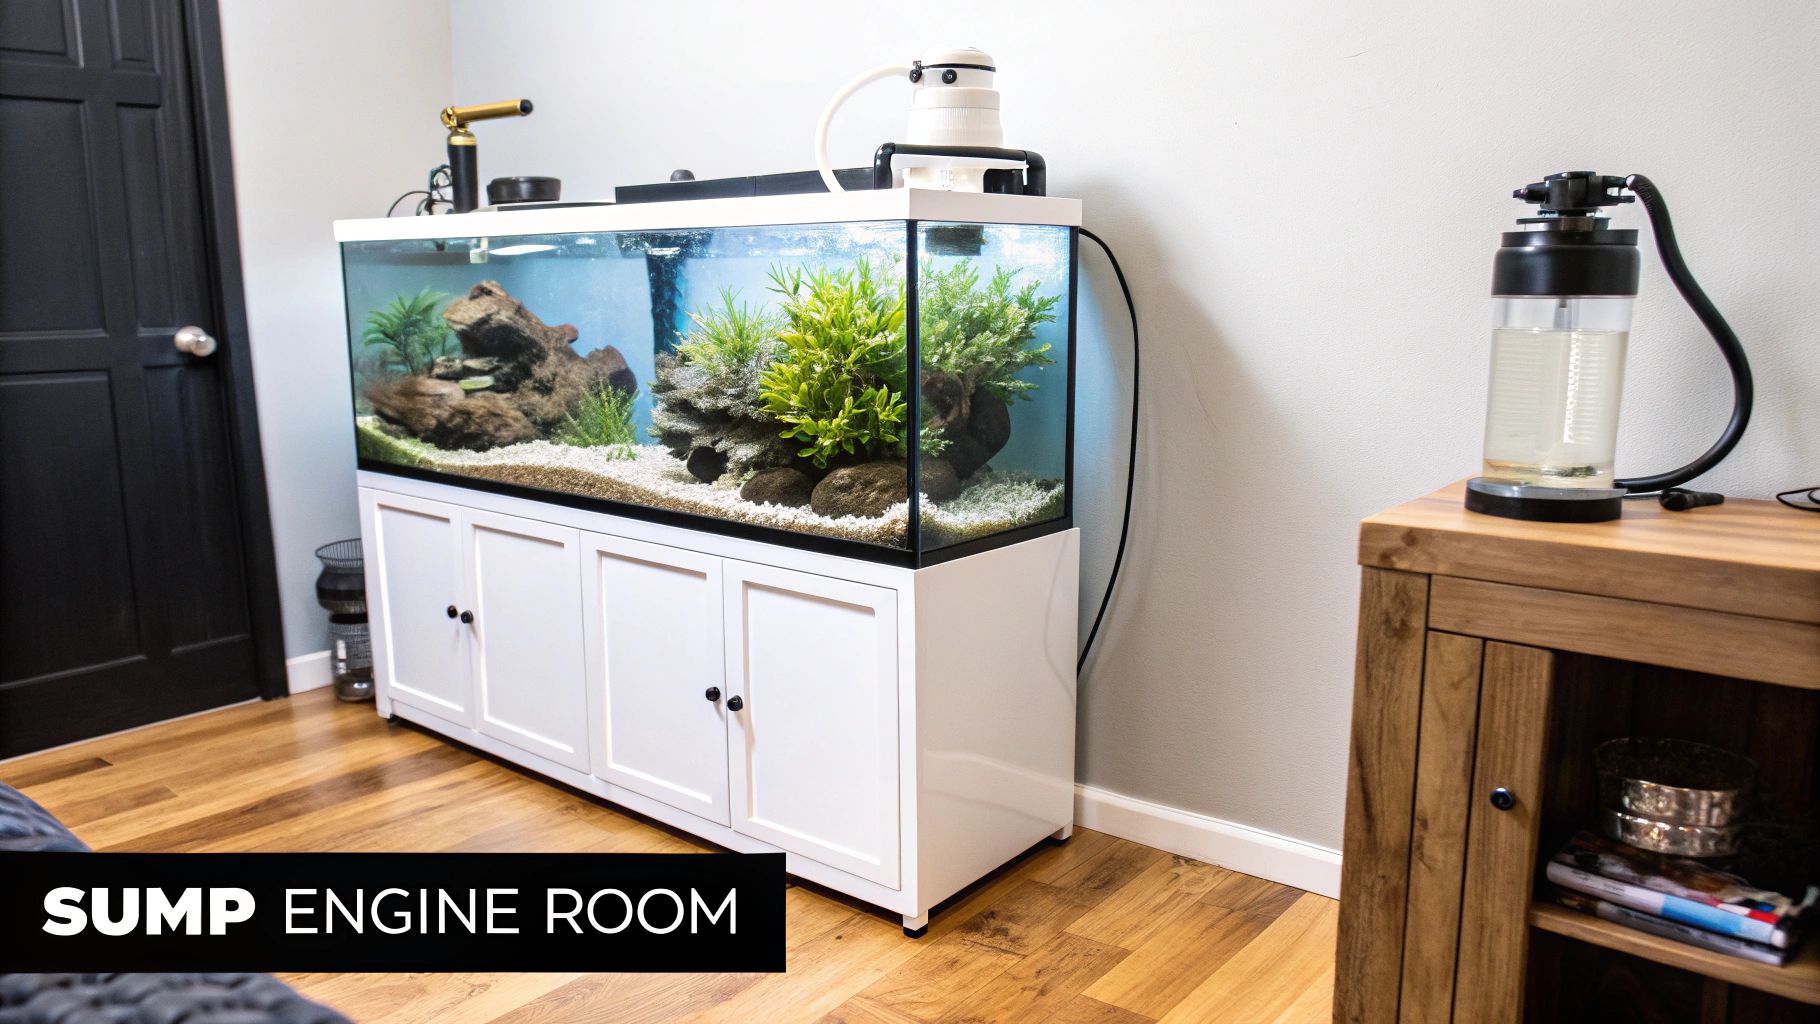
Stop thinking of a sump as just another tank tucked away in your aquarium stand. A well-planned sump is the command center for your entire aquatic world. It’s the dedicated space for all the life-support equipment that would otherwise clutter up your main display. This guide will cut through the technical jargon and give you a clear, practical roadmap for a bulletproof setup.
By moving your heater, protein skimmer, and dosing pumps into a sump, you clean up the look of your display tank and create a much more stable and controlled environment. The benefits are immediate and substantial.
Core Advantages of a Sump System
A properly set up sump does way more than just hide your gear. It fundamentally improves your reef tank's stability and health in a few critical ways:
- Increased Water Volume: A sump can easily add 5 to 20 gallons or even more to your total system volume. That extra water acts as a buffer, diluting waste and making your whole system more resistant to sudden swings in temperature or water chemistry.
- Superior Filtration: It gives you dedicated chambers for mechanical, chemical, and biological filtration. This is where you can run a beast of a protein skimmer, use filter socks to catch gunk, and even grow a refugium—all working together to keep your water crystal clear.
- Stable Water Levels: The overflow box keeps the water level in your display tank perfectly constant. No more ugly water lines! All evaporation happens down in the sump’s return chamber, which becomes the single, convenient spot for your auto-top-off (ATO) system.
The real magic of a sump is how it changes your whole approach to reef keeping. You move from being reactive to proactive. It gives you the space and control to precisely manage what goes in and what comes out of your ecosystem, leading to a healthier, more vibrant display with a lot less manual effort.
The Growing Importance of Advanced Filtration
The push for more sophisticated setups is a huge trend in the hobby. The entire aquarium market was valued at around USD 3.79 billion in 2023 and is projected to keep growing. This reflects a worldwide interest in advanced aquatic systems.
This growth is fueled by hobbyists like us who are always looking for better ways to maintain delicate ecosystems, making sumps a central part of modern reef keeping. You can learn more about the market’s trajectory over at Fortune Business Insights.
Ultimately, getting your sump setup right is about more than just plumbing and gear. It’s about building a solid foundation for long-term success and giving yourself the tools to create that breathtaking reef tank you've always imagined.
Choosing Your Sump and Designing the Layout
Alright, let's get into the heart of your tank's filtration system: the sump. Your first big choice is a classic one in the reefing world—do you buy a polished, ready-to-go commercial sump or roll up your sleeves and build a custom one from an old aquarium?
There’s no wrong answer here. It really boils down to your budget, how comfortable you are with a little DIY, and what your specific tank needs. A pre-made sump gets you up and running fast, while a DIY project offers total control over every single inch.
This isn't just a niche corner of the hobby, either. The global aquarium sump market is estimated to be between USD 1.14 to USD 1.24 billion in 2024. That massive number shows just how crucial high-quality, dedicated filtration has become for modern reef keepers. For a deeper dive into market trends, check out this detailed aquarium sump market analysis.
Commercial Sump Versus DIY Sump
So, should you buy or build? Both paths have their pros and cons, and what works for one reefer might not be the best fit for another.
A commercial sump is pretty much a plug-and-play dream. They come with perfectly spaced chambers, built-in filter sock trays, and dedicated spots for probes and dosing lines. For a lot of hobbyists, paying a bit more is well worth it to skip the headache of cutting glass and messing with silicone.
On the flip side, a DIY sump gives you complete freedom. You can design each chamber to perfectly fit your skimmer, your reactor, and your return pump. This is the ultimate way to maximize the cramped space under your stand. It's also much easier on the wallet, especially if you can score a used tank for cheap. It just requires some planning and elbow grease.
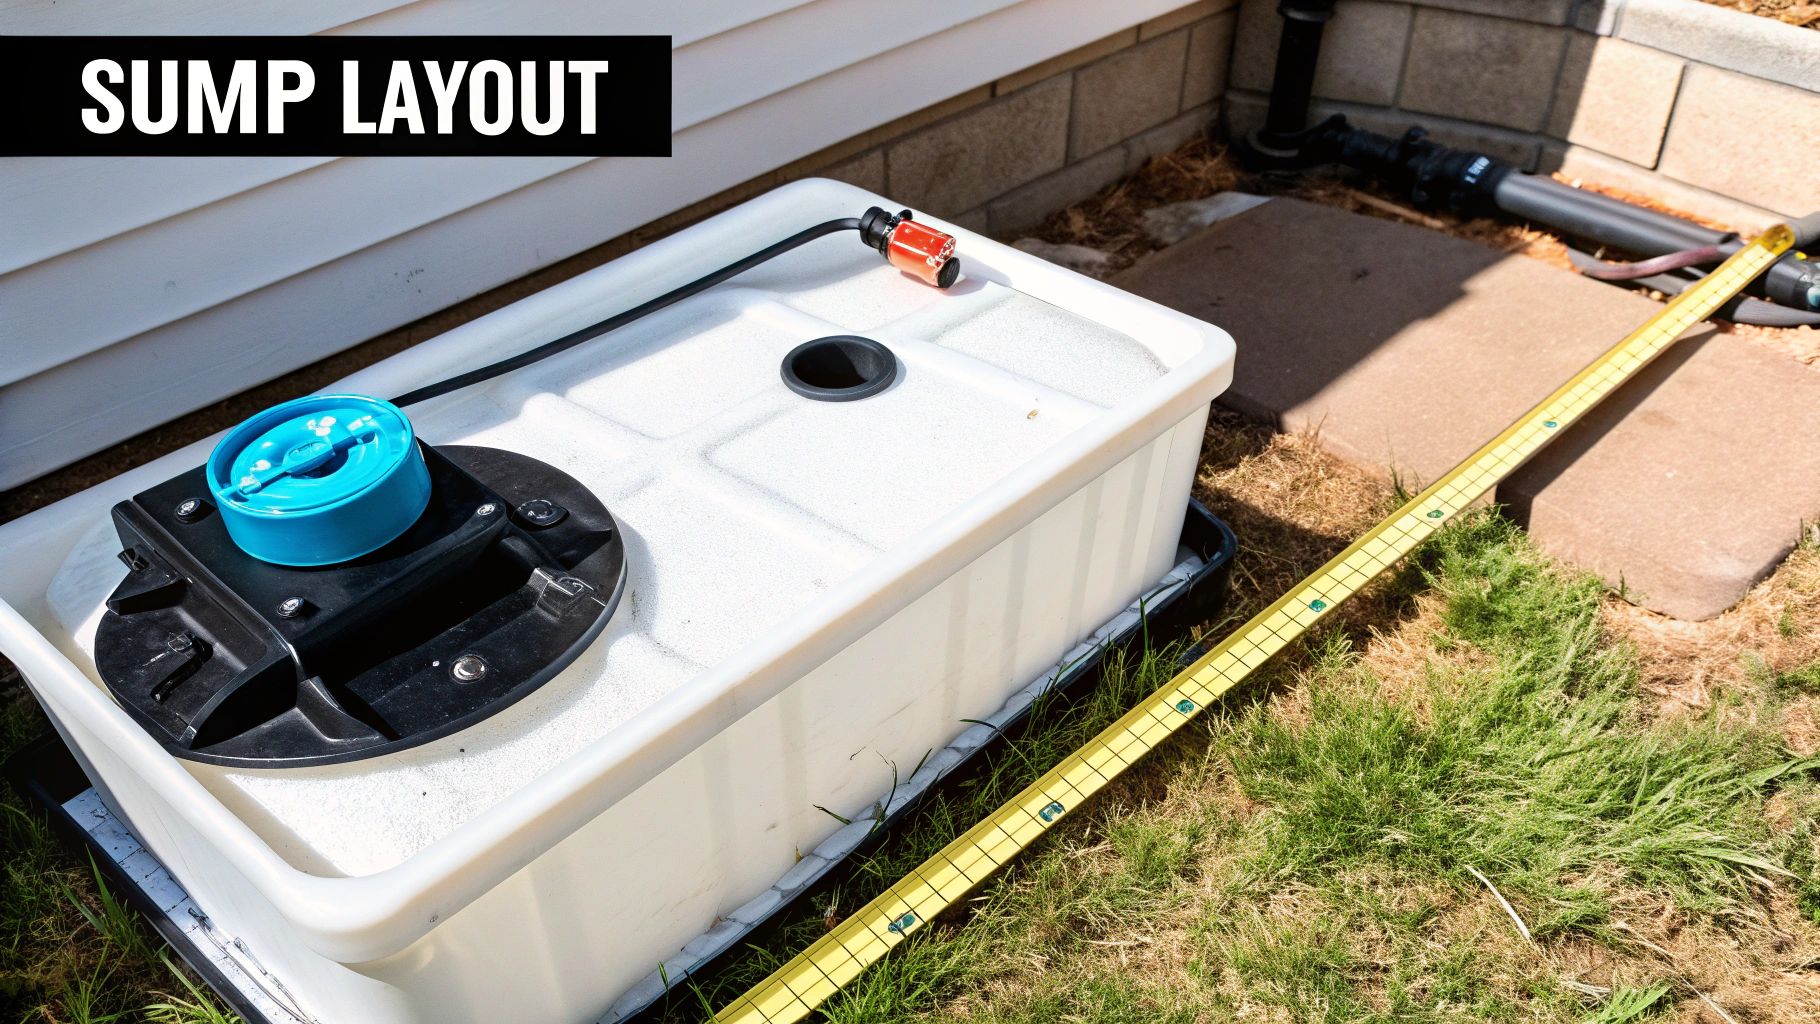
Pro Tip: If you're going the DIY route, grab a roll of painter's tape. Before you buy a single piece of glass or acrylic, use the tape to mark the exact footprint of your equipment inside the empty tank. This simple trick has saved countless reefers from making a costly measurement mistake.
To help you decide, here's a quick breakdown of what you can expect from each option.
Commercial Sump vs DIY Sump Comparison
| Feature | Commercial Sump | DIY Sump |
|---|---|---|
| Convenience | Plug-and-play; minimal setup required. | Requires planning, measuring, and assembly. |
| Cost | Generally more expensive upfront. | Significantly more budget-friendly. |
| Customization | Limited to the manufacturer's design. | Fully customizable to your specific equipment. |
| Aesthetics | Professional, clean finish with polished edges. | Appearance depends on your craftsmanship. |
| Time Investment | Ready to use immediately. | Can take several days to plan, build, and cure. |
Ultimately, the choice comes down to your priorities. If you value time and a guaranteed professional look, go commercial. If you're on a budget and love a good project, DIY is the way to go.
The Art of Baffle Design
The real magic of a sump lies in its baffles. These are just simple panes of glass or acrylic siliconed into place to create chambers. But their placement is critical. They create a path that forces water to flow over and under the dividers, which does two incredibly important things: it traps annoying microbubbles and maintains a perfectly stable water level for your equipment.
A simple three-chamber design is a tried-and-true layout that just works. Here's how it's typically set up:
- Drain/Skimmer Chamber: This is where water from your display tank's overflow first enters the sump. This chamber's water level is held constant by a baffle, which is non-negotiable for a protein skimmer. Skimmers are notoriously picky and need a stable water height to produce that dark, nasty gunk consistently.
- Refugium Chamber (Optional): If you're planning to use a refugium for natural nutrient control, it goes in the middle. The slower flow here is perfect for growing macroalgae like Chaetomorpha, which will happily soak up nitrates and phosphates. If you're new to the fundamentals of reef tank filtration, our complete guide on starting a saltwater tank is a great place to start.
- Return Pump Chamber: The final stop. Clean, filtered water collects here before your return pump sends it back up to the display tank. The water level in this chamber will drop as water evaporates from your system, making it the ideal spot for your auto-top-off (ATO) sensor.
Real-World Example: Converting a 20-Gallon Tank
Let's put this into practice. Say you're converting a standard 20-gallon high aquarium (24" L x 12" W x 16" H) into a sump for your 75-gallon reef. This is a classic, effective DIY project.
You’d typically use a three-baffle "bubble trap" between your main sections. This setup involves setting the first baffle 1 inch off the bottom, the second one sitting directly on the bottom, and the third one again raised 1 inch off the bottom. This over-under-over flow path is excellent at popping microbubbles before they can get to your return pump and make your display tank look like a snow globe.
Now, for the most important part: the skimmer chamber water height. Let's say your protein skimmer's manual recommends an ideal operating depth of 9 inches. You would set the height of the baffle that water flows over to 9.5 inches. This locks in the water level in that first chamber, ensuring your skimmer runs like a champ 24/7. This is the kind of precise control that makes a DIY sump so rewarding.
Plumbing Your Sump System Without Leaks
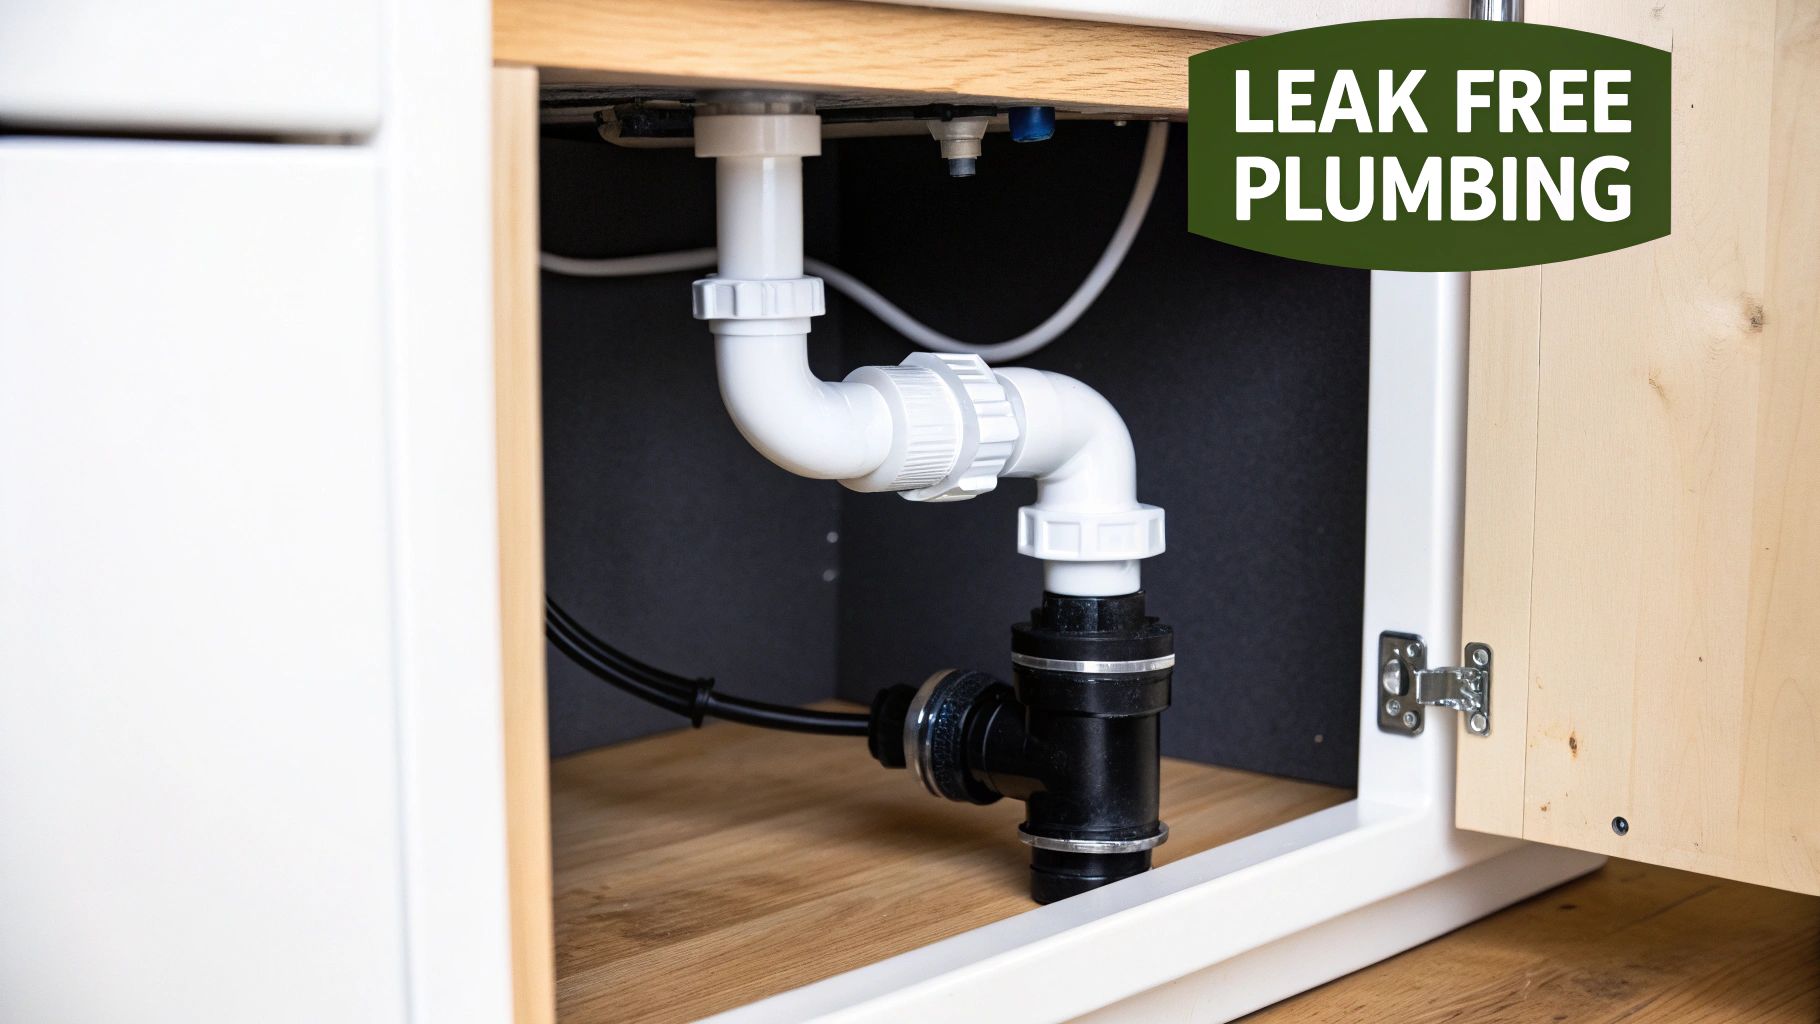
Plumbing is the one part of setting up a sump that sends a lot of reefers running for the hills. It seems complicated, permanent, and the thought of a leak is enough to cause nightmares. But honestly, with a bit of planning and the right parts, it’s a surprisingly manageable process you can definitely get right on the first try.
The mission is simple: get water from your display tank down to the sump and back up again. And do it silently and without spilling a drop. Let's walk through the components you'll need, how to stick them together, and the critical safeguards to prevent a flood.
Drains: The Secret to a Silent System
The overflow drain is probably the single most important piece of your plumbing puzzle. Get it right, and your tank will be whisper-quiet. Get it wrong, and you'll be stuck with a constant, maddening gurgle that sounds like a toilet flushing on a loop.
Two drain setups have become the gold standard in modern reefing because they're so reliable and quiet.
- The Herbie Overflow: This is a two-pipe system. One pipe acts as the main drain and runs as a "full siphon"—meaning it's completely full of water and makes zero noise. The second pipe is a dedicated emergency drain, set just a little higher, ready to take over if the main drain ever gets clogged.
- The BeanAnimal Overflow: This is the next level up, using three pipes for ultimate redundancy. You get a main siphon drain, a secondary "open channel" drain to handle any small fluctuations in flow, and a third, completely dry emergency drain. This design is practically foolproof and dead silent.
For most tanks under 150 gallons, a well-tuned Herbie overflow is all you'll ever need. The BeanAnimal is fantastic for larger systems or for anyone who wants the absolute maximum in safety and silence. The magic for both systems lies in using a gate valve on the main siphon line to perfectly balance the drain's flow rate with your return pump's output.
Choosing Your Plumbing Materials
When you get to the hardware store, you’ll basically see two choices for plumbing your sump: rigid PVC pipe and flexible vinyl tubing. Each has its pros and cons.
Rigid PVC is the professional standard for a reason. It creates a clean, secure, and permanent setup that won't ever kink or sag. It's hands-down the best choice for all your drain lines and any long, straight runs for your return pump.
Flexible tubing, on the other hand, is perfect for the final connection from your return pump to the rigid PVC return line. Pumps vibrate, and those vibrations can create a low hum that travels right through hard plumbing. A short piece of flex tubing acts as a fantastic vibration dampener, isolating the pump and keeping your system quiet.
Key Takeaway: Never, ever use a ball valve to try and control the flow on your main drain line. Ball valves are designed for simple on/off control and are terrible for making fine adjustments. A gate valve gives you the precise, incremental control that is absolutely essential for tuning a silent siphon drain.
Assembling Your Plumbing Like a Pro
Gluing PVC might seem intimidating, but it's dead simple if you just follow the steps. The secret is using both PVC primer (the purple stuff) and PVC cement. The primer cleans the pipe and actually softens the plastic, which allows the cement to create a permanent, chemically welded bond.
When you're ready to glue, work quickly. Apply primer to both the outside of the pipe and the inside of the fitting. Immediately follow that with the cement on both parts. Push the pipe into the fitting with a slight twisting motion and then hold it firmly in place for about 30 seconds. That's it. You've just made a leak-proof connection.
Here's another pro tip: use unions in your plumbing. These are special fittings that let you unscrew and separate sections of pipe without having to cut anything. Putting unions on your return pump line and near your overflow makes future maintenance an absolute breeze. Need to clean your pump? Just unscrew the unions. No tools needed.
Preventing a Power Outage Disaster
This is the scenario every reefer dreads: the power cuts out. Your return pump shuts off, but gravity keeps working. Water from your display tank will continue to siphon back down the return line, quickly overflowing your sump and flooding the floor.
Fortunately, there are two simple ways to prevent this catastrophe.
- Install a Check Valve: This is a simple one-way valve you install on your return line. It allows water to flow up to the tank but slams shut the moment the pump stops, instantly stopping any back-siphon.
- Drill a Siphon Break: This is my preferred method because it's completely free and foolproof. Just drill a small (1/8 inch) hole in your return line's output nozzle, right below the normal water surface in your display tank. When the pump turns off, air gets sucked into this hole, which instantly breaks the siphon.
The siphon break is the most reliable method, as check valves can sometimes fail or get stuck open with debris. Proper plumbing is a cornerstone of a stable and safe aquarium. For more on this, our guides on water quality and filtration have some great insights. Taking these steps ensures your system is safe, silent, and ready for anything.
Equipping Your Sump for Peak Performance
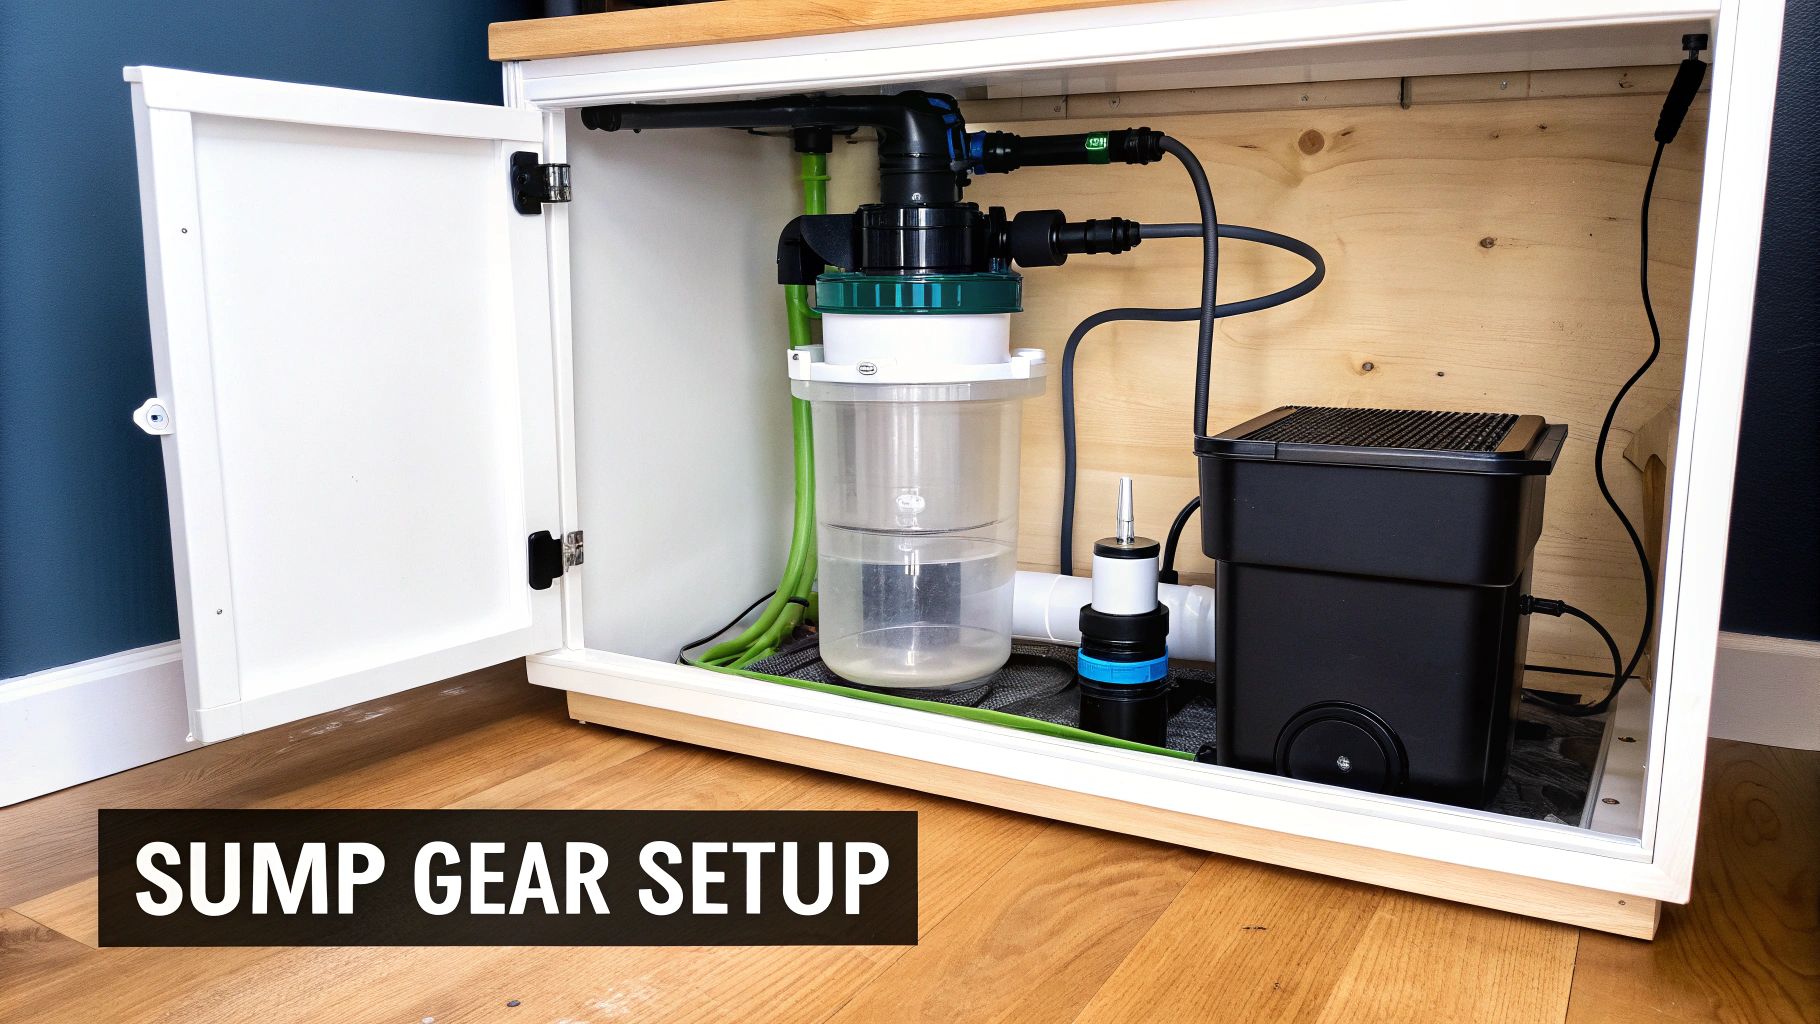
Alright, your sump is built and the plumbing is connected. Now for the fun part: turning that empty box into the powerhouse life support system for your reef. Arranging your equipment isn't just about keeping things neat; it’s about setting up a logical sequence of filtration where every piece of gear makes the next one's job easier.
The idea is to process the tank water methodically. We start by removing the big stuff and progressively filter out finer and finer impurities before the water heads back to the display. This strategic layout is what makes every component work at its best, creating the stable, healthy environment your corals crave.
The commitment to these advanced setups is a huge part of why the hobby has grown so much. The global saltwater aquarium trade is now a massive $2.15 billion industry, catering to millions of us who are passionate about our tanks. This shows just how vital good equipment is for these delicate ecosystems. If you're curious, you can dig into the numbers with these saltwater aquarium trade insights.
Mechanical Filtration First
The water coming down from your display tank is loaded with undissolved junk—fish waste, uneaten food, and all kinds of detritus. Your very first line of defense is to physically pull this stuff out before it breaks down and turns into nitrates and phosphates.
This is the job of mechanical filtration. The most popular options are filter socks or an automated filter roller, and they should always be placed right under your drain lines to catch everything as it comes in.
- Filter Socks: These are basically just felt bags that trap debris. They’re super effective and inexpensive, but they need to be cleaned or swapped out constantly—usually every 2-4 days—to be effective.
- Filter Rollers: These are automated systems that use a big roll of filter fleece. When a section gets clogged, a sensor kicks on a motor that rolls out a fresh piece, winding up the dirty stuff. It’s a game-changing "set it and forget it" upgrade that slashes your maintenance time.
Getting this physical waste out right away makes every other piece of filtration down the line work much more efficiently.
The Protein Skimmer Chamber
Once the water has passed through the mechanical filter, it flows into the protein skimmer chamber. This is, without a doubt, one of the most critical pieces of gear in your entire system. A skimmer works by blasting the water with millions of tiny air bubbles, which create a thick foam that organic waste molecules stick to. This foam rises into a collection cup, permanently yanking that gunk out of your aquarium.
For a skimmer to do its job right, it needs one thing above all else: a rock-solid, stable water level. Even a half-inch change in water height can wreck its tuning, causing it to either overflow like crazy or produce nothing at all. This is exactly why the baffle leading out of the skimmer chamber is set at a fixed height—it locks in the water depth your skimmer needs to run like a clock.
Pro Tip: When you get a new skimmer, just let it run for a week or so to "break in" before you start messing with the adjustments. New skimmers often have residual manufacturing oils that make them go nuts with foam at first. Have a little patience, and it will settle into a steady, productive rhythm.
Placing Heaters and Probes
With the heavy lifting of waste removal done, the water continues its journey. The final chambers, which are usually the return pump section or a shared space with a refugium, are the perfect spot for your heaters and any controller probes you’re using. Placing them here means they are reading and adjusting water that is just moments away from being sent back up to your display tank.
Try to position heaters horizontally near the bottom of the chamber; this helps distribute heat more evenly throughout the system. Controller probes for temperature, pH, or ORP should be in an area with good, steady flow to ensure you’re getting accurate readings. It’s also a good idea to keep them away from any dosing tube outlets to avoid getting wild, inaccurate swings.
The Heart of the System: The Return Pump
The final piece of this puzzle is your return pump. This is the heart of your aquarium, the muscle that pushes all that clean water back up to the display tank. Picking the right one is absolutely critical. You need a pump powerful enough to overcome both gravity and the friction loss from your plumbing—a concept we call head pressure.
You can't just trust the GPH (gallons per hour) rating on the box. You have to figure out the head pressure for your specific setup. A quick way to estimate this is to measure the vertical distance from the water level in your sump to the top of your return line in the tank. Then, for every 90-degree elbow in your plumbing, add about one foot of head pressure.
Once you have that total, you can look at a pump’s performance chart. This will show you the actual flow rate the pump will produce at that specific head height. Choosing a pump that delivers your target flow after accounting for head pressure is the key to ensuring your whole system circulates perfectly, turning your collection of gear into a truly powerful filtration engine.
Cultivating Your Refugium and Cycling the System
With your pump, skimmer, and heater humming along, the plumbing is done. Now, it's time to shift from the mechanical side of things to the biological heart of your reef tank—the refugium.
Think of your refugium as a dedicated, in-house natural filter. This is where you’ll harness a bit of nature to do the heavy lifting, pulling unwanted nutrients out of the water before they can fuel ugly algae outbreaks in your display tank. Get this part right, and you've built a secret weapon for maintaining pristine water with way less manual intervention.
Building Your Biological Filter
The undisputed star of most modern refugiums is macroalgae, and for a good reason. You’ll want to get your hands on Chaetomorpha, or "Chaeto" as it's known in the hobby. It's a fast-growing, spaghetti-like green algae that forms a dense, tangled ball, making it an incredible nutrient sponge.
Getting your refugium started is surprisingly simple. You just need a few key pieces:
- A Substrate Bed: While you can grow Chaeto in a bare-bottom chamber, adding a shallow 1-2 inch layer of sand or crushed coral gives beneficial bacteria and microfauna a place to call home, boosting your tank's biodiversity.
- A Grow Light: Macroalgae needs light to photosynthesize and suck up those nitrates and phosphates. A simple submersible LED grow light is all you need. Just make sure it’s designed for marine refugiums.
- Gentle Flow: You're looking for just enough water movement to slowly tumble the Chaeto ball. Too little flow and the algae on the bottom won't get light; too much, and you'll be blasting bits of it into your return pump.
Here’s a pro tip: run your refugium light on a reverse daylight schedule. When your display tank lights go off for the night, the 'fuge light kicks on. This is a game-changer for pH stability. During the day, photosynthesis in your main tank uses up CO2, causing pH to rise. At night, respiration takes over and pH drops. By keeping photosynthesis going in the sump overnight, you counteract that natural pH dip, creating a much more stable environment for your corals.
Seeding Your Sump with Microfauna
Your refugium is more than just an algae scrubber. It's the perfect five-star hotel for a booming population of microfauna, like copepods and amphipods. These tiny crustaceans are the unsung heroes of a clean reef tank.
They are a relentless cleanup crew, constantly grazing on detritus, leftover fish food, and nuisance algae. But the real magic happens as their population explodes. The overflow of pods gets sent up into the display tank, providing a constant, free supply of live, nutritious food for your fish and corals. This is absolutely essential if you ever hope to keep picky eaters like Mandarinfish or certain wrasses.
One of the single best investments you can make when starting a new tank is seeding the refugium with a quality culture of live copepods. You're not just adding food; you're kickstarting an entire ecosystem that will benefit every single inhabitant of your tank.
Once your refugium is set up with its light and Chaeto, just pour in a bottle of live pods. A good practice is to turn off your return pump and skimmer for about 30-60 minutes. This gives the pods a chance to settle into the macroalgae and substrate without getting immediately sucked into the filtration or skimmed out.
For a deeper dive into making your refugium a biological powerhouse, check out this fantastic refugium in sump guide for a thriving reef tank.
Cycling Your New System
With all the gear running and the refugium seeded, there's one last, non-negotiable step before you can even think about adding fish: cycling the tank. This is the process of establishing the beneficial bacteria that will act as your tank's invisible waste-processing plant.
The nitrogen cycle happens in two main stages, driven by two different groups of bacteria:
- First, one type of bacteria consumes toxic ammonia (from fish waste, uneaten food, etc.) and converts it into nitrite.
- Then, a second type of bacteria consumes that nitrite (which is also toxic) and converts it into the much less harmful nitrate.
To get this process started, you need to add a source of ammonia to your clean, empty system. A raw shrimp from the grocery store, a few drops of pure bottled ammonia, or a dedicated "fishless cycle" liquid product will all work.
Your job now is to be patient and test the water every couple of days. You'll see ammonia spike first, then drop as nitrite appears. Then, nitrite will spike and begin to fall as nitrate starts to show up on your test kit. The cycle is officially complete when you can add a dose of ammonia and see both ammonia and nitrite test at 0 ppm within 24 hours. At that point, your tank's biological foundation is strong, stable, and ready to safely support its first inhabitants.
Answering Your Top Sump Questions
Even the most meticulously planned sump setup can throw you a curveball or two once it's up and running. It's a rite of passage for every reefer. This section is all about tackling those common head-scratchers so you can get your system dialed in, running silently, and humming along efficiently.
Let's move you from the "constantly tinkering" phase to the "confidently trusting my tank" phase. Once you solve these initial growing pains, you're well on your way to a stable, low-maintenance reef.
"Why Is My Tank Full of Microbubbles?"
Seeing your pristine display tank look like a freshly shaken bottle of seltzer is one of the most common—and annoying—issues with a new setup. Don't worry, those tiny bubbles are almost always coming from your sump, and we can track down the culprit through a simple process of elimination.
- Your Skimmer is Brand New: A protein skimmer right out of the box will often spit out a ton of microbubbles for the first week or so. This is totally normal. It’s just shedding manufacturing oils and needs a break-in period. Give it time to settle down before you change anything else.
- The Return Chamber Water is Too Low: If the water level in your return pump chamber drops too low, the pump can start to form a vortex, sucking in air with the water. Make sure your ATO is working correctly and the water level stays well above the pump's intake screen.
- You Have a Tiny Plumbing Leak: An almost invisible leak on the suction side of an external return pump is a classic air-sucker. Double-check every single fitting, union, and connection leading into the pump.
- Your Bubble Trap Needs Help: Sometimes, especially in high-flow sumps, the standard baffle design just isn't quite enough to stop every bubble. If you've ruled everything else out, try tucking a small piece of coarse filter sponge into your bubble trap. This is often an instant fix.
"How Do I Get Rid of That Gurgling Sound?"
That constant glug-glug-flush sound from your overflow can be enough to drive you nuts. A silent overflow isn't a myth; it's completely achievable. The noise comes from air and water mixing chaotically in the drain lines.
The solution almost always involves tuning a full siphon drain, which is the heart of popular overflow styles like the Herbie or BeanAnimal. The trick is to use the gate valve on your main siphon drain to perfectly balance the drain rate with your return pump's flow rate.
Start by closing the gate valve very slowly. You want to raise the water level in your overflow box until it's just a hair below the emergency drain pipe. The goal is to have the main drain fully submerged and dead silent, with only the slightest trickle of water going down the emergency line as a failsafe. A little patience and some fine-tuning here will eliminate that gurgle for good.
Setting Up a Realistic Sump Maintenance Routine
A sump makes reefkeeping easier, but it doesn't mean you can just forget about it. Sticking to a simple, consistent schedule is the best way to prevent small issues from snowballing into big headaches.
A clean sump is the foundation of a clean display tank. Neglecting the engine room will eventually lead to problems upstairs. A simple 20-minute weekly routine is often all it takes to keep your system running optimally.
Here's a practical checklist you can actually stick to:
Weekly To-Do List:
* Clean or swap out your filter sock or advance your filter roller.
* Empty and rinse the protein skimmer collection cup. It's gross, but necessary.
* Give the inside glass of the sump a quick wipe-down.
* Check your ATO sensors for any salt creep or gunk.
Monthly To-Do List:
* Give your return pump and skimmer pump a quick cleaning to maintain flow.
* Harvest some of that macroalgae from the refugium before it gets too dense.
* Double-check that your heaters are working correctly.
"What Happens If the Power Goes Out?"
This isn't a question of if, but when. Prepping for a power outage is non-negotiable. The absolute biggest risk is a back-siphon, where water from your display tank drains back down the return plumbing, overflows your sump, and floods the floor.
Your number one defense, which we covered in the plumbing section, is a siphon break. This is just a small hole drilled in your return line's nozzle, right below the water's surface. When the pump cuts off, the hole sucks in air and breaks the siphon immediately. It's a lifesaver.
Beyond that, you have to be certain your sump can handle the volume of water that will drain back from the overflow and plumbing during an outage. As a rule of thumb, never run your sump's normal operating water level higher than 50-60% of its total volume. This leaves a generous buffer to safely contain all that backflow without a single drop hitting the floor.
Ready to kickstart your sump’s ecosystem with a thriving population of microfauna? PodDrop Live Aquarium Nutrition provides high-quality, lab-cultured live copepods and phytoplankton to seed your refugium and fuel your entire reef. Explore our diverse species and nutritional blends at https://www.getpoddrop.com to give your tank the vibrant life it deserves.